by Ann at Go West Gardener | Updated: Jun 20, 2025 | Flower Garden Basics, Western Container Gardening With Flowers
You want to add a big splash of color to your front porch or back deck this summer (“heyyy, neighbors!”), but you’re just getting the hang of flower gardening. You may find yourself with a lot of questions swirling around your brain.
This is normal!
In this week’s tip, we’re going to cover commonly asked questions, like:
- What are the best flowers to grow in containers for big, showy color?
- In your containers, should you plant flowers that come back every year or flowers that only bloom for one summer?
Then, in my next tip, we’ll dig deeper. You’ll get 4 proven questions to help you narrow down your flowers choices and choose the best flowers for YOUR flowerpots.
Watch my video below or scroll down for the article.
What are the best flowers to grow in containers for big, showy color?
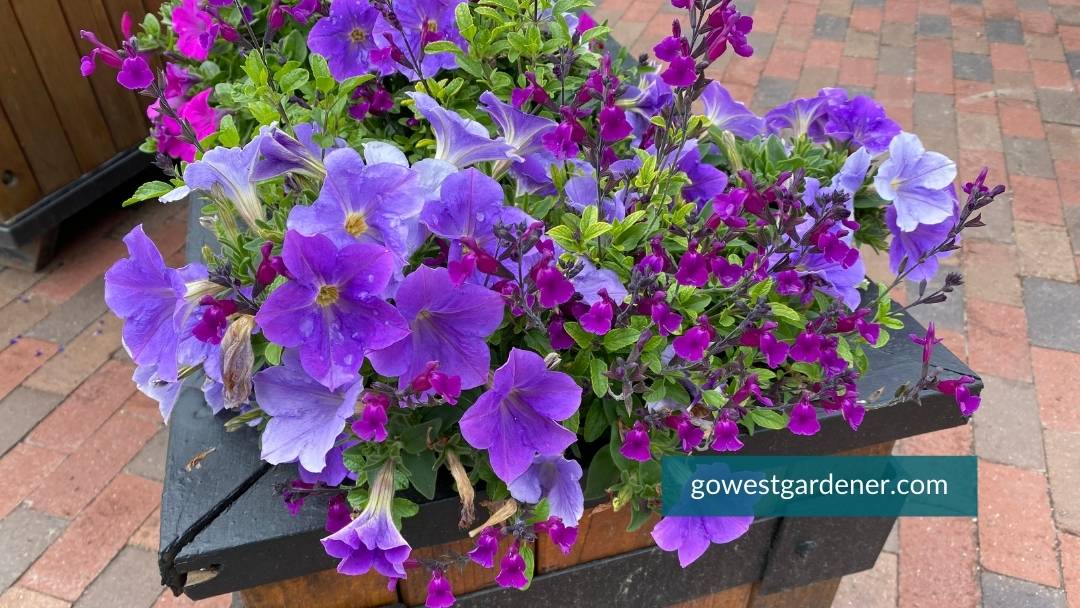
If you want flowerpots that are overflowing with color — like the vibrant containers you see in mountain villages or in town centers — then you’re looking for “annuals.”
Annuals are flowers that give you lots of color all summer long, but they don’t return next year.

The word annual is confusing because of how we use it in everyday conversation.
“Hey, we’re hosting our annual barbecue.”
We usually use it to mean recurring. But in gardening, annual actually means one and done. These flowers grow for one season, and then they’re done.
If you like word games to remember these types of phrases, here’s a helpful trick:
Annual = A single season.
So, when you go to your garden center, how do you know which flowers are the annuals?
Well, there are a couple of hints.
One, you may see a section of the store where it looks like the color dial has been cranked way up. There’s just so much color! Chances are, those are your annuals.
These flowers offer you big, showy color.
What’s another hint that you might be looking at the annuals section?
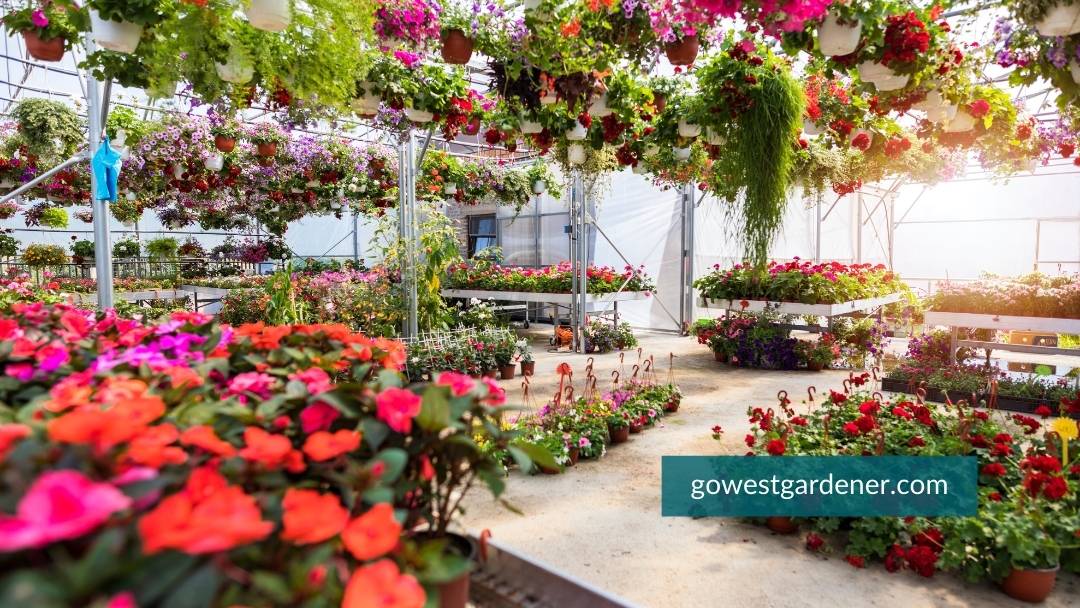
If you’re at an outdoor nursery, many of the annuals (and possibly all of them) are likely going to be located in a section with a cover or a greenhouse.
Annuals often need more moisture than perennials, so they’re typically in a section where the sun isn’t shining directly on them.
And of course, you can always ask:
- “Where are the annuals?” or
- “Where can I find the best flowers to grow in containers or pots?”
People are more than happy to point you in the right direction, so you know where to go.
Annuals may be the most popular flowers for colorful containers … But they aren’t your only options.
Let’s say, for example, you want to add scent to your flowerpots.
You could include herbs in with your flowers.
Or, let’s say you want to include plants that have interesting textures.
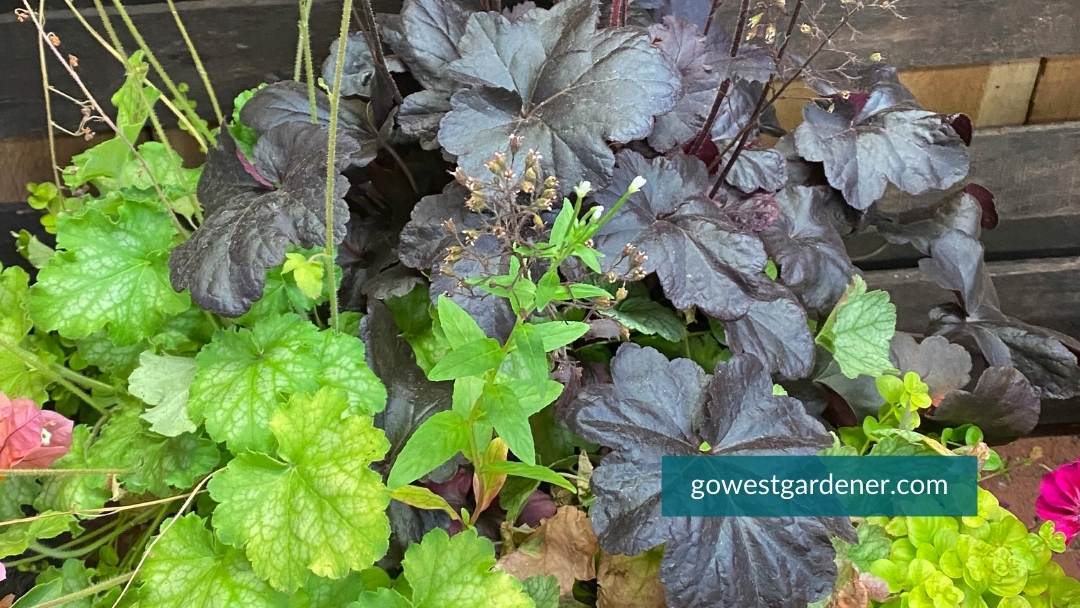
You could grow perennials in your flowerpots, like the container below with Coral Bells and Creeping Jenny.
Perennials are flowers that return year after year, but (usually) bloom for a shorter amount of time.
Many perennials bloom for a few weeks only.
So, if you plant perennials in your containers, most of them are not going to give you that big, showy color for the entire summer.
They’ll still be pretty, though, and they should give you interesting leaves and textures.
Here’s an example of how I use perennials in my containers.
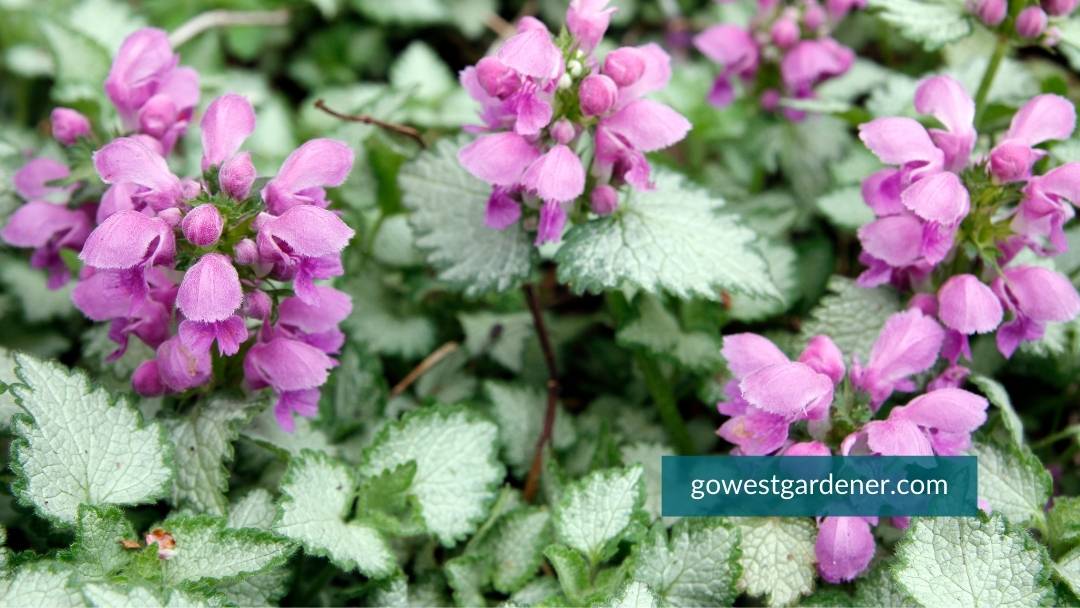
I like to plant lamium in some of my flowerpots. Lamium is a perennial.
It gives me flower blooms for some, but not all, of the summer.
I like to use lamium because its leaves are white. It’s unusual for a container garden. It’s a nice contrast with green-leafed flowers.
In the early fall, I can dig it out of my containers and plant it in the ground, so it can return next year.
Want to create pretty flowerpot designs like the ones you see at the garden center? Join the wait list for my spring training program: The Proven Flowerpot Formula.
Often times, perennials grown in containers won’t survive the winter.
It can be too cold on their roots. Too cold and hard. They prefer to be in the ground to return.
So, if you want your perennials to come back next year, simply dig them out of your containers in the late summer or early fall and plant them in the ground.
If you want big, showy color in your containers, look for annuals!
Related tips that may interest you:

by Ann at Go West Gardener | Updated: Jun 20, 2025 | Flower Garden Basics, Gardening Tips and Tricks
So, you walk into your local western garden center…
And you see row after row of flowers. You may find yourself thinking one of two things:
- “Ahhhh, I’m in my happy place.” You feel like a kid in a candy store.
Or …
- “HOLY. CRAP.” There are sooooo many choices. You suddenly feel a strong urge to breathe deeply into a brown paper bag.
Both are natural reactions!
Here are 5 tips to help you navigate your local garden center and make awesome flower choices.
Tip #1: Western garden centers may not sell the flowers you recognize from other parts of the country or from magazine photos
And that’s actually a good thing.
Here’s why.
Colorado and similar western states are tough on plants.
Really tough.
It’s dry here. Windy. Our high-altitude sun is more intense on our plants. Our soil lacks nutrients. We get hail and 60-degree temperature swings.
Down at our lower elevations (3500-6000 feet), our summers can get H-O-T with very little rainfall.
And up at our higher elevations — like in our mountain valleys — we can get frost in the summer.
(Aren’t you glad you’re becoming a gardener here? )
The point is, we need hardy-plants that can handle these types of conditions.
Typically, the pin-worthy flowers from Southern Living magazine and other lifestyle magazines prefer a lot of moisture, different soil, a more temperate climate, etc.
You’ll be much more successful and have to replace fewer plants in states like Colorado and Utah if you’re planting flowers that do well in our crazy, western conditions.
So, get ready to discover some new types of flowers as you browse the aisles!

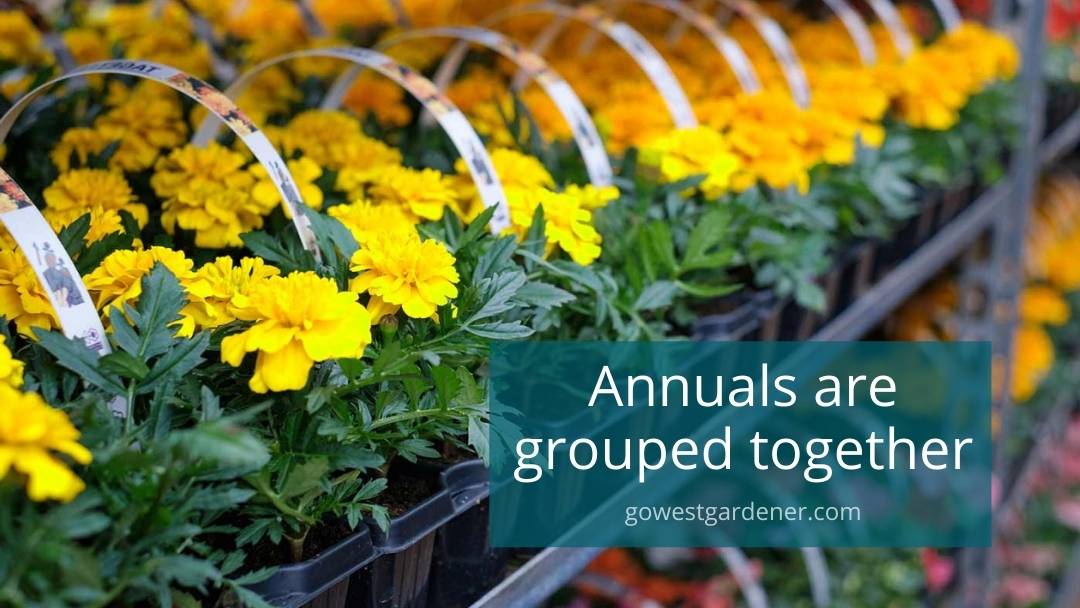
Tip #2: Flowers are often arranged together based on whether they grow for one season or return every year
In other words, there is a method to the colorful madness.
You want big, showy color all summer, particularly in your flowerpots?
You’re probably looking for annuals. Annuals give you a lot of color for one growing season, but they don’t come back the next.
You want pretty flowers in the ground that come back year after year?
You’re looking for perennials. Perennials return every year, but they typically bloom for a shorter window of time — often, only a few weeks.
The good news is your garden center likely has organized its annuals together and its perennials together.
The annual section usually has a lot of flowers together with bright, showy color.
If you aren’t sure which section is which, please ask. People are happy to help.
In addition, in the perennial section, plants that love sunshine are often separated from plants that prefer shade …
Though, not always. (I’m looking at you home improvement stores.)
In outdoor garden centers, the shade-loving plants will likely have a screen or a cover over them. This is always a helpful clue that they prefer less sunlight.
Tip #3: Perennials bloom at different times of the summer, so it’s helpful to return to the garden center every 2-4 weeks to see what’s blooming
When I planted my first garden in Colorado, I was so excited to buy flowers.
I went to the garden center in early June, and I bought a variety of colorful perennials (the flower plants that come back year after year).
Over the next few years, my garden looked GOOD … in May and June.
But by the time July arrived, everything would stop blooming.
I had very little color for the rest of the summer.
What happened?
Perennials bloom at different times during the summer — usually for 2 to 3 weeks at a time.
I bought the perennials that looked pretty at the garden center in the early summer. They were the flower plants that bloom in May and June.
I didn’t realize that I needed to pace myself.
If you’d like color in your garden across the w-h-o-l-e summer, it’s helpful to return to the garden center to see what blooms during different months.
Your garden center will likely be getting new plants in.
Plus, plants you didn’t notice before may be blooming now.
Don’t have time to make multiple trips to the garden center to look at perennials?
In that case, be sure to look at the plant tags (tucked in each pot) when you buy your flowers.
The plant tags should tell you when your perennial will bloom.
Look for perennials that bloom at different times of the summer. That means you may need to look for plants that aren’t flowering at the time you’re at the garden center.
If you live at a high elevation in a western state like Colorado, you’ll have a shorter growing season. You may want skip the “early fall” bloomers. Your growing season may not be long enough for those flowers to bloom. You also may have more summer options if you start flowers from seed.
Tip #4: The size of the flower plant in the store isn’t its final size
Perennials take up to 3 years to reach their full size.
So, when you see a pretty perennial at the garden center and it’s flowering and you can totally picture the perfect spot for it in your garden …
Pump the brakes.
Read the plant tag (tucked in the pot) to find out how big the plant will grow and how much space it needs.
When you read the tag, you may find yourself thinking:
“This adorable little plant needs 24 inches in width and is going to be 3 feet tall? Nah!”
Yep.
It just may take a few years to get there.
Here’s what this means:
Your garden may not look “full” in the first year or two, but this is totally normal.
You can always fill in with flowerpots of annuals.
Putting each plant in the right place for its needs will help you keep your plants from competing for water, nutrients and sunlight.
Translation: You’ll have happier, healthier plants and less work for the long term.
By the way, almost every gardener has ignored a plant tag and had to move — or remove — a plant when it’s gotten too big (myself included).
So, if you’ve done this, you’re in good company!
There’s nothing like planting a perennial in the front of your garden, only to discover that your plant has turned into the tall kid in the school class picture — and you have it standing in the front row.
And if you like having the tall kid in the front row, great!
Nature is wild and unruly, and it can be part of the fun of gardening too.
Just make sure your tall kid isn’t crowding out your other plants (for example, blocking their sunlight or water).
The other thing to keep an eye on is whether your tall kid’s roots may be growing into other plants and taking their nutrients.
Tip #5: A big flower plant growing in a small container can be a problem, so look for containers that are proportional to the plant
As plants grow bigger above the soil, their roots are elongating below the soil.
So, when you see a big plant growing in a small pot — for an amazingly low price, no less — you may not be getting the deal you think you’re getting.
Why?
Because when plant roots have nowhere to go, they start circling around the inside of the container, growing tighter and tighter.
The plant’s roots will begin to strangle and kill the plant.
This is known as: “root girdling.”
Sometimes, there are things you can do to loosen up the roots when you get your plant home, but these steps take extra work and you can end up damaging the roots.
Your flower plant may not recover.
What’s another sign that the roots are too big for the container?
You may notice a lot of roots growing out of the bottom of the pot.
Poor lil’ dudes are trying to escape!

Root girdling is a bigger issue in perennials (and shrubs and trees), than in annuals. After all, your annuals are only going to last for one season.
Nonetheless, be wary of plants that have outgrown the size of their containers.
You may be buying a problem.
Being observant can help you set yourself (and your plants) up for more success in your garden. And cheers to that!
Related topics that may interest you:

by Ann at Go West Gardener | Updated: Sep 12, 2025 | Gardening Tips and Tricks, Western Container Gardening With Flowers
I used to think that once you planted your flowerpots, that was it. Your flower babies were in there for the long haul.
But I’ve come to appreciate that you can swap out the flowers in your pots.
It’s like changing your wardrobe for the seasons.
If you want to change the flowers in your flowerpots, you can — especially in the late summer to early fall. You can change just one flower. Or, you can change them all.
Why would you change the flowers in your pots?
There are all kinds of reasons.
Let’s say:
- You want to spice up your flowerpots for a new season — like transitioning from spring to summer, or summer to fall.
- You have an empty gap in your pots. Some of your flowers didn’t fill in quite like you thought they would.
- You’d like to add in more color.
- You have perennials planted in your flowerpots. They’re done blooming for the season. (Perennials are the flowers that can come back each year, but often bloom for a short amount of time.)
- There’s a flower in your flowerpot that doesn’t look so good or it may have died. (No judgment! It happens.)
Late summer to early fall can be a good time to add in new flowers
As we transition to fall, one of my favorite flowers to add to my flowerpots is Black Eyed Susan.
(This plant goes by many names, including Rudbeckia and Gloriosa Daisy.)
You can find it in a lot of pretty colors, as you can see below.
Black Eyed Susans give flowerpots a bright pop of color. They can bloom for a long time.
Best of all, these flowers feel like fall — like a Sunday drive to go leaf peepin’ or the sweet smell of mulled apple cider after a trip to the pumpkin patch.
Give your flowerpots a fresh look for fall
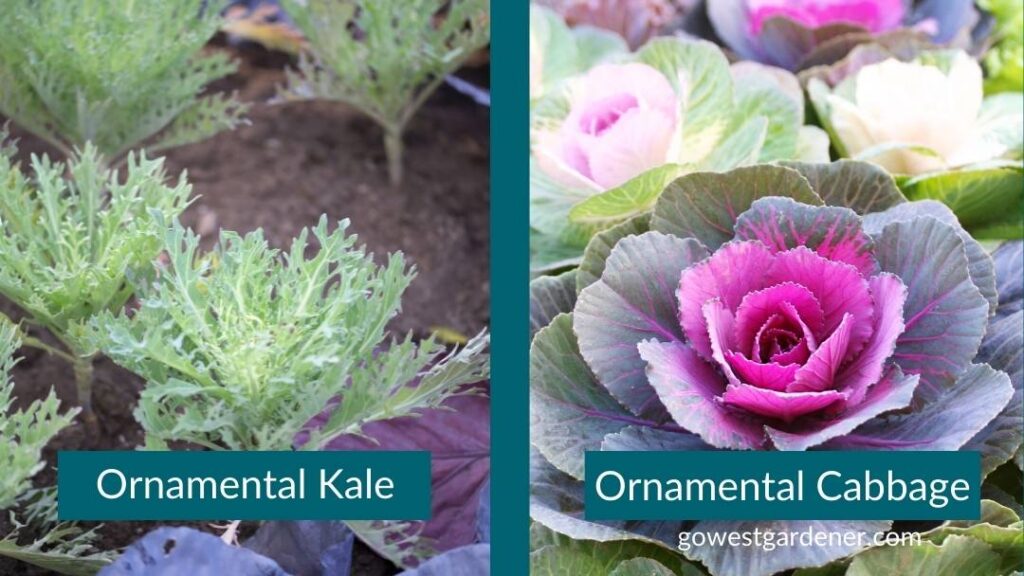
If you’d like to freshen up your flowerpots for fall, you can pop in flowers like…
- Black-Eyed Susans (aka, Gloriosa Daisies)
- Mums
- Ornamental Cabbage
- Ornamental Kale
- Pansies
- Violas
You can see some examples below.
Helpful tips if you change the flowers in your flowerpots
1) Keep your new flowers well-watered
Flowers tend to like A LOT of water when they’re newly planted in flowerpots, especially in our late-summer heat.
You may need to water your pots more than you have been doing.
Keep your eye on your newly-planted flowers. They can get droopy or crispy quickly.
2) Keep your eye on temperatures
Many fall flowers are “cool season” flowers.
They’re happiest when our days and nights start to cool down.
This means you may want to hold off on planting flowers like Pansies, Violas and Ornamental Cabbage until temperatures start to cool off. For example, Pansies tend to be in their happy place when daytime temps are in the upper 50s and 60s, and nighttime temps are in the 40s.
3) Look for plants that have new buds on them (meaning all the flowers haven’t opened yet)
This is one way to ensure that you’ll get longer-lasting color from your new flowers.
If you’d like to see photos of what I’m talking about, check out these 3 simple tips to pick fall flowers that bloom longer.
Related topics that may interest you:
by Ann at Go West Gardener | Updated: Jan 28, 2026 | Gardening Tips and Tricks, Western Container Gardening With Flowers
The seasons are changing. It’s time to figure out what to do with your outdoor pots in the winter.
(Good thinking!)
Before you start getting winter snow and freezing temps, it helps to:
1) Empty the dead flowers and dirt (or “soil” in garden lingo) from your outdoor pots.
2) Move your empty pots someplace dry. Ideally, you’d store them someplace that stays above freezing (like an attached garage). If that isn’t possible, you could put them on a covered porch or in a shed.
If your pots are too heavy to move…
3) Turn them upside down OR cover and wrap them with a thick plastic tarp to help keep the moisture out.
Why does it help to protect your outdoor pots?
If you leave the soil in your containers and moisture gets in the soil, the soil can freeze and expand, damaging your pots.
Even resin (plastic) pots can get freeze damage and crack open. I learned this the hard way when one of my resin flowerpots cracked down the side, like a man splitting his pants. Oops.
Some flowerpot surfaces can hold moisture too, like glazed ceramic and terracotta pots.
Here are examples of winter freeze damage on several of my neighbors’ flowerpots.
Do you have to do anything with your outdoor pots in the winter?
It’s a matter of your risk tolerance for your pots.
I used to leave my pots outside all winter with old soil and dead plants still in them. But after ruining several pots in winter freezes, I’m all for protecting my pots during the winter.
With that said, I have friends who don’t do anything with their outdoor pots in the winter. They’ve NEVER had issues with their pots breaking. And they have glazed ceramic pots that should be vulnerable.
It all depends on how much you want to risk it.
If you have pretty outdoor pots that you don’t want to lose, it’s a good idea to protect them from freezing winter conditions.
Related tips that may interest you:
by Ann at Go West Gardener | Updated: Jan 28, 2026 | Flower Garden Basics, Gardening Tips and Tricks
– 20 degrees below zero… -50 degrees below zero… -70 degrees below zero …
Yikes.
Every few years, we see some big wind chill numbers across parts of the Rocky Mountain region and high plains during winter, including in Colorado and Wyoming.
With these arctic blasts, it’s natural to wonder:
“Will wind chill kill the plants in my garden?”
The short answer is no.
Wind chill affects humans, not plants. The temperatures that affect your plants are the actual lows, not the wind chill temperatures.
Do you have snow in the forecast? That can be a good thing. Snow acts like insulation. It can serve as an insulating blanket on the ground, helping protect your plants’ roots from really cold temperatures.
Mid-winter is a better time for cold blasts than spring or fall. No one wants arctic temperatures, but if we’re going to get them, it’s better for our plants to get them in the heart of winter. Most perennials (and shrubs and trees) are in their hardened winter mode. Extreme lows can be much more destructive to plants in the spring or fall.
Many plants are “cold hardy” and can tolerate frigid dips.
It will be a wait-and-see game when spring and summer come around to find out if and how plants are affected by winter’s arctic blasts. In the spring, I’ll keep my eye on my “marginally hardy” perennials and newer plants that are still developing their root systems.
But if you hear weather forecasters toss around epic wind chill numbers, don’t let the wind chill numbers alarm you for your garden.
To learn more…
Related topics that may interest you:
by Ann at Go West Gardener | Updated: Jan 28, 2026 | Gardening for Pollinators, Gardening Tips and Tricks
The sun is shining its warm rays. Birds are singing. And Costco has started assembling its spring pergola displays. Spring is starting to feel like it’s within reach, even if it’s still a ways off.
It’s enough to make you want to skip through the aisles of Costco.
(Go ahead. We won’t judge.)
So, on these warm winter days…
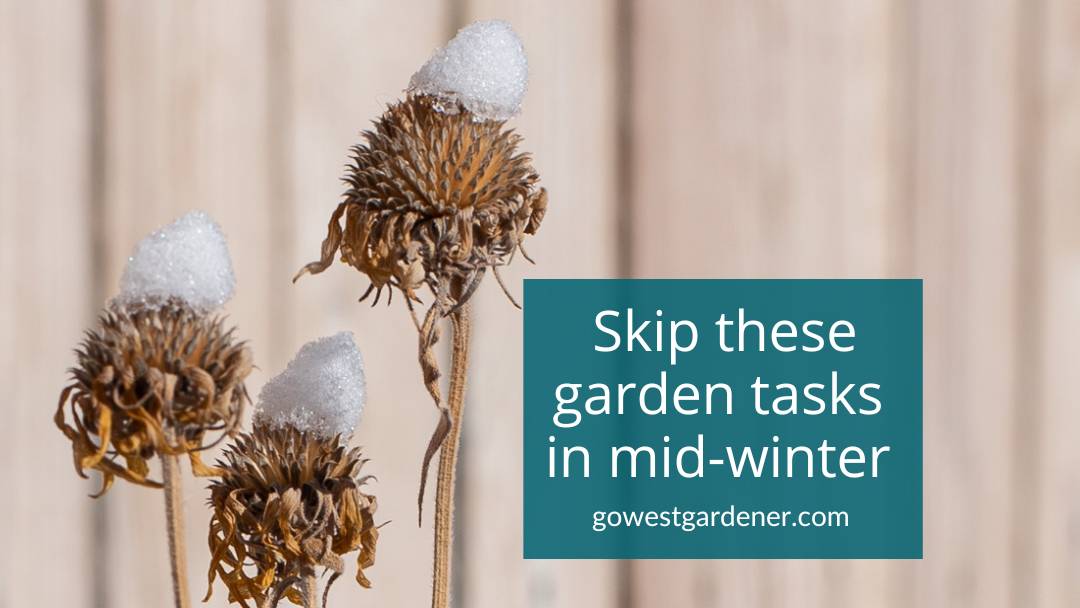
Should you start cutting back your garden in Colorado and similar states?
It’s tempting to want to start cleaning up your western garden for the new season—you know, raking leaves out of your flower beds, cutting back perennials.
But good news, there’s still time to relax. It’s best to hold off on these tasks for now. Yep, step outside and simply enjoy the sunshine instead.
Why wait on garden clean-up?
1) You’re giving your plants extra protection.
When you leave plant stems standing all winter, you’re giving some plants a better chance of returning in the spring, saving you money and effort.
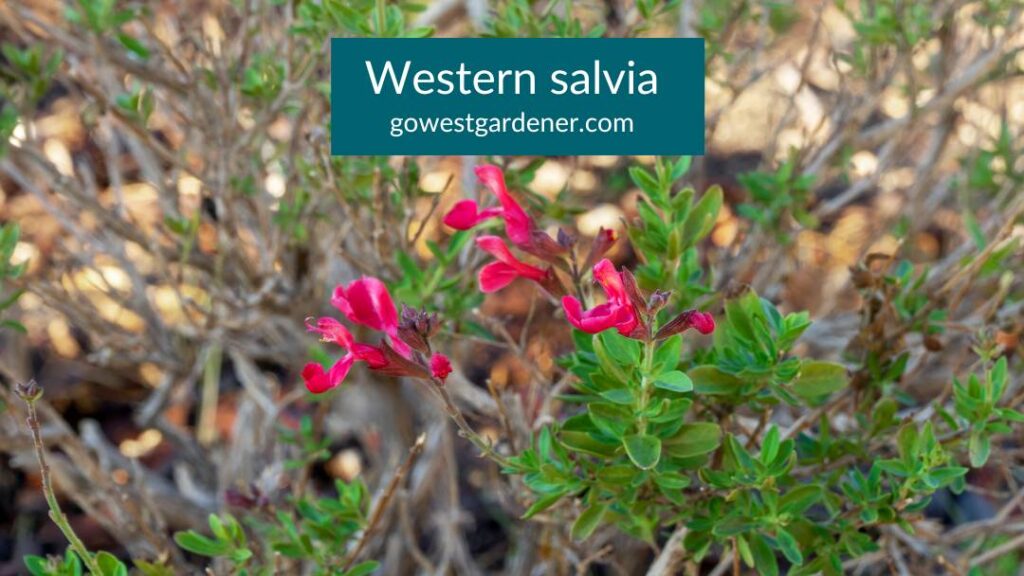
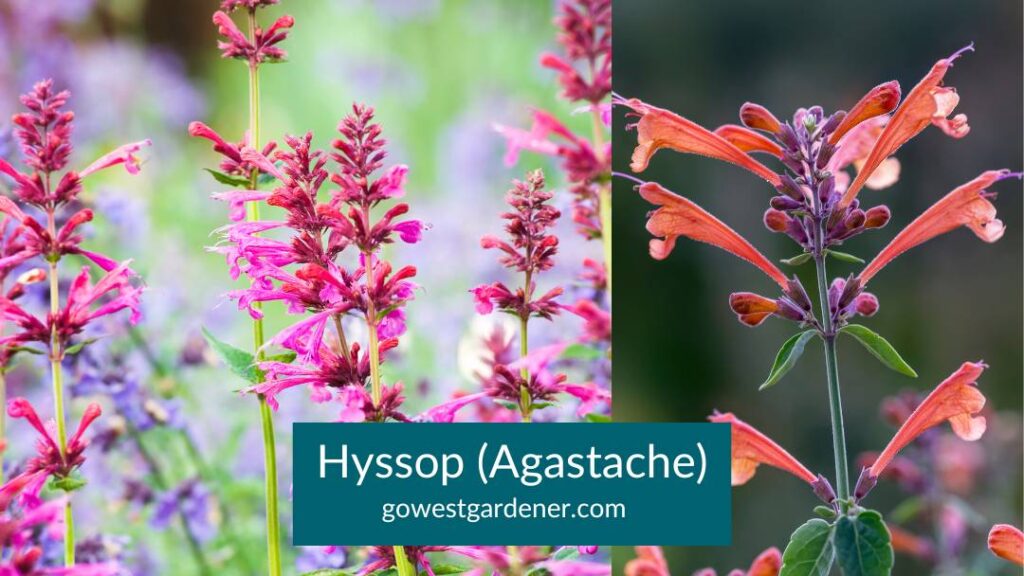
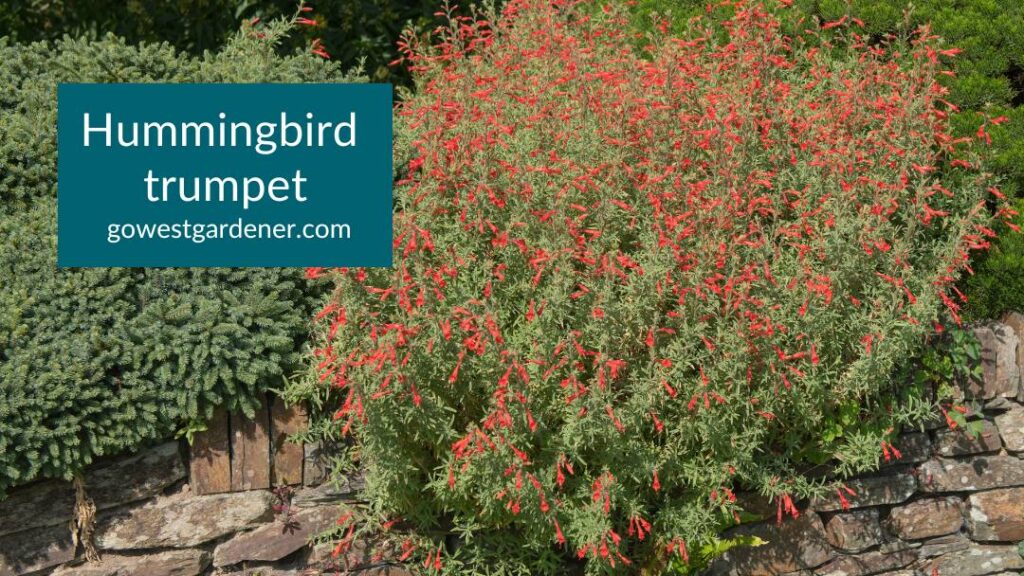
It makes the plants hardier in the cold. This includes beautiful plants that hummingbirds love like western salvias, hyssops (Agastache) and hummingbird trumpet.
2) You’re helping nesting pollinators.
Some pollinators, like Monarch butterflies, head south for the winter like happy retirees. But many beneficial insects (or their babies) overwinter in your garden and don’t emerge until April or May. Some nestle down in leaf debris. Some lay eggs or create cocoon-like structures on the dormant stems of your perennials and shrubs. Many overwinter in hollow plant stems or in holes in the ground.
Your garden is a lil’ Airbnb!
3) You’re feeding the birds.
Local and migrating birds will feed on dried seeds from your plants. In January, I noticed 15 robins in my backyard (it was a robin convention!), along with juncos, woodpeckers and a few mystery cuties. Hopefully, you’re enjoying birds in your yard too.
Cheers to nature right outside your door!
Related topics that may interest you:
by Ann at Go West Gardener | Updated: Dec 2, 2022 | Gardening Tips and Tricks
Here are the key items you need to sterilize your flowerpots:
Here’s how to sterilize your flowerpots:
- Wear clothes for cleaning. For example, put on rubber gloves. You also may want to put on old clothes.
- Place your pots in a sink or tub (if you can).
- Wash your pots in soapy water. I use dish soap. When you’re done, empty the water.
- Partially fill a bucket with a mixture of 90% water and 10% bleach. (For every 1 gallon of water, you’d add about 1-3/4 cups of bleach.) If you’d like an alternative to bleach, you can use vinegar. Just know it isn’t quite as effective at sterilizing. You also can ask your local garden center whether they carry any organic agricultural products that are good alternatives to bleach.
- Use a sponge to wash the mixture over the inside and outside of your pots. If you can soak your pots in the mixture for a few minutes, great, but I know this can be tough to do with big pots or heavy pots.
- Rinse your pots with clean water. If your pots are terracotta, soak them in clean water. (Terracotta is very absorptive.)
- Let your pots air dry.
If you set up a tub or plastic container outside to wash your pots, you may want to set up in your garage. Keep all of this away from your lawn and plants.
Related tips that may interest you:
by Ann at Go West Gardener | Updated: Nov 14, 2022 | Flower Garden Basics
As you learn how to garden, it’s helpful to understand:
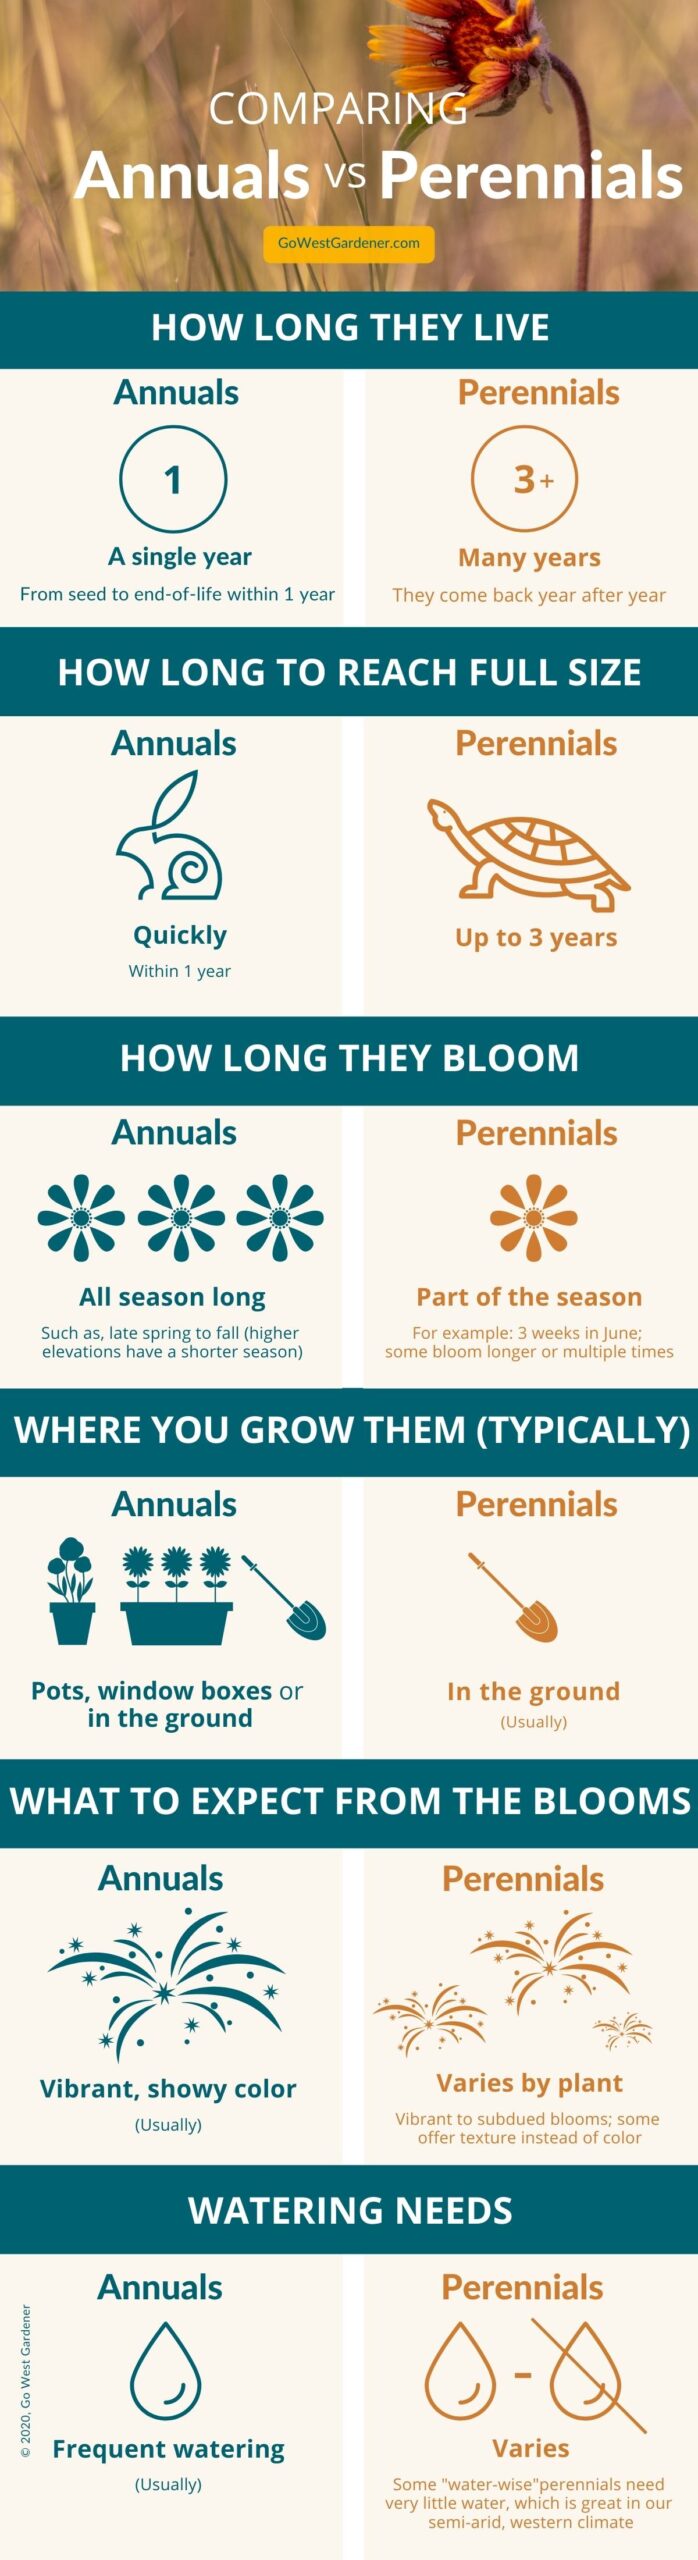
“What’s an annual vs a perennial?”
Why?
Because most flowers in your western garden will be one or the other.
Here are key differences between annuals and perennials, so these types of flowers make more sense.
Keep in mind, Mama Nature makes her own rules, so there are always exceptions.

Related tips that may interest you:
by Ann at Go West Gardener | Updated: Sep 12, 2025 | Gardening Tips and Tricks
Looking for a fun fall project that will make your front porch look GOOD?
Use a pumpkin as a planter. You’ll create a cute autumn flowerpot that has your neighbors saying, “Wow!”
I created pumpkin planters with a friend last fall. This project is quick and easy. (Yesss!) And I got great feedback from my neighbors.
Scroll on to get the scoop on how to use a pumpkin as a planter.
What you need to make a pumpkin planter…
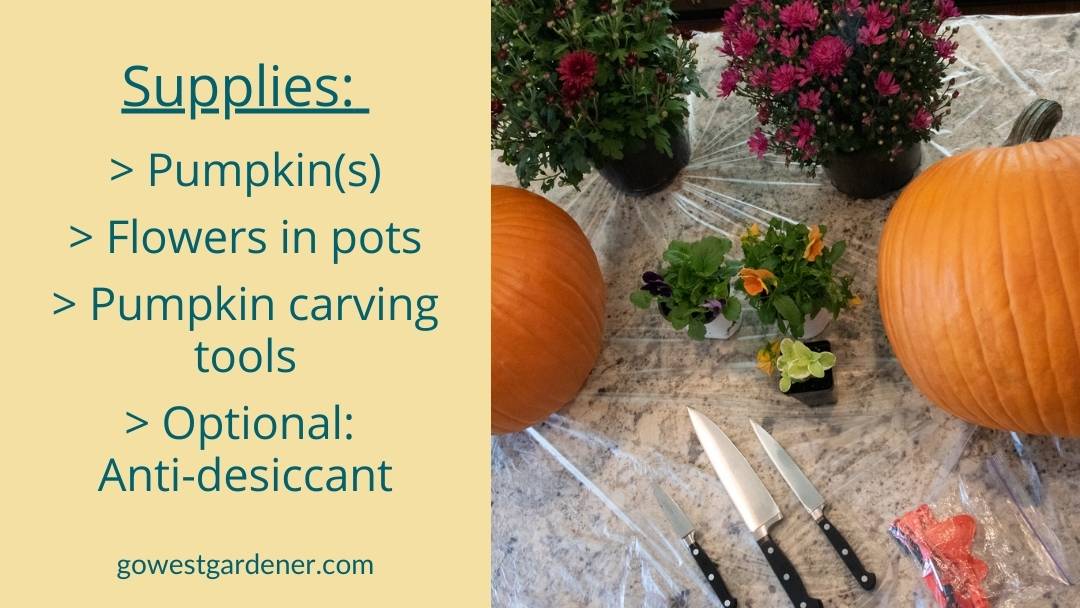
The basic things you need are:
- Large pumpkins
- Flowers in pots (you’ll keep your flowers in the nursery pots rather than planting them directly in the pumpkin)
- Pumpkin carving tools
- OPTIONAL: An anti-desiccant spray (this is supposed to help the pumpkin from drying out)
Alright, let’s jump into the steps!
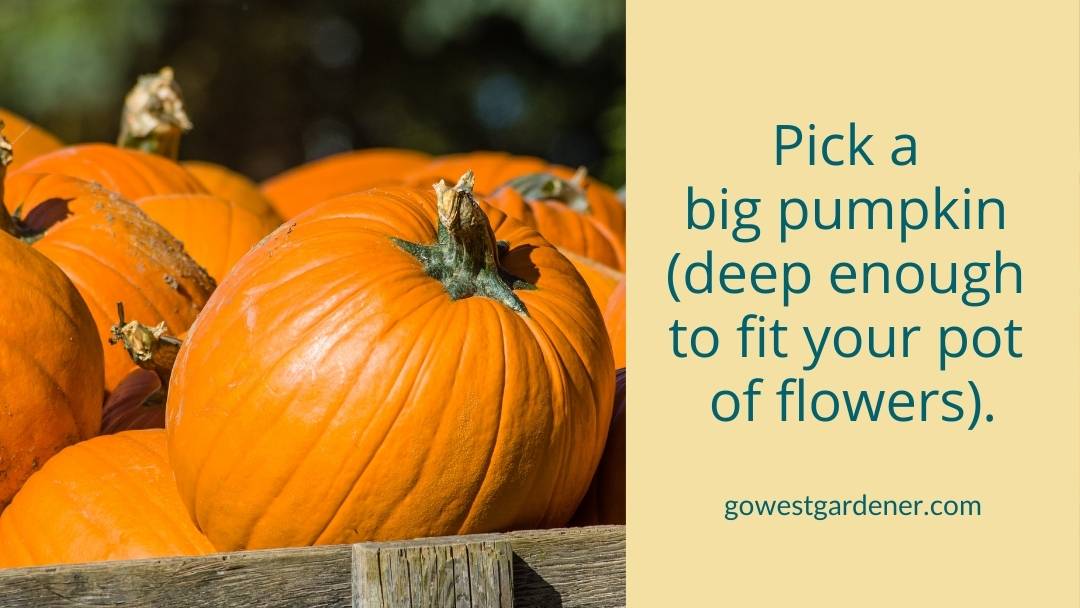
Pick a big pumpkin.
Size matters here. Look for a big pumpkin.
I took an empty flowerpot with me to the store, so I could get a sense for how big of a pumpkin I needed.
I’m not great at spatial planning, so this helped me a lot.
Wash your pumpkin.
Clean the outside of your pumpkin with soap and water.
This will help it look like a shiny, new penny and keep your hands clean.
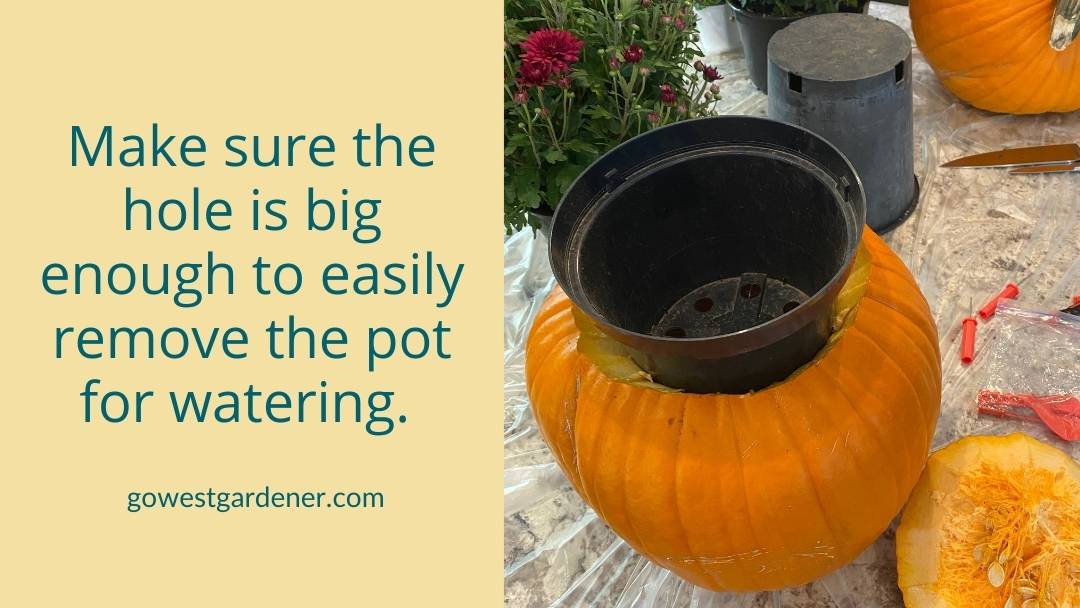
Create the hole for the flowerpot.
Trace a hole on your pumpkin that’s slightly bigger than the size of your flowerpot.
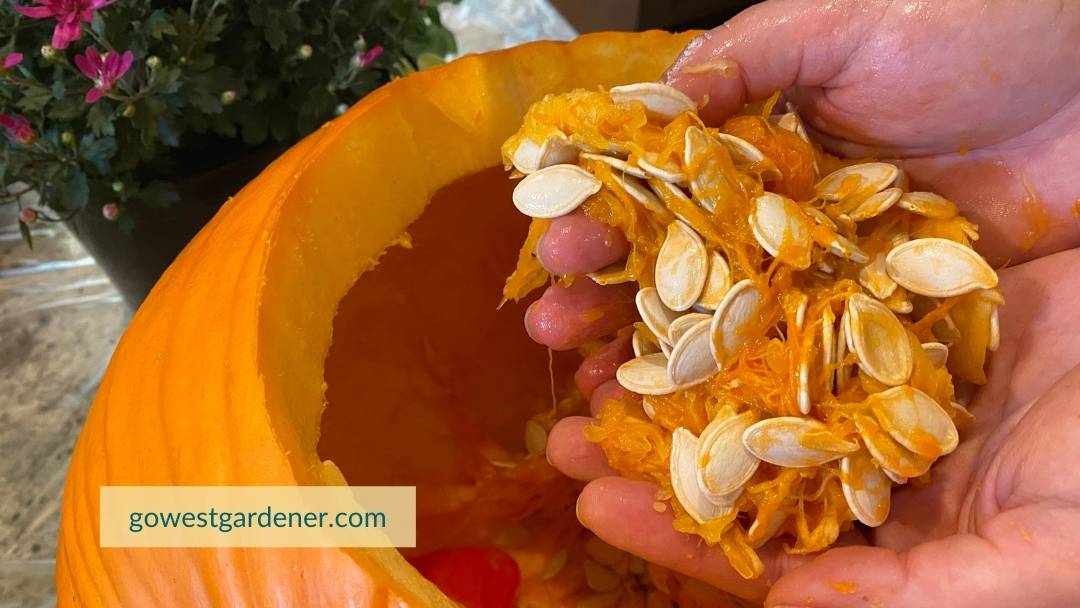
Clean out the inside of the pumpkin.
Make sure the hole is big enough to easily remove the flowerpot for watering. As you can see in the photo below, I needed to slightly expand the hole.
It’s important to be able to remove the flowerpot.
When you water your flowers, you’re going to pull the flowerpot out of the pumpkin. That way, you don’t have water seeping into the bottom of the pumpkin.
When you’re done watering and the water has stopped dripping, you’ll put the flowerpot back in the pumpkin.
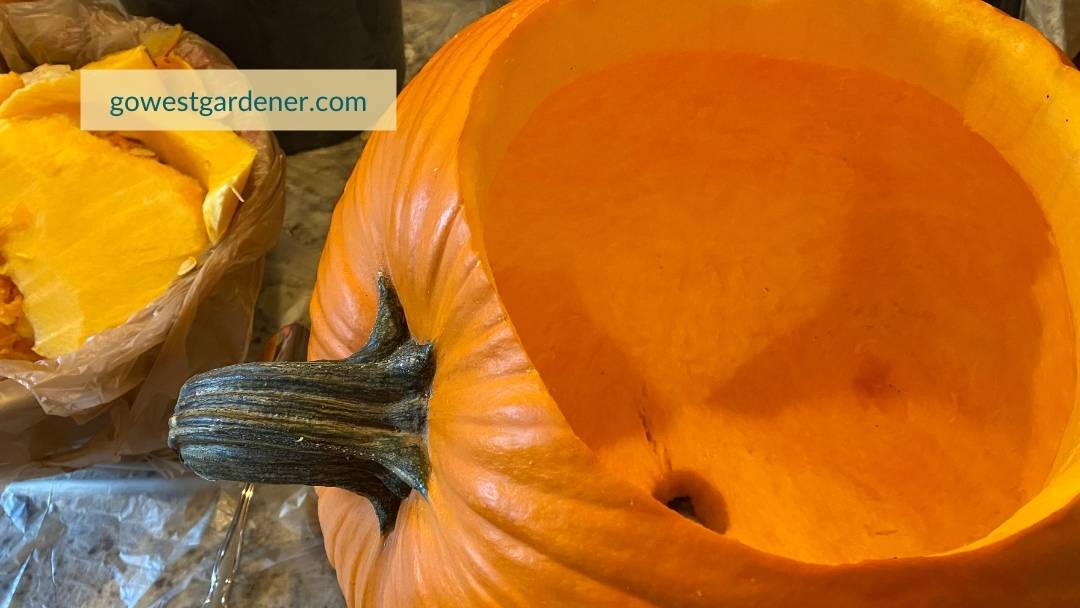
If there’s any chance you’ll have water dripping at the bottom, you may want to carve a drainage hole in the bottom of the pumpkin too.
Get creative with where you carve the flowerpot hole.
You don’t have to cut the hole for the flowerpot where the stem of the pumpkin is.
My friend found a cool pumpkin that looked better on its side, as you can see below.
Optional: Once the pumpkin is cleaned out, spray the interior with an anti-desiccant.
An anti-desiccant spray is supposed to help keep the pumpkin from drying out. I found the spray at a local garden center last fall. You also can order it on Amazon.
Follow the instructions on the bottle for how long to let it dry.
Full disclosure: I didn’t find that the anti-desiccant made much of a difference, so I’m not going to use it this year.
You could stop here, and you’d have a really cute pumpkin planter.
Or, you can go a few steps further…
Turn your pumpkin planter into a Jack O’Planter.
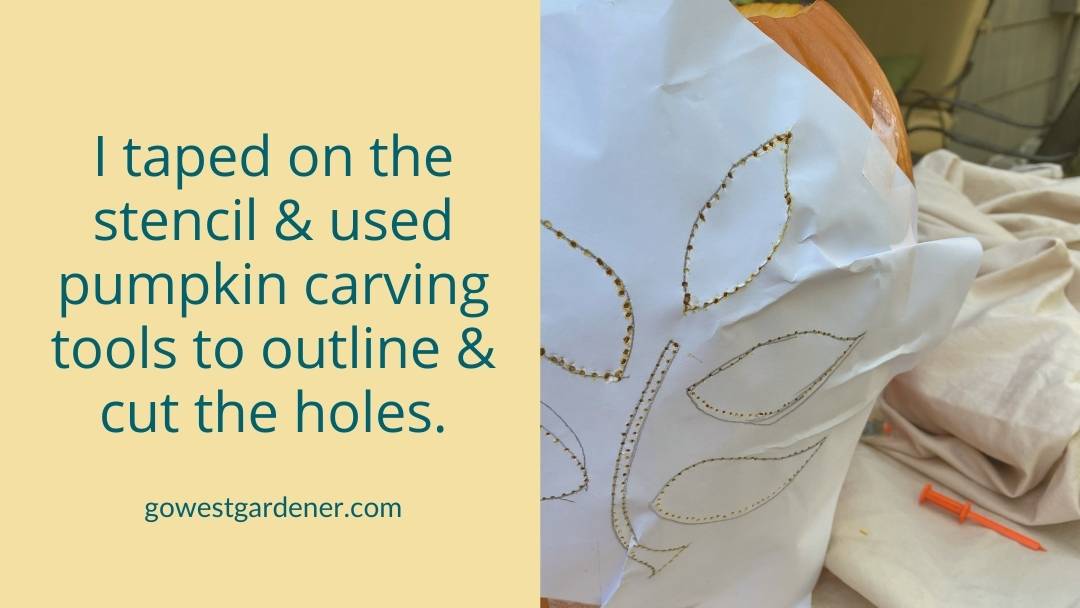
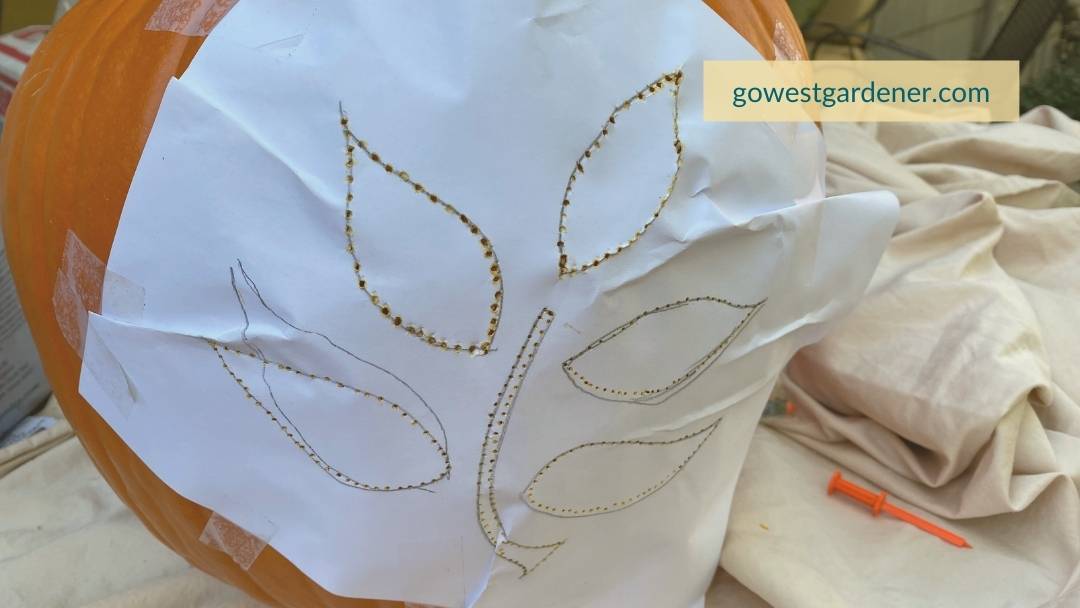
I felt like my pumpkin needed a little “oomph,” so I decided to carve it.
You could carve anything you want into your pumpkin: a funny face, a pretty pattern, the brand logo for your business…
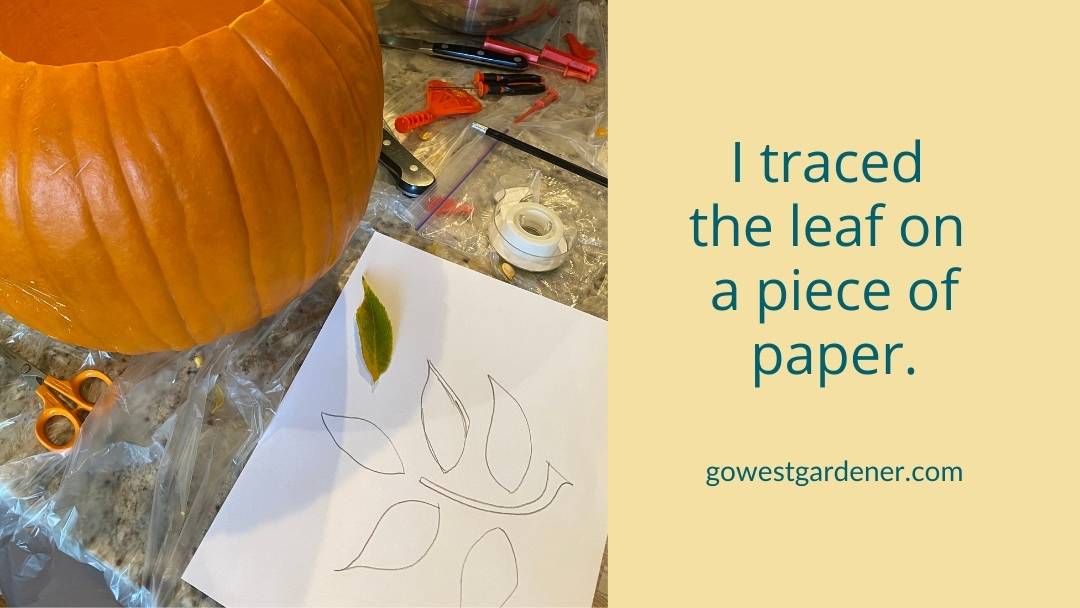
In my case, I started with a leaf.
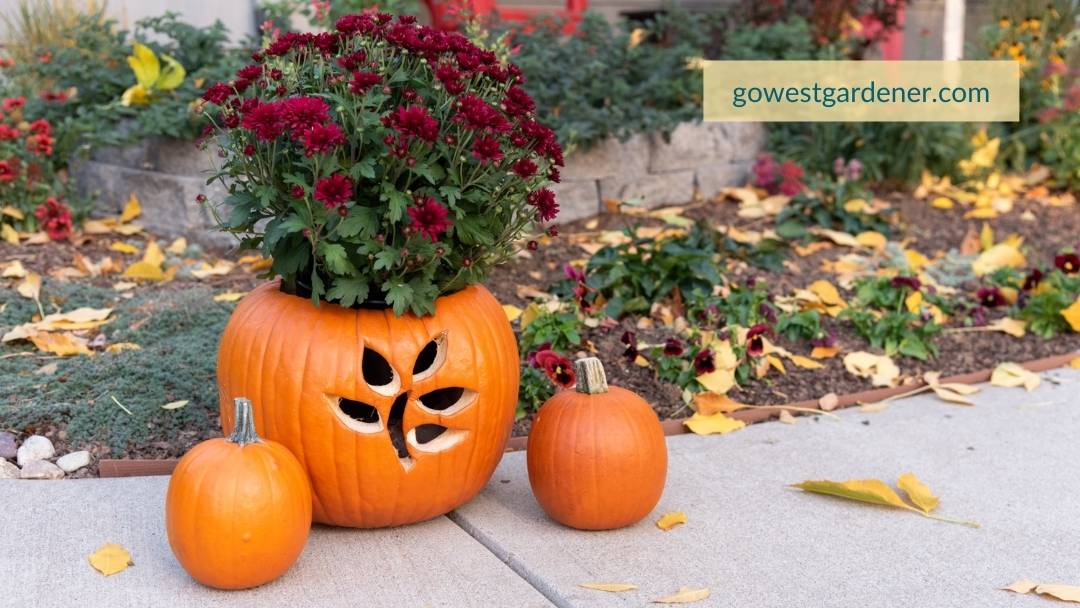
Here’s how my pumpkin planter turned out.
I was excited with how it came together!
How do you get your flowerpot to sit at the right height in the pumpkin?
You may need to put something inside the pumpkin for the flowerpot to sit on.
In my case, I turned an old plastic cup upside down inside the pumpkin. Then, I set the flowerpot on top of it.
This helped the flowers to sit at the right height.
Plant a pretty mix of fall flowers.
If you want to use a pumpkin as a planter, you also could include a mix of fall flowers.
(Go big, right?)
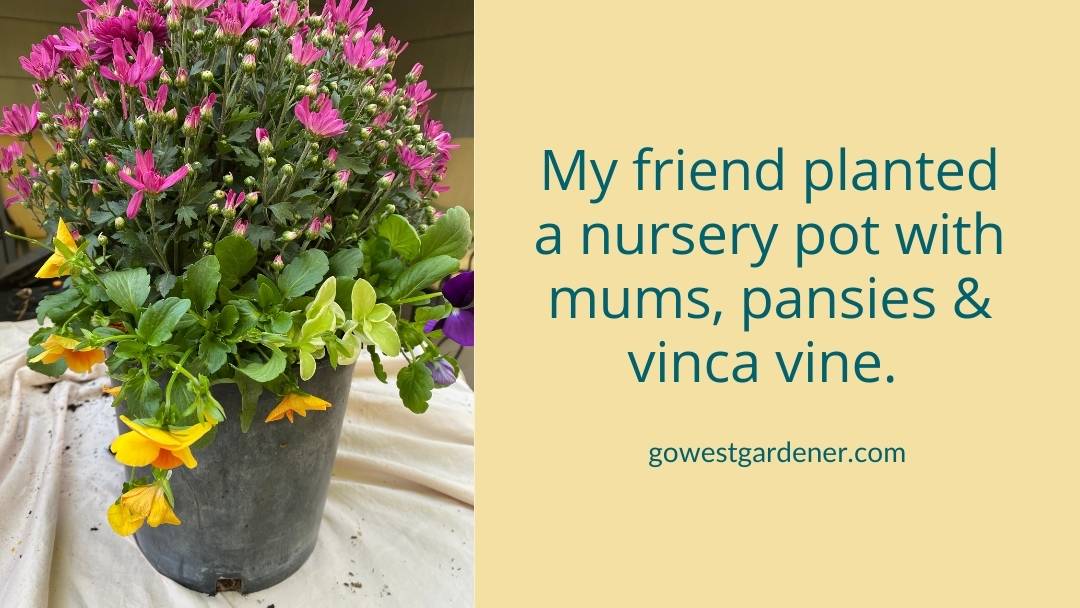
My friend filled an empty nursery pot with potting soil and packed in several types of fall flowers, like mums and pansies.
Then, she put that flowerpot inside her pumpkin planter.
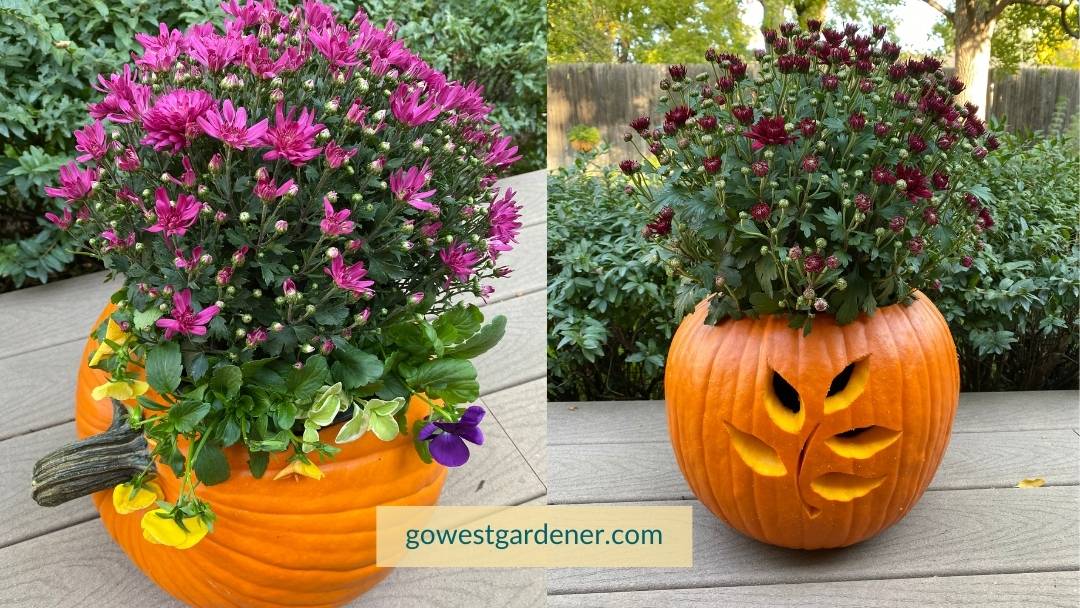
Here’s a look at both of our pumpkin planters.
Cute, right?
What we may tweak for this autumn…
My friend and I may experiment with adding in other types of pumpkins this year. I have a ceramic Jack O’Lantern pumpkin. My friend has a craft pumpkin from a craft store.
We’re going to see if these options help our fall displays last longer.
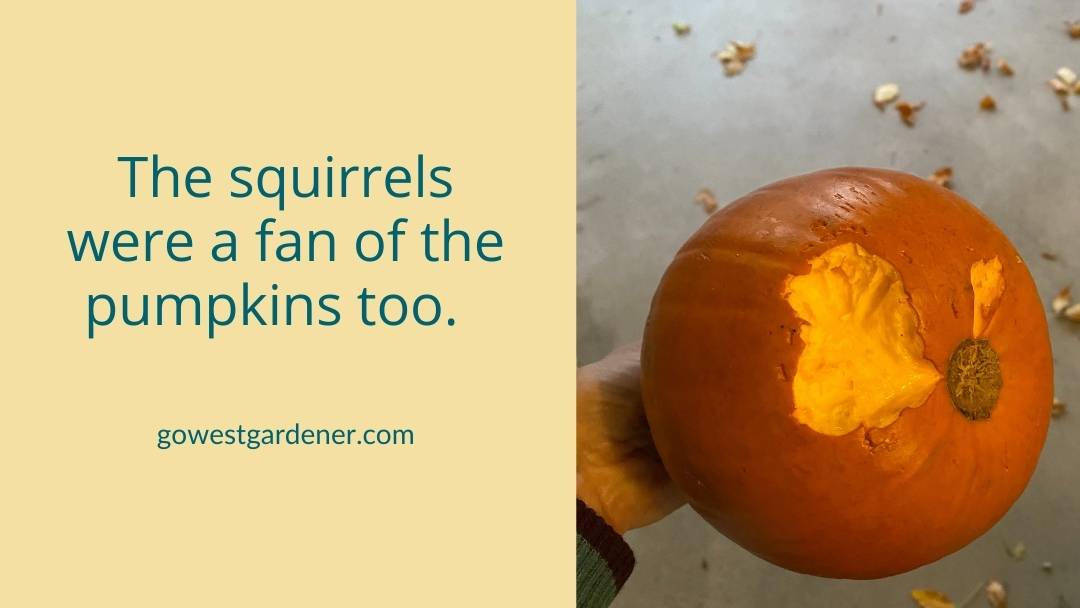
At the very least, the squirrels should be less interested in the pumpkins.
But I’m also going to carve real pumpkins again and use them as planters.
It was fun!
If you make a pumpkin planter, share it on Instagram or Facebook and tag @gowestgardener. I’d love to see what you create.
Related tips that my interest you