by Ann at Go West Gardener | Updated: Sep 10, 2026 | Best Flowers for Colorado, Utah & Similar States, Gardening for Pollinators, In-ground garden, Waterwise Gardening in the Intermountain West
Want to add a splash of color to a late-summer garden?
Dig into some of the best flowers for late summer in Colorado—whether you live in Denver, Colorado Springs, Grand Junction or another Colorado town!
These late-summer flowers bloom in August, September and some into October. They’re ideal if you’d like to:
- Add beautiful color and texture that will have neighbors taking notice.
- Attract pollinators to your garden, like hummingbirds and bees.
- Reduce the amount you have to water. (Yay for less work—and less water! They’re all drought tolerant plants.)
These plants are perennials, so they should return for multiple years. They prefer sunny spots that get 6+ hours of sunlight per day.
If you live at a higher elevation in Colorado (or a similar western state), your growing season may not be long and warm enough for these late-summer and early-fall flowers. But good news, you can find a list of flowers for mountain gardens from the Colorado State University Extension.
Let’s jump in!

The best flowers for late summer in Colorado include…
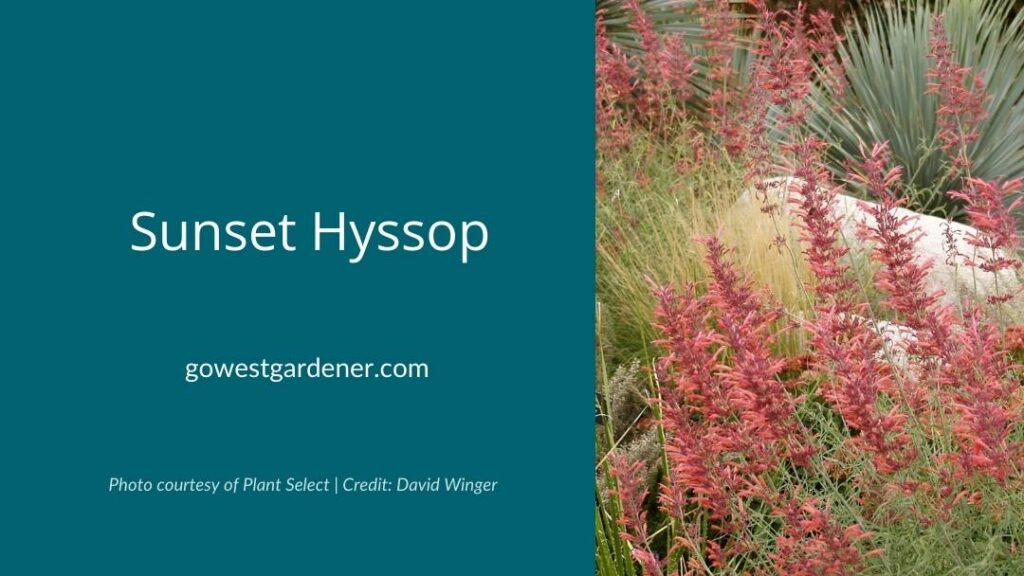
Sunset Hyssop
Agastache rupestris

Hummingbirds adore Sunset Hyssop. This late summer flower is Grand Central Station for hummingbirds. You may notice butterflies, bees and sphinx moths visiting it too. And bonus, this plant is typically deer and rabbit resistant, meaning Bambi will likely visit your neighbors’ gardens first.
Sunset Hyssop is one of the more reliable hyssops in Colorado when it’s planted in sunny, well-drained locations. Translation: It has a good track record of returning when other hyssops may not! Its salmon-orange flowers tend to be the showiest in August, but you should see blooms into fall.
Sunset Hyssop is native to the mountains of the Southwest. Zones 5-10.
Not familiar with “zones?” Learn what a hardiness zone is and how to find your zone here.
Dakota Sunshine Maximilian’s Sunflower
Helianthus maximiliani ‘Dakota Sunshine’
If you like sunflowers or you simply like daisy-like flowers, this may be one of the best flowers for late summer in your garden! Dakota Sunshine gets spires of showy yellow blooms that grow up tall stems. It’s a drought-tolerant perennial that can reach 5’ to 6’ tall, so it’s ideal for adding height to the back of a garden. Native to the prairies, Dakota Sunshine blooms in August into early September. It’s a favorite of bees when it’s blooming. When it goes to seed later in the fall, the seedheads attract birds. Zones 3-8.
If you’d like a version of this plant that blooms in the fall, look for Maximilian Sunflower. It grows even taller—often 6′ to 8′ in height—and typically blooms in September and October in western states like Colorado.
I found Dakota Sunshine at High Country Gardens. You also may be able to find these plants at local, independent garden centers.
Autumn Joy Sedum
Sedum spectabile ‘Autumn Joy’
So many reasons to love Autumn Joy Sedum, so little time! This perennial has beautiful pink flowers that appear in late summer and last into fall. Honeybees love the flowers.
Autumn Joy has thick leaves that add great structure and textural contrast to a garden. It tends to be a longer-lived perennial, coming back for many years. It adapts well to our tricky Colorado weather and soils (dirt). And during the winter, its seed heads can catch snow, adding interest to your winter garden too. Zones 4-11.
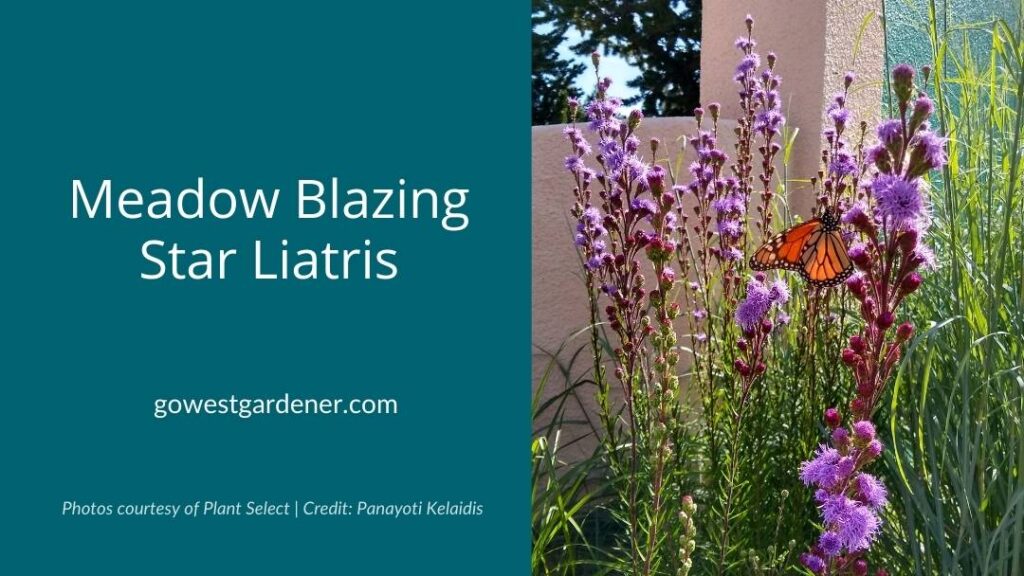
Meadow Blazing Star Liatris (aka, Rocky Mountain Gayfeather)
Liatris ligulistylus
When I’m strolling through the Denver Botanic Gardens in August and September, this is the plant I usually hear people asking about. It’s an attention getter.
Blazing Star Liatris sends up vertical shoots of rosy-purple flowers that look like fuzzy buttons. The narrow, vertical shape of this plant offers a nice contrast to round-shaped plants in late summer gardens. And its flowers are extremely attractive to adult butterflies, including Monarchs. In my garden, Blazing Star Liatris also attracts native bees—particularly bumblebees.
If you see the words, Liatris punctata (Dotted Blazing Star) or Liatris ligulistylus (Meadow Blazing Star), on the plant tag, your plant is native to Colorado and the Central Plains. Zones 4-9 and 3-8.
If you see Liatris spicata (Dense Blazing Star) on the plant tag, it’s native to the eastern United States. It tends to prefer more moisture.
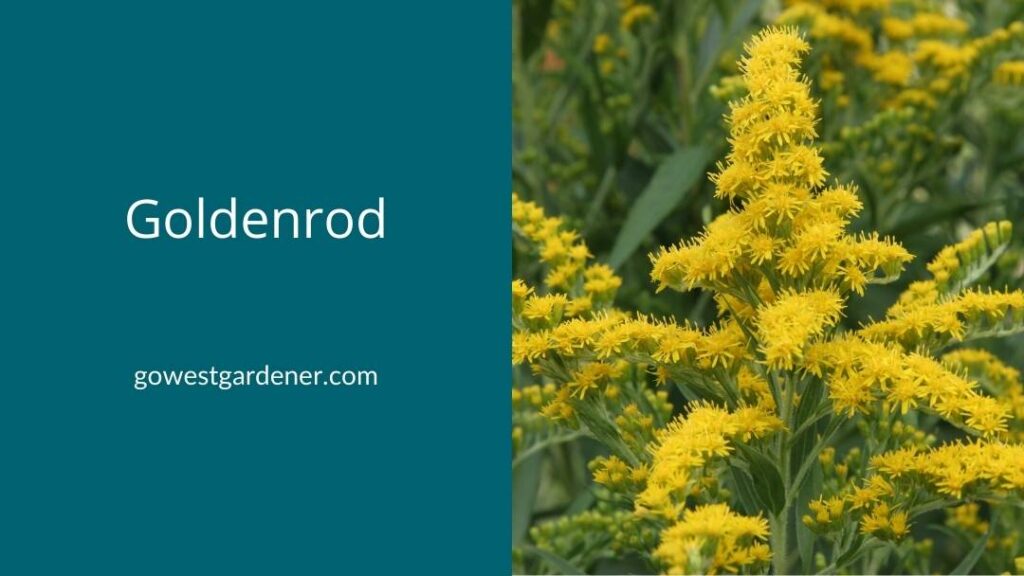
Goldenrod
Solidago
Many Goldenrods put on a show with their vibrant, golden flowers in late summer and early fall. There are many species of Goldenrod that are native to different parts of North America, and you can find them in a variety of heights. Look for Goldenrods that bloom in August and September.
Goldenrod flowers are extremely attractive to a wide variety of pollinators, including bees and butterflies. In my garden, tiny native bees love these plants. Zones 4-8.
Goldenrod has been blamed for seasonal allergies like hay fever, but this is a garden myth that has been disproven. The allergy-causing culprits are typically wind-pollinated plants like ragweed, which happen to bloom at the same time.
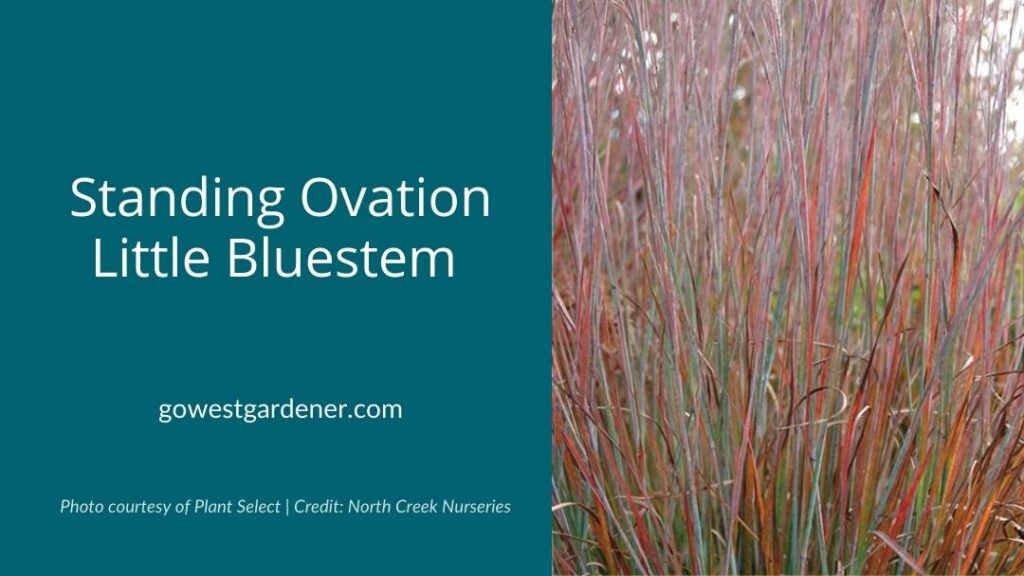
Little Bluestem Grass
Schizachyrium scoparium
Ornamental grasses are in their glory in late summer and early fall. One of my faves is Little Bluestem.
It has a column-like shape rather than a round, mounded shape, so it fits in well in small urban gardens, as well as spacious western landscapes.
Native to Colorado (and the prairies of much of the United States), many varieties of this blue-green grass turn a red color in the fall, making it a wonderful accent to other plants. During winter, it can take on a bronze hue with light seed heads, so it can add colorful interest to your winter garden too. Zones 3-8.
Ruby Muhly Grass
Muhlenbergia reverchonii
If you’re looking for a late summer flower that’s a showstopper for your Colorado garden, check out Ruby Muhly Grass. It has airy, pink seed heads that dance in the wind and catch the late summer light. It’s ethereal! And it’s another ornamental grass that looks beautiful in the fall and through the winter.
Ruby Muhly Grass grows in a mounded shape, up to a few feet wide.
If you live in the Denver area, you can see beautiful examples of Ruby Muhly Grass at the Denver Botanic Gardens. Zones 5-10.
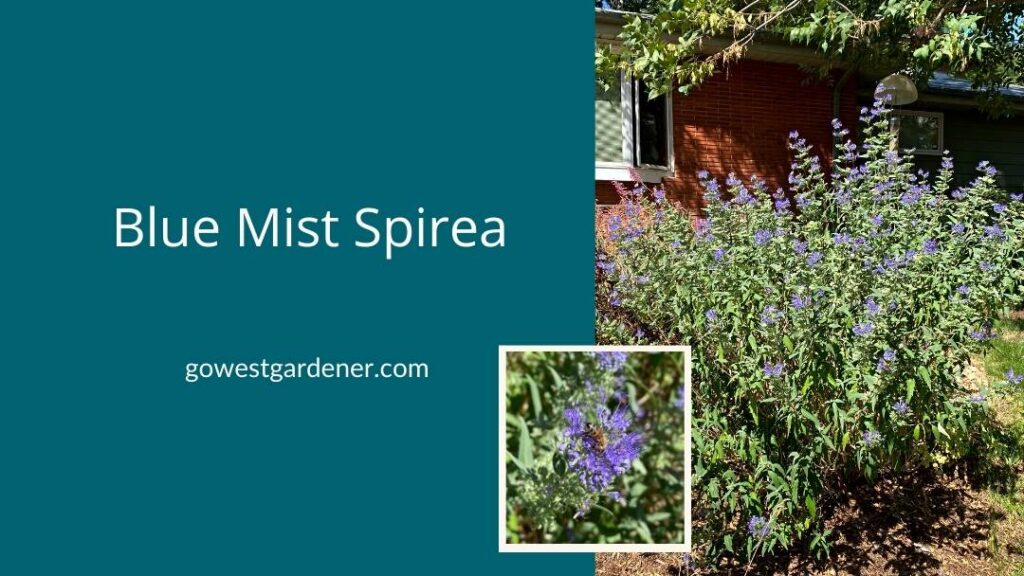
Blue Mist Spirea
Caryopteris x clandonensis
Blue Mist Spirea is an easy-to-grow shrub that’s covered with blue flowers in late summer. It often blooms for up to 8 weeks during August and September. This shrub is a pollinator MAGNET! It attracts a variety of bees and butterflies in late summer—when many other shrubs and perennials are done blooming. And bonus, deer and rabbits tend to skip it.
Use Blue Mist Spirea to add structural interest to your garden, as a border plant or in a hedge. It grows to about 3 to 4’ wide and tall. Zones 5-8.
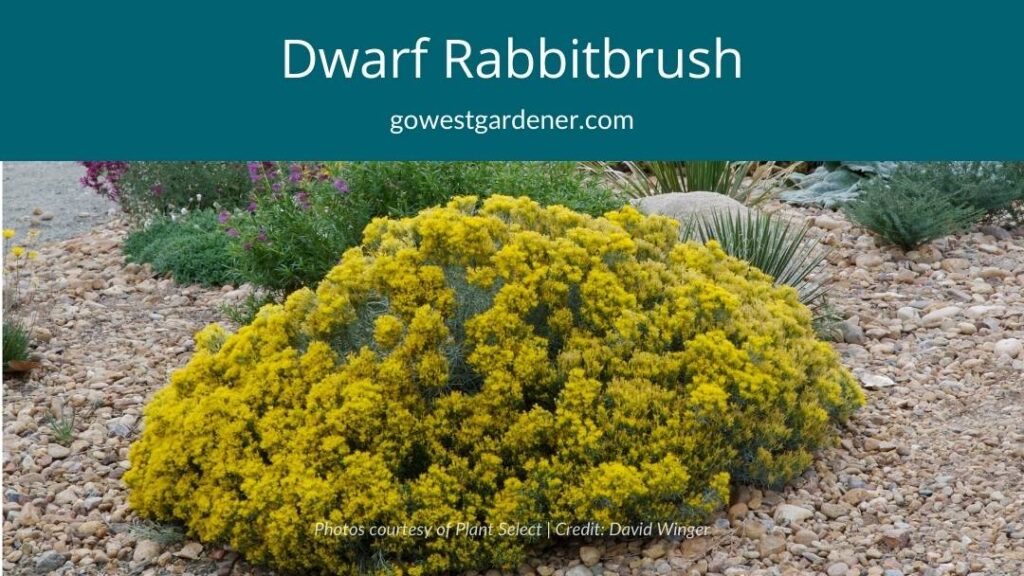
Dwarf Rabbitbrush (aka, Baby Blue Rabbitbrush)
Ericameria (Chrysothamnus) nauseosus var. nauseosus
Dwarf rabbitbrush offers vibrant, late summer flowers that attract native bees and butterflies.
As the name suggests, dwarf rabbitbrush is a mini version of rabbitbrush. It grows up to 2′ tall and 3′ wide. It’s native to Colorado’s Front Range. It has dense, silver-blue foliage and keeps its shape well. It lights up with golden flowers in late summer and fall in Colorado, often from September to November.
Rabbitbrush can spread its seeds like a fairy godmother tossing pixie dust, so be prepared to pull some seedlings. This shrub benefits from a light shearing in the late fall or early spring to increase next season’s flowers. Zones 4-9.
Related topics that may interest you:

by Ann at Go West Gardener | Updated: Sep 10, 2026 | Best Flowers for Colorado, Utah & Similar States, In-ground garden, Waterwise Gardening in the Intermountain West
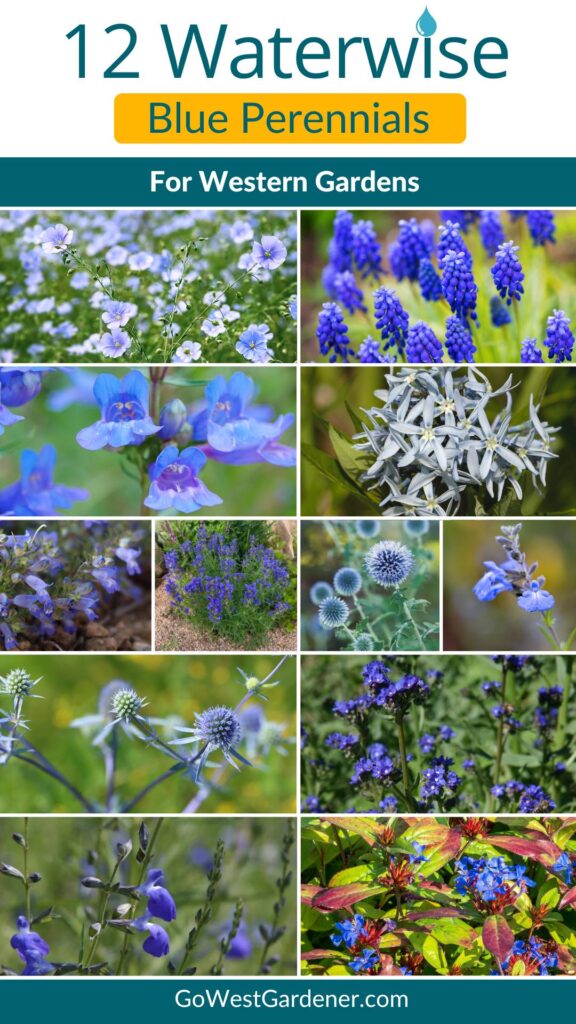
Confession: I love blue flowers. There’s something about them that makes my heart sing. In Colorado, Utah, and similar states, we’re lucky to have a variety of waterwise, blue flowers available to us as perennials (plants that return for multiple years).
Here are 12 waterwise perennials with blue flowers to get you started. These drought-tolerant beauties can handle our tricky, western conditions—from low precipitation to summer heat.

SPRING BLOOMERS
Blue flax (Linum lewisii)
Zones 4-9
Blue flax is a “What’s that?” plant… as in, your neighbors will stop and ask about this drought-tolerant perennial. It has airy, ferny leaves and charming, blue flowers in May and June. The flowers can be pale blue, powder blue or sky blue. Flowers open in the morning and close in the evening.
Blue flax can reseed heavily if you let it go to seed—like a fairy godmother tossing pixie dust—so think about where you plant it. It prefers a lot of sunlight and well-drained soils.
If you’d like a blue flax that’s native to Colorado, Utah and Wyoming, Linum lewisii is the easiest one to find in stores and at plant exchanges. The Colorado State University Extension says it can grow at elevations up to 9,500 feet! If you aren’t picky on native origin, there are European blue flaxes available too, such as Linum perenne (zones 4b-8) and Linum narbonense (Zones 5-8).
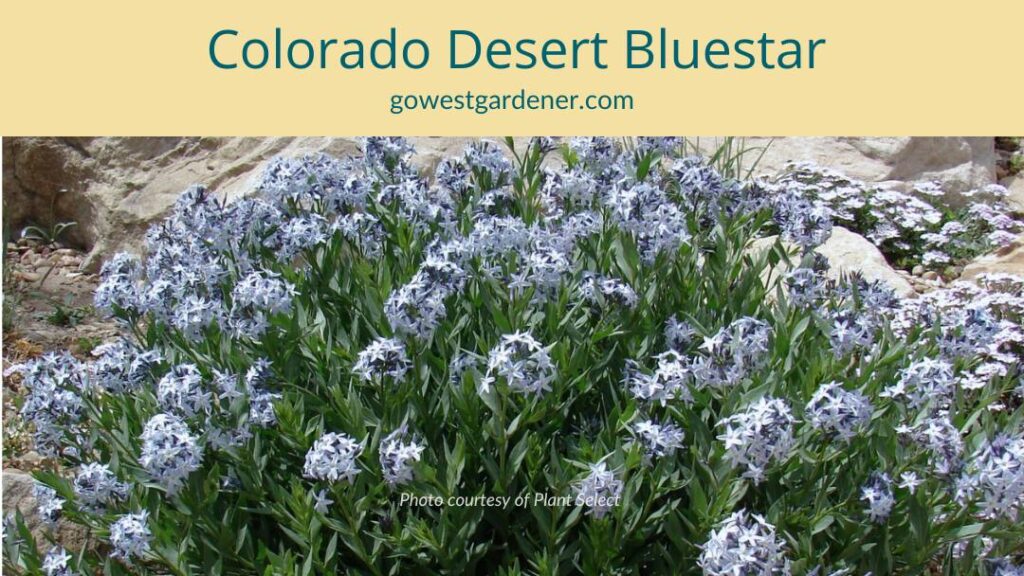
Colorado desert bluestar (Amsonia jonesii)
Zones 4-9
Colorado desert bluestar has pale-blue flowers that look like stars. It blooms in April and May. During autumn, its leaves turn yellow, offering a splash of fall color.
Colorado desert bluestar thrives in hot, sunny and dry locations. It’s very waterwise. Worth noting, this perennial can take several years to grow in size, so consider buying a bigger plant to get started. Otherwise, plan on being patient for a few years. (It’s worth the wait.)
This perennial can be a hard one to find, so if you see it at the garden center or a plant exchange, snag it!
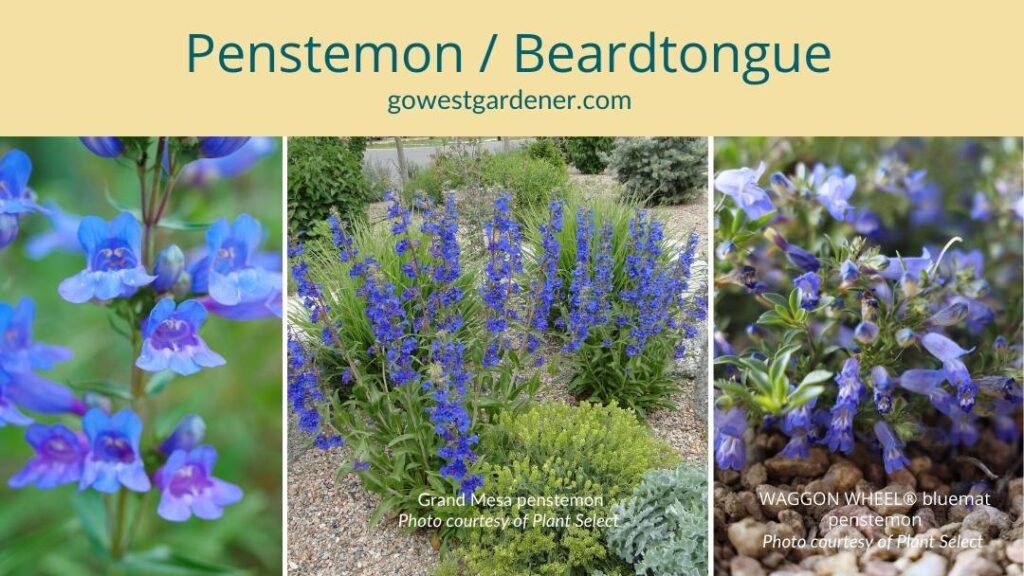
Blue penstemons / beardtongues (Penstemon)
Penstemons (aka, beardtongues) typically put on a colorful show in late spring and early summer gardens in the West. They thrive in hot and sunny locations. They can keep their green foliage through most of the year, including winter. These plants attract hummingbirds and bees.
There are a number of penstemons that have blue flowers, including:
- Grand Mesa penstemon (Penstemon mensarum) — native to Colorado and Utah (zones 3-9); Grand Mesa penstemon is a stunner, and it’s very attractive to different types of pollinators; I was able to find it at HighCountryGardens.com
- Blue Mist penstemon (Penstemon virens) — native to Colorado and Wyoming (zones 4-8)
- Electric Blue penstemon (Penstemon heterophyllus ‘Electric Blue’) — a selection of a California native penstemon (zones 5-9)
- WAGGON WHEEL® bluemat penstemon (Penstemon caespitosus ‘P022S’) — a selection of a low-growing penstemon that’s native to Colorado, Utah, Wyoming and Arizona (zones 4-7)
All of the penstemons listed above thrive in waterwise gardens.
Muscari / grape hyacinth (Muscari armeniacum)
Zones 4-9
Muscari (aka, grape hyacinth) has deep-blue flowers that bloom in the middle of spring. It grows from a bulb you plant in the fall. It naturalizes easily in western gardens, so it can spread and come back year after year. Muscari is drought tolerant, making it a good addition to waterwise gardens. Plant it en masse for a big splash of color.
Muscari offers bees an early source of food before many other plants have started blooming.
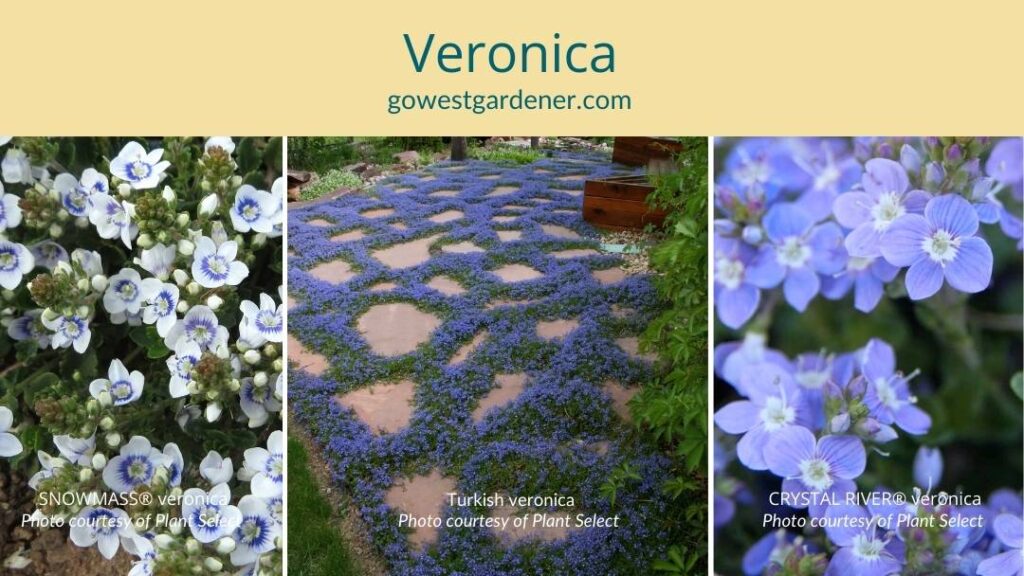
Turkish veronica (Veronica liwanensis)
Zones 3-10
Turkish veronica is a low-growing groundcover. It gets tiny, blue flowers in May. Plant it among pavers and walkways for a pretty look or along the fronts of your garden beds.
Turkish veronica will grow in partly shady locations, as well as in sunny locations. (You’ll get more flowers in the sun.) The leaves are evergreen, meaning they typically stay green throughout the year, including winter. This plant takes low to average water.
There are variations of this perennial that have blue flowers as well. For example, CRYSTAL RIVER® veronica has lilac-blue flowers with a white center (zones 3-7), and SNOWMASS® blue-eyed veronica has white petals with blue centers (zones 3-10).
SUMMER BLOOMERS
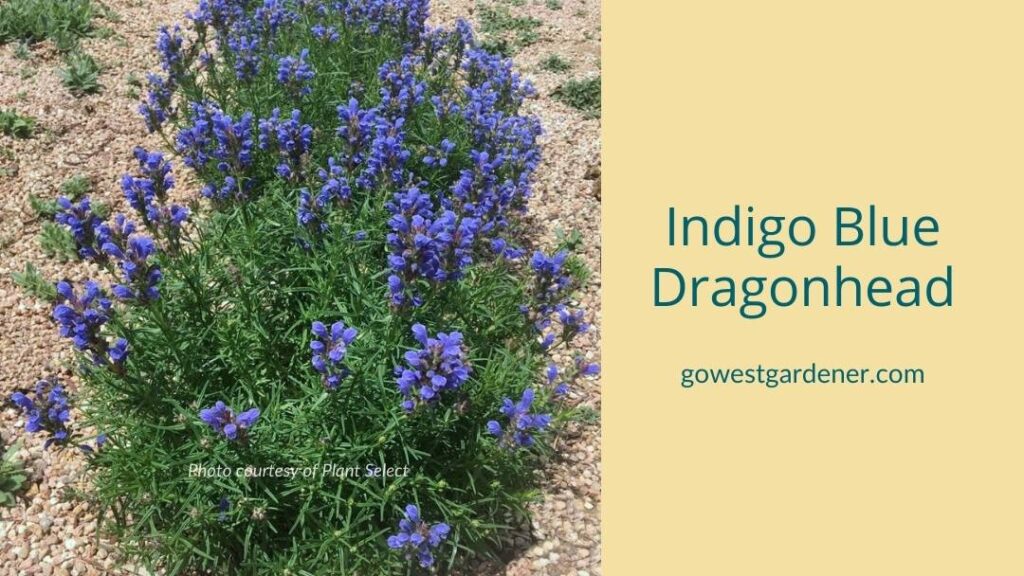
Indigo blue dragonhead (Dracocephalum ruyschiana)
Zones 3-8
Indigo blue dragonhead gets blue flowers in the late spring/early summer. This perennial has vibrant-green foliage with needle-like leaves. I think it looks pretty when it’s paired with waterwise perennials that have silver foliage.
Indigo blue dragonhead is drought-tolerant and easy going. You can plant it in a variety of soils. It’s happiest in sunny locations.
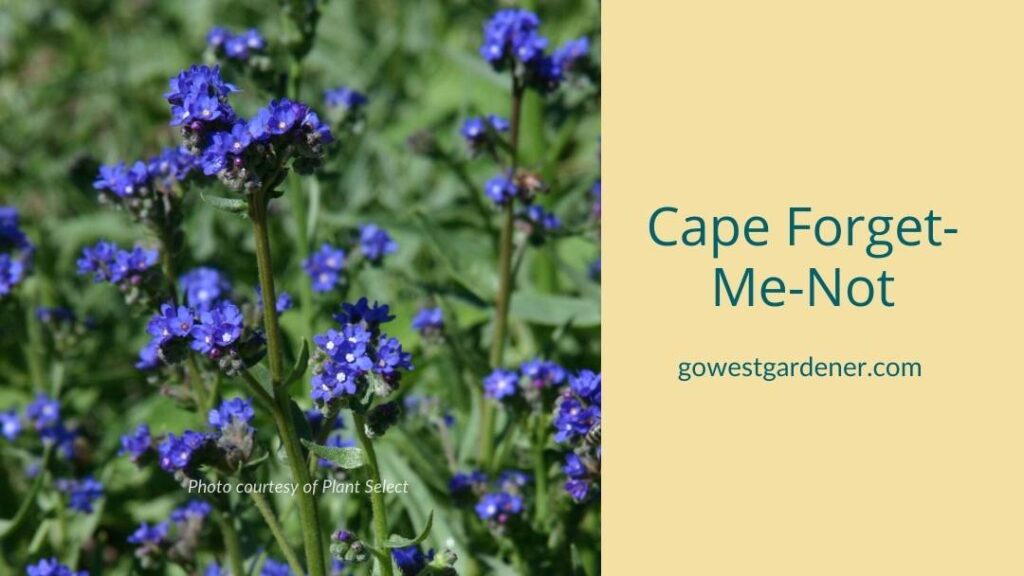
Cape forget-me-not (Anchusa capensis ‘Cape Forget-Me-Not’)
Zones 5-10
Cape forget-me-not grows in full sun and part shade. In sunny locations, it prefers a little more water.
This attractive perennial from South Africa starts blooming in April, and it can bloom into the fall if you keep deadheading it. Honey bees love the sky blue flowers.
This waterwise, blue flower can be a shorter-lived perennial. If you want it to continue in your garden, let some of the spent flowers go to seed. With that said… it easily reseeds, so if you don’t want a lot of new plants, be sure to deadhead the spent blooms.
Prairie salvia (Salvia azurea)
Zones 5-9
Prairie salvia is a regionally native plant that gets blue flowers on tall stems in mid- to late summer. It’s a prairie plant that attracts pollinators, like bumble bees and hummingbirds.
This waterwise perennial grows well in our tricky western soils, from clay to sand. It doesn’t need a lot of water, and it’s happiest in sunny gardens. If you plant it in rich garden soils (meaning your dirt has a lot of organic material in it), it can get floppy.
Prairie salvia looks lovely when it’s planted among ornamental grasses, like little bluestem, and goldenrods.
Blue Glow globe thistle (Echinops bannaticus ‘Blue Glow’)
Zones 3-8
Blue Glow globe thistle produces round flowers—blue globes—in the middle of summer. The round flowers create an interesting focal point in waterwise gardens, creating contrast with other plants. This perennial can get reasonably tall (up to four feet tall), so plant it in the middle or back of your garden. It thrives in sunny, hot and dry locations, and it can bloom for a long time.
This beauty attracts a range of pollinators, including honey bees and bumble bees. In my garden, I’ve seen hummingbirds visiting it as well.
When you see the word, “thistle,” you may think, “Eeek, is this the bad kind of thistle?” Blue Glow echinops isn’t the invasive type of thistle, but it can reseed. If you don’t want it taking over neighboring plants, deadhead it when it’s done blooming.
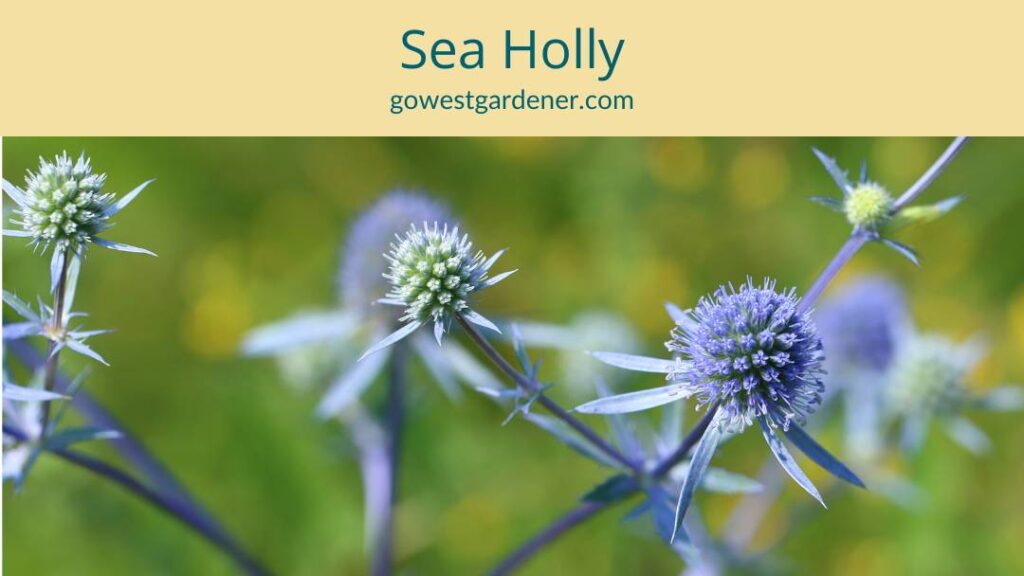
Blue Glitter sea holly (Eryngium planum ‘Blue Glitter’)
Zones 4-9
Another waterwise plant with interesting flowers!
Blue Glitter sea holly gets blue, spiny flowers on blue stems in the middle of summer. It thrives in sunny, dry locations. (You’ll find other sea holly plants on the market, but they aren’t always as drought tolerant as Blue Glitter.)
My neighbors ask me about this plant every summer. I’m partial to it because it looks unusual, and it’s a party for pollinators, including native bees, beneficial wasps and butterflies.
FALL BLOOMERS
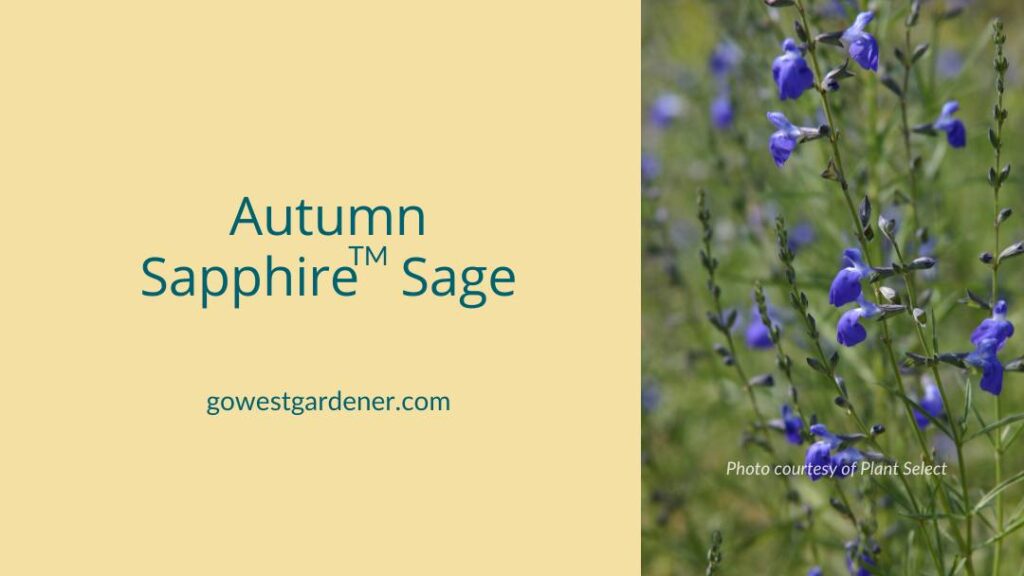
Autumn Sapphire sage (Salvia reptans ‘P016S’)
Zones 5-10
There are a couple of waterwise, blue flowers that shine in the fall, including Autumn Sapphire sage. This drought-tolerant perennial adds a pop of color in September and October when other flowers have stopped blooming. Plus, it’s a source of nectar and pollen for late-season pollinators, including bees and butterflies.
Autumn Sapphire sage has willowy, green leaves. It looks lush and green in July and August, despite our heat in Colorado and Utah. Small, sapphire-blue flowers cover this plant in early fall. It can bloom until frost.
I think it’s pretty when it’s paired with hyssops (Agastache), western salvias and ornamental grasses.
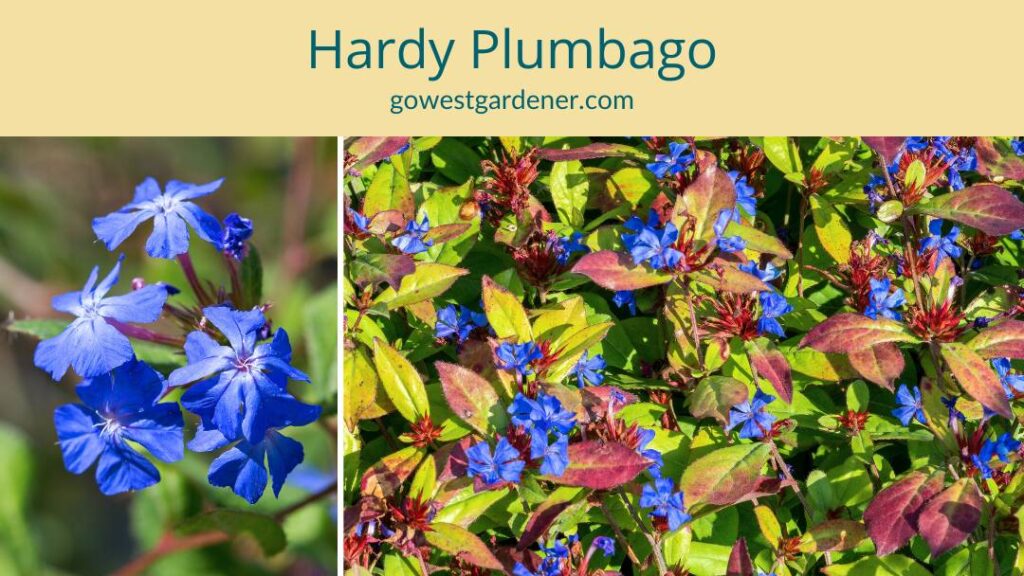
Hardy plumbago (Ceratostigma plumbaginoides)
Zones 5-9
Hardy plumbago is another late-season bloomer. It gets bright blue flowers in the late summer and early fall in Colorado. Hardy plumbago is a groundcover, growing up to 8 inches tall and spreading about 18 inches wide.
Hardy plumbago will happily flower in the shade. Known as a “dry shade” plant in Colorado and Utah, hardy plumbago doesn’t need a lot of water in the shade. (You can plant it in the sun too, but it will be happier with more water in the sun.)
Another bonus… Hardy plumbago’s leaves turn a deep red color in the fall, adding an extra pop of color to your fall landscape. In the photo above, the leaves have started changing color.
Related topics that may interest you:
If this article was helpful to you, please share it!
by Ann at Go West Gardener | Updated: Sep 10, 2026 | Best Flowers for Colorado, Utah & Similar States, Garden design Ideas, Gardening Tips and Tricks, In-ground garden
No one wants to end up with extra garden chores and sad-looking plants
But that’s what can happen if you accidentally pick plants that are known to struggle in Colorado landscapes — particularly during winter.
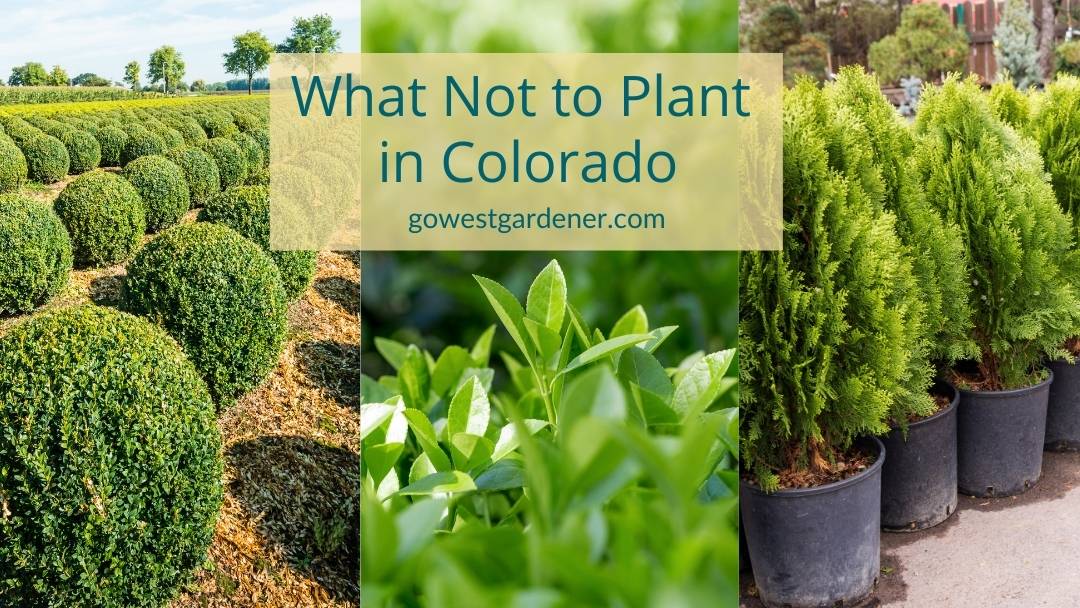
So, in this tip, you’ll get the scoop on 3 popular plants to AVOID planting in Colorado and similar western states. These plants can be high maintenance here. (Do you remember the TV show, “What Not to Wear?” Think of this article as: “What Not to Plant.”)
These 3 plants are very popular in other parts of the country, but they don’t like our winters. They tend to struggle in our:
- Dry climate
- Drying winter winds
- Intense winter sun
- Big temperature swings (from above freezing, to below freezing like a kindergarten seesaw)
You’ll probably see these plants at your garden center, so use this article to be a smarter shopper. Let’s dig in!
Boxwoods
Boxwoods are decorative shrubs. They grow well in regions of the country with milder winters. It’s hard to open a garden magazine without seeing a lush, eastern garden that’s lined with boxwoods.
Boxwoods are evergreen. When they’re planted in a place where they’re happy, they typically stay green through the entire winter. I like to think of evergreen plants as staying “forever green.” It also means they don’t go dormant (into hibernation mode), so it’s important to keep them regularly watered through the winter.
Unfortunately, in western states like Colorado and Utah, boxwoods can be temperamental
During the winter, boxwood leaves have a tendency to dry out — often turning brown or orange.

You also may see translucent yellow leaves (like the leaves below in the upper left).
You may hear this called “winter burn,” and it isn’t a pretty look.
When you see boxwoods at the garden center, they’re going to look lush, green and super cute. But save yourself the headaches and skip them!
“But I have my heart set on boxwoods!” In this case, head to a locally-owned garden center. Ask whether they carry types of boxwoods that have a better track record in states like Colorado and Utah.
You may have more luck if you plant boxwoods in sheltered places in your yard that face east, northeast or north.
And just know they’re likely going to need more work and water to keep them looking good.
Manhattan Euonymus
(pronounced: yoo-on-uh-muhs)
These plants are like super-sized boxwoods. When they’re green, they look good.
But this is another shrub that can struggle in Colorado winters
You may be wondering, “Okay, so what does winter damage look like on a Manhattan euonymus?”
The leaves on your Manhattan euonymus will turn yellow. The may become brittle and dried out. The leaves will start dropping off.
As the dead leaves slowly fall off, it’s like bad New Year’s Eve confetti. You may find yourself raking up these leaves for months … and months … and months.
(I’m speaking from personal experience here. I used to have Manhattan euonymus in my yard.)
With good watering, you should get buds for new leaves when temperatures warm up, but it takes time. When these shrubs get winter burn, they don’t look good for much of the year.
If you want shrubs that stay consistently green through our yo-yo temperature swings during winter, this isn’t it. 🙂
Add Manhattan euonymus to your “What NOT to plant in Colorado and similar western states” list.
Arborvitaes
(pronounced: arbor-vie-tees)
Arborvitaes are trees and shrubs that are often used as hedges.
They’re a popular landscape plant in humid regions of the country. They grow quickly, and they’re evergreen. Again, this means typically stay green over the winter. They don’t go dormant.
But arborvitaes are another plant to avoid in Colorado landscapes
Arborvitaes like a lot of moisture, so they may struggle if you aren’t great about winter watering.
Not to mention, our drying winter winds and our harsh freezes can be brutal for them. You may see them turn brown — almost like a rust color.
Some years, your arborvitaes may do fine and make it through the winter without an issue.
Other years?
Not so much.
If you want to save yourself some headaches (and avoid the expense of replacing dead plants), skip arborvitaes in your Colorado landscape.
So, does this mean you CAN’T plant any of these shrubs and trees?
Friends, the beauty of gardening is you can try planting (almost) anything. You may be able to find a protected location in your yard where these plants are less vulnerable to winter damage.
But if you’re planning your landscape in Colorado, Utah or a similar western state, growing plants that are better adapted to our winters will take less effort!
Related tips that may interest you:

by Ann at Go West Gardener | Updated: Sep 10, 2026 | Gardening Tips and Tricks, In-ground garden, Western Container Gardening With Flowers
When you’re strolling through the garden center or dashing into the grocery store and all those pretty flowers are smiling up at you, it’s hard not to choose the showiest mums you see.
“Well, helloooooo there.”
But if you’d like your mums to last longer, hold up!
There are ways to choose mums that last longer… and hint, this means resisting the urge to buy the flowers that look the prettiest.
TIP 1: Look for the flower plants with a lot of new buds (rather than just open blooms)
Do you see the yellow mum plant below? The showy, yellow flowers have opened, and they look beautiful.
But because these flower blooms have already opened, they likely won’t last as long when you get them home. They’ve already used up some of their bloom time.
Instead, look for plants that resemble this second set of mums (below).
Do you see how this plant has lots of new buds?
These flowers should last longer for you when you get them home because these flower blooms haven’t opened yet.
You can use this tip when buying annuals OR perennials
I use this tip when I pick annuals (the one-season flowers) for my flowerpots in the spring and fall.
I also use it when buying perennials (the flowers that come back every year) for my western garden.
If you want your flowers to last longer, it helps to look for plants with new buds. They don’t always look the prettiest in the store, but that’s just because they haven’t fully opened yet.
But what if you aren’t sure what color the flowers are going to be?
Great question! Sometimes it’s hard to know what the color is when the flowers haven’t opened yet.
Tip #2: There are several ways to figure out flower color
- Look for any open flowers on the plant.
- Check the plant tag to see if the plant tag lists the color. Sometimes, the flowers have the color in their name or in the photo on the tag.
- You can check the nearby plants. If the same type of flower has already opened, you can see the color.
Tip #3: For many flowers, their blooms don’t last as long when it’s hot
Where I live in Colorado, we can get heat waves well into the fall. It may be the same where you live too.
If you want to buy fall flowers — like mums — and you want them to last as long as possible, you may not want to buy them the week that blazing hot temperatures are in the forecast.
Those flowers tend to go through their blooms quickly when it’s hot, meaning they won’t last as long.
Just a lil’ something to think about!
Related tips that may interest you:
by Ann at Go West Gardener | Updated: Sep 10, 2026 | Gardening Tips and Tricks, Western Container Gardening With Flowers
What can you do with the dirt in your pots after your flowers have died?
Good news! You have a few options for what to do with old potting soil.
Let’s assume, for a sec, your plants were healthy at the end of the season. If yes…
Here are 4 things to do with old potting soil:
1) You can put the soil in a sealable container. Store it outside for next season.
An old garbage can works well because the lid creates a good seal and the wheels make it easier to move. But any type of storage container that you can seal should work.
The nutritional value is gone from the soil, so you wouldn’t want to use it on its own next season. But next year, it’s possible to mix it together with fresh ingredients — like new potting soil or “compost.” Compost is a mix of organic materials used to improve soil.
This approach allows you to re-use some of your old potting soil.
Why use a sealable container?
- It helps keeps pathogens out — aka, things that could make your plants sick next year.
- It helps prevent insects from laying their eggs and overwintering in your soil. (Yep, it happens.)
- And it’s just an easy way to store it.
2) You may be able to take used potting soil to a yard waste drop-off program.
Many cities offer “leaf and yard waste drop-off” programs in the fall. They’re a great way to dispose of the materials from your flowerpots, like your dead flowers and old soils. And the materials you drop off will be used to create compost, which is good for our soils and plants.
The companies that do commercial composting have machines that can heat the soil and leaf material to very hot temperatures, so the compost can be safely used next year.
To see if your city offers this type of program:
- Look on your city’s website OR check nearby cities. Some cities only make these programs available to their own residents. But other towns make their leaf and yard-waste drop off services available to anyone.
- Search for words like, “Leaf drop-off,” or, “Yard-waste drop-off.” Often times, these programs aren’t advertised as composting programs.
- Read up on what’s allowed for yard waste. Dead flowers are usually allowed, but make sure they’ll take your used potting soil too. I usually take the potting soil with me and ask when I get there. (I’ve never had an issue, but I imagine it can vary by city.)
- Follow the instructions for the drop-off. For example, you may be asked to put your yard waste in brown composting bags. They look like tall paper bags. You often can find them at local hardware stores. Or, the instructions may say you can bring your yard waste in any type of container. They’re just going to have you dump it out — as was the case in the photo above.
3) You can add the old soil (and flowers) to your own compost pile.
Home composting is a topic for another time. But just know it’s another thing you can do!
4) You can mix old potting soil into your flower garden beds or spread it lightly across the top.
The dirt from your flowerpots isn’t adding anything beneficial from a nutritional perspective. Over the summer, all the good stuff left the soil with each watering.
But we have such tricky soils in the Rocky Mountain region — like clay and sand. The potting soil may help improve the structure of your soil in the ground. That can lead to better water drainage for your plants, so they have happier roots.
And hey, it beats putting the soil in a landfill.
Here are a few tips:
- It’s easiest to add old potting soil to areas that don’t have plants.
- But you also can spread a thin layer of potting soil on the ground near plants. Keep it away from the “crowns” of your plants. The crown is where a plant’s stem comes up from the ground. It’s where the stem and roots connect to each other.
- If you’re going to mix the old soil into the ground near existing plants like perennials (the plants that return each year), be careful where you dig. You don’t want to disturb any plant roots.
What if your flowers had disease issues at the end of the season?
Then, put ALL the contents from that flowerpot in the trash — including the potting soil.
Disease can carry over from one year to the next in both the soil AND on the flowerpots themselves. It’s possible to accidentally spread last season’s issues to next season’s flowers.
You also may want to sterilize your flowerpots, so you can keep next season’s flowers from getting sick.
Are you the extra-thorough type?
If you want to reuse some of your potting soil next year, it’s possible to sterilize your old potting soil to reduce insect and disease issues. The University of California Extension has helpful tips on how to heat up your potting soil to the right temperature. (Scroll to page 5 of their PDF.)
Full disclosure, I’ve never done this.
But it’s worth considering if you had disease or insect issues this year, and you really want to reuse your old potting soil.
Cheers to you for exploring what to do with old potting soil and finding ways to use it in a productive way!
Related tips that may interest you:
by Ann at Go West Gardener | Updated: Sep 10, 2026 | Gardening Tips and Tricks, Western Container Gardening With Flowers
In the fall, one of the questions that often comes up is:
“When should I empty my flowerpots?”
There are different schools of thought on when to empty your flowerpots, so I’m going to share several options. That way, you can decide which makes the most sense for you.
#1) Empty your flowerpots when you’re ready.
I have a neighbor who has a gorgeous container garden every summer. Typically, she reaches a point in the early fall when she decides:
“I’ve had enough.”
She’s over it. Her flowers still look good, but she’s ready to be done with watering and deadheading. She wants to empty her flowerpots while the weather is still nice.
You may feel guilty about pulling your flowers out early. Heck, you may feel guilty about pulling your flowers out anytime!
But chances are, you’ve planted “annuals” in your flowerpots. True annuals go through their life cycle within 1 year.
So, it’s 100% okay to empty your flowerpots if:
- You reach a point where you’ve had enough OR
- You want to do your fall chores before it gets too cold
Your flowers are nearing the end of their life cycle, and the killing freezes ARE coming… You may just be beating Mother Nature to them.
#2) Empty your pots when your flowers stop looking good due to frosts and freezes.
(This is what I do.)
The majority of the flowers in your containers can’t survive freezing temperatures. This means there’s a point when the flowers in your containers will get nipped by cold temperatures and die.
So, how will you know if your flowers have frozen and are dying?
If your flowers have been nipped by a frost or a freeze:
- Your flowers will often change colors. You may see them turn brown, black, gray or a yellowish cream.
- They may go limp.
- They may shrivel and dry up.
- Sometimes, they’ll get mushy.
They’ll no longer look right, and it’s their way of telling you:
“Hey, it’s time to dig me out of your flowerpot!”
If you have frosts or freezes in your forecast and you don’t want your flowers to get nipped, check out 6 ways to protect your flowers from frost and freezing.
#3) Empty your pots BEFORE you start getting consistent freezes and/or snow.
So, let’s say you’re having a busy fall. Your plants have frozen and died, but you haven’t had time to empty your flowerpots yet. You may want to think about emptying your flowerpots BEFORE you start getting consistent freezes or snow.
Here’s why:
There are some types of flowerpots — like terracotta pots, ceramic pots and even concrete flowerpots — that can chip, crack or crumble over the winter.
Check out the photo below for an example of what flowerpot freeze damage can look like.
#4) Dig out your flowers if you want to put something else in your flowerpots.
If you don’t mind leaving your flowerpots out, you can turn them into decorative planters during other parts of the year — especially if they’re in a spot that’s protected from the elements.
For example, you could:
- Replace your summer flowers with fall flowers, like the mums in the photo below
- Put pumpkins, gourds or decorative branches in your flowerpots in the fall
- Spruce up your containers with evergreen bows or other festive adornments in December
- Fill them with flowers in the spring that like chillier weather (like the pansies pictured earlier on this page)
There’s no rule that says you can only use your flowerpots during the summer!
If this sounds like too much work, then of course, you don’t have to do it.
Just know you have options!
Related topics that may interest you:
by Ann at Go West Gardener | Updated: Sep 10, 2026 | Gardening Tips and Tricks, Western Container Gardening With Flowers
I used to leave everything in my flowerpots until spring. The whole shebang. Dead flowers, old potting soil, all of it. And for a few years, everything was fine.
But then, I lost a few flowerpots to cracking. (Ugh.) I also learned about some pesky insects that like to overwinter in potting soil.
Now I’m on Team Fall.
There is no right or wrong approach here, so if you prefer to wait until spring, it’s okay! But here are 5 reasons to consider emptying your flowerpots in the fall.
#1: Fall is a good time to get rid of your old potting soil (dirt).
In the fall, I’ve found there are more ways to get rid of old potting soil, like local leaf and composting drop-offs. Not every one of them takes old potting soil, but some of them do. It’s one less thing to worry about later.
#2: You take insects out of the equation.
There are pesty insects—like leaf miners and budworms—that will overwinter as “pupae” (little cocoons) in soil. And your container of potting soil can be a great place to call home. Emptying your flowerpots in the fall helps take insects out of the equation, so you’re less likely to have issues next year.
#3: You can protect your flowerpots from breaking over the winter.
Some flowerpots are vulnerable to cracking and breaking over the winter—like clay, ceramic and resin pots.
Here are examples of winter freeze damage on several neighbors’ flowerpots. Do you see how parts of the flowerpots have cracked and fallen off?
Some pots can absorb moisture directly into their surfaces. When that moisture freezes, it can crack or damage your pots. I suspect this is what happened in the photos above.
In other cases, moisture can get into the old potting soil that’s in your pots. When the soil freezes, it can expand and break your pots—including your resin (plastic) pots.
I’ve learned this lesson the hard way.
And we get A LOT of freeze/thaws in the West!
When you empty your flowerpots in the fall, you remove the potential of old potting soil freezing, expanding and breaking your pots. Plus, you can move your flowerpots (that aren’t too heavy) to a garage or a covered porch, so they’re protected from moisture. That way, they last longer.
#4: You can remove the salt build-up on your pots while it’s still relatively fresh.
Cleaning your flowerpots is like cleaning up after a dinner party. Most of us don’t ENJOY scrubbing the lasagna dish or the mashed potato pan, but it’s a heck of a lot easier to get the residue off while it’s still fresh.
The same is true with your flowerpots.
We have hard water in many parts of the West, including Colorado. It can leave deposits of different types of salts (calcium, magnesium and iron) on the inside of your flowerpots. The build-up looks like a white, crusty material. It’s similar to the crusty material that can appear on kitchen and bathroom faucets.
And some types of popular flower fertilizers are based in salts. These salts can build up inside your pots too.
Do you see the salt build-up in the below? One of my neighbors hadn’t cleaned her flowerpots before. She was struggling to keep her flowers looking good. (Her flowerpots also didn’t have holes.)
At some point, all this salt build-up in your pots and soil can affect your flowers, especially after it builds up over a few years. It can become toxic to your plants.
Not to mention, salt attracts H2O molecules. It can pull water out of your plant’s roots.
I’ve found that this salt residue is easier to remove in the fall when it’s still fresh. It can become more of a chore to remove after time has passed, especially if you don’t do it every year.
#5: You have one less thing to do in the spring!
I know, I know, this means you have one MORE thing to do in the fall. But hey, it can be nice to get it done. That way, you can focus on cleaning up your garden in the spring or doing more of the fun flowerpot stuff, like planting.
Related tips that may interest you:
by Ann at Go West Gardener | Updated: Sep 10, 2026 | Gardening Tips and Tricks, Western Container Gardening With Flowers
The seasons are changing. It’s time to figure out what to do with your outdoor pots in the winter.
(Good thinking!)
Before you start getting winter snow and freezing temps, it helps to:
1) Empty the dead flowers and dirt (or “soil” in garden lingo) from your outdoor pots.
2) Move your empty pots someplace dry. Ideally, you’d store them someplace that stays above freezing (like an attached garage). If that isn’t possible, you could put them on a covered porch or in a shed.
If your pots are too heavy to move…
3) Turn them upside down OR cover and wrap them with a thick plastic tarp to help keep the moisture out.
Why does it help to protect your outdoor pots?
If you leave the soil in your containers and moisture gets in the soil, the soil can freeze and expand, damaging your pots.
Even resin (plastic) pots can get freeze damage and crack open. I learned this the hard way when one of my resin flowerpots cracked down the side, like a man splitting his pants. Oops.
Some flowerpot surfaces can hold moisture too, like glazed ceramic and terracotta pots.
Here are examples of winter freeze damage on several of my neighbors’ flowerpots.
Do you have to do anything with your outdoor pots in the winter?
It’s a matter of your risk tolerance for your pots.
I used to leave my pots outside all winter with old soil and dead plants still in them. But after ruining several pots in winter freezes, I’m all for protecting my pots during the winter.
With that said, I have friends who don’t do anything with their outdoor pots in the winter. They’ve NEVER had issues with their pots breaking. And they have glazed ceramic pots that should be vulnerable.
It all depends on how much you want to risk it.
If you have pretty outdoor pots that you don’t want to lose, it’s a good idea to protect them from freezing winter conditions.
Related tips that may interest you:
by Ann at Go West Gardener | Updated: Sep 10, 2026 | Gardening Tips and Tricks, Western Container Gardening With Flowers
Friends, the end of the flowerpot season is like the end of a dinner party.
You’ve had an amazing evening of laughter, stories and delicious food. (“Oh my God, that was so good! I need that recipe!”) Your heart feels so full.
And then… you walk into your kitchen.
Sweet Mother of Lassie.
Your counters are lined with dirty dishes, empty wine glasses and serving utensils you didn’t even know you owned. You have caked-on pots and pans tucked into the stove, the refrigerator and other secret hidey-holes.
And ugh, your dishwasher only holds so much!!
I always have a similar feeling after a season of gardening.
After a summer of pretty flowers, there’s some flowerpot clean-up to do. And let’s be real, the clean-up isn’t going to be the highlight of your season.
“Wait, whaaat??? I need to clean my pots?”
Rest easy, you don’t have to do anything you don’t want to do!
But a little clean-up can make a BIG difference for your flowers next season.
I didn’t used to clean my flowerpots, but I have become a believer after experiencing some issues. For example, salt residue can build up on the inside of your pots. It can create problems for your young plants next season. (Headaches, hassles and struggling plants!)
With just a little cleaning, you eliminate those issues.
Here’s what to do with your flowerpots when your flowers are dead.
First, here are supplies for cleaning your pots that are helpful to have handy.
1) Empty out the dead flowers, roots, and used potting soil.
I suggest you set up a garbage bag and a compost bag. Compost bags are often available in the fall at local hardware stores.
- The trash bag is for dead plants that looked diseased. Throw away any plants that looked diseased at the end of the growing season, as well as all the potting soil from that flowerpot. (No judgment! These things happen.)
- The compost bag is for dead flowers and roots that were healthy. They can get turned into “compost.” Compost is an awesome material we can add back into our garden soils to improve their quality. Pull the dead plants out of your flowerpots. Add all of your dead plants that were healthy at the end of the season to the compost bag. (You also can create your own compost pile, but that’s a topic for another time.)
Click here for options for what to do with old potting soil >>
2) Clean your flowerpots.
When your flowers are dead and you’ve emptied everything out of your pots:
- Brush off any lingering dirt and white residue from the inside (and bottom) of your pots. I use a soft bristle brush from the hardware store. Avoid brushes that are too stiff because they can scratch your pots. If you can’t get the white residue off with a brush… You can try using a plastic puddy knife to scrape and get under the tough spots. It works pretty well, particularly on residue at the bottom of your pots. You also can try soaking your flowerpots in a mixture of vinegar and water. (If you’re wondering what the white residue on your flowerpots is, scroll down for quick explanation.)
- Rinse your flowerpot with water. I like to set the hose nozzle on the “jet” setting. It typically does a good job removing dirt.
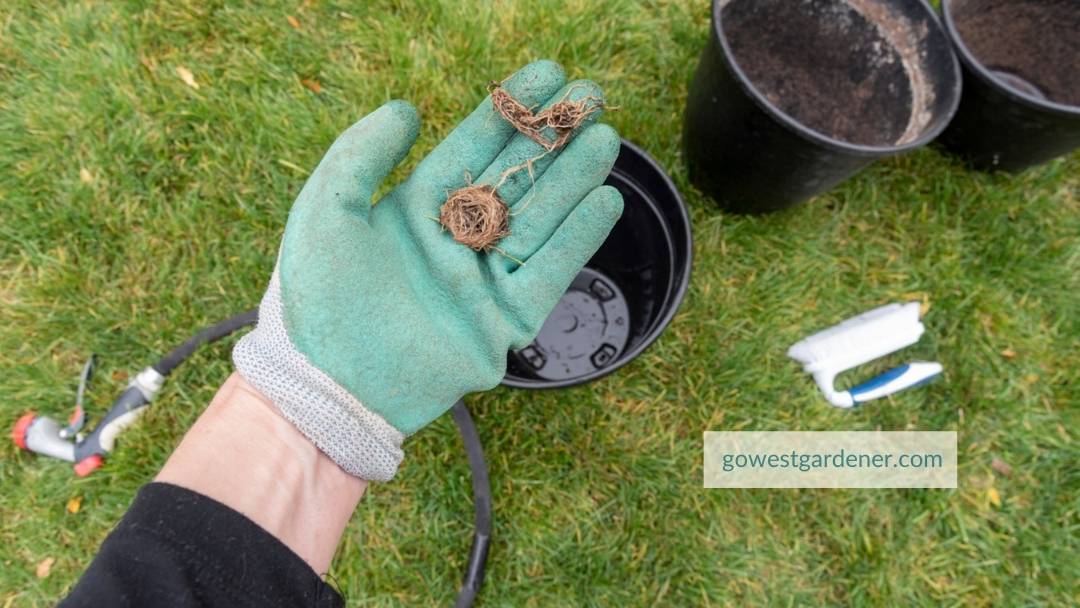
- Remove any roots that have grown into the holes at the bottom of your pot. You want to make sure the holes are free of any debris for the next growing season, so water can drain freely from your pots.
- Repeat these steps for each pot.
“What IS that white stuff on my pots?”
Many of us have hard water. That white residue is likely a build-up of calcium and salts from watering and fertilizing.
It won’t be great for your plants’ roots next season.
I’ve found it’s easier to get the white residue off when it’s fresh in the fall, rather than waiting until the spring.
It’s kind of like the pan you cook lasagna in. That cheese residue will be much easier to get off before it fully hardens. Clean the residue while it’s still fresh, if you can.
But no worries if you decide to wait until spring!
3) Store your empty flowerpots for the winter.
To help keep your pots clean and protect them from cracking or breaking:
- Store your empty flowerpots out of the elements, if possible. Ideally, you’d store them someplace that stays above freezing temps, like an attached garage. That way, pots that are vulnerable to freeze damage and breaking (like terracotta pots and ceramic pots) are less likely to crack and break. But if that isn’t an option, store your pots in a shed or on a covered porch.
- If you leave your pots outside, you may want to turn your pots upside down or cover them to keep them clean and keep moisture out.
You may be wondering: “Do I have to protect my flowerpots?”
Nope, you don’t have to, and your flowerpots may be fine!
But just understand, freeze damage can happen, depending on your winter.
See the photo below of one of my neighbor’s flowerpots for an example. I have a bunch of cracked terracotta pots from one of my first winters in Colorado. Oops.
Most years, I stop here and call it good.
And if you’ve made it this far, awesome! You’re well on your way to getting next season’s flowers off to a great start.
But it’s worth noting…
The steps above haven’t sterilized our flowerpots.
You may be thinking: “Ummmm, there’s more??? Why do I need to sterilize my flowerpots?”
Plant diseases can carry over from year to year — and not just in the soil, but also on the pot itself. This means a disease you had this last season could ruin next season’s flowers.
So, it’s a good idea to sterilize your flowerpots if:
- You had (or suspected you had) diseased plants.
- You’ve purchased used pots. It’s best to clean them before you use them.
- You want to grow flowers from seeds in your flowerpots. Seedlings need an environment that’s as clean as a bottle for a newborn baby.
If any of these apply to you and you’re willing to go a step further, here are tips to sterilize your flowerpots.
Do you have to empty and clean your flowerpots?
Nope, it’s gardening. You can do what you want!
But cleaning up your pots when your flowers are dead can:
- Get your plants off to a healthy start in the spring.
- Give you fewer chores at the start of next season. (Yesssss!)
- Help your pots look good and last longer.
You’re cleaning up after this year’s flower party, so you’re ready for an amazing season next year.
Related topics that may interest you: