by Ann at Go West Gardener | Updated: May 9, 2024 | Best Flowers for Colorado, Utah & Similar States, Gardening for Pollinators, In-ground garden
Who else loves Columbine flowers?
(I have both my hands up.)
You’ll see Columbine flowers growing along alpine hiking trails in the Rocky Mountains… and in western gardens.
When I see them on mountain trails, I want to turn into Julie Andrews at the start of The Sound of Music, twirling around with my arms in the air, singing about the hills being alive. They make me giddy every time I see them.

Columbine flowers are perennials. This means they come back every year.
If you’re like me, you may think of Rocky Mountain Columbines first. They’re the bluish-purple and white flowers you’ll often see on mountain trails (like the ones pictured above). Rocky Mountain Columbines grow well in moist mountain meadows.
But you can find Columbine flowers in different types and colors.
There’s even a type of Columbine that can handle our hot, semi-arid summers at lower elevations in the intermountain west. (Scroll down for the scoop!)
Typically, Columbine flowers bloom in May and June at our lower elevations in states like Colorado.
And at our higher elevations, these flowers usually bloom in June and July.
Columbines are a WONDERFUL hummingbird magnet.
If you ever get a chance to visit the Betty Ford Alpine Garden in Vail, Colorado during the summer, make a beeline to the Columbine flowers.
If they’re in bloom, you’ll often be able to watch the hummingbirds blissfully zip from flower to flower.
It’s heavenly.
Tip: If you want to plant flowers that attract hummingbirds to your garden, add Columbines to your list.
Happy plants tend to live longer, so let’s chat about how to keep your Columbines happy.
The big thing is planting your Columbines in the right place in your garden.
Our summers can get really hot in our lower elevations in western states like Colorado and Utah. If you live someplace hot, your Columbines will likely prefer spots in your garden that have “partial shade” or “shade.” (A helpful guideline is 4 hours or less of sunlight. Avoid planting them in afternoon sunlight, which can be too hot.)
For example, you may want to plant them in the shade of a leafy tree.
They also like it when your dirt (which we’ll call “soil”) is moist and drains well.
To help keep your soil moist, it helps to put a layer of “mulch” (like wood chips or mini-bark) on top. You can find mulch at your local garden center.
But there IS a type of Columbine that can handle sunnier spots…
And it’s a much better fit for our gardens in the hot, semi-arid parts of the intermountain west!
If you’re looking for a Columbine flower that grows well in sunshine, ask at the garden center about Denver Gold® Columbine.
This plant’s official botanical name is: Aquilegia chrysantha ‘Denver Gold’.
Denver Gold® is a showy, yellow Columbine that flourishes in sunny locations.
It grows well in our tricky western soils up to elevations of about 9,000 feet.
In the photo above, you’ll see Denver Gold® Columbines (the tall, yellow flowers) planted next to purple flowers known as bearded irises.
Isn’t this a pretty combo?
Denver Gold® Columbines give you beautiful yellow flowers in May and June in our lower elevations. And if you trim off the dead blooms, you may get more flowers later in the summer as well.
It’s native to the canyon lands in the Southwest.
In the photo above, Denver Gold® Columbines (the yellow flowers) are planted alongside a bluish-purple flower known as Salvia (Salvia sylvestris ‘May Night’).
Another showy combo!
If you live in another region of the country…
Ask at your local garden center whether Columbines will grow well where you live.
Related tips that may interest you:

by Ann at Go West Gardener | Updated: May 20, 2026 | Gardening Tips and Tricks, In-ground garden
The tulips in your spring garden have given you gorgeous color. But what do you do with tulips after they’ve flowered?
They’re done blooming, and now your tulip leaves are turning yellow and flopping on the ground. They don’t look so great.
(This is normal, BTW! You haven’t done anything wrong.)
- Should you leave the tulip leaves?
- Should you cut the tulip leaves off?
- And if yes, when should you cut the tulip leaves?
These are the things we’re going to talk about in today’s tip!
Tulips go through an awkward period when they’re done blooming.
After tulips have flowered, their leaves turn yellow and flop on the ground.
But those fading leaves can make a BIG difference in how well your tulips bloom next year!
Here’s why:
Tulips grow from a bulb.
Think of the bulb like a battery and the leaves like solar panels.
When your tulips finish flowering, those leaves are gathering sunlight and turning it into food (and energy). Those solar panels are hard at work, even though they don’t look great.
Your tulips will use that food to get through next winter and next year’s bloom season.
The bulb is pulling all that food from the leaves back down into the bulb and storing it.
It’s recharging its battery.
If you cut the tulip leaves, you’re cutting off the solar panels.
The bulb won’t be able to recharge properly.
This means your tulips may not bloom as well next year.
It also means you may get smaller flowers or lackluster blooms.
When your tulip leaves are turning yellow and brown, you have several options.
#1: If you want pretty tulips next year, DO cut off the stem the flower was on, but DON’T cut off the leaves.
When you trim off the stems, you’re telling your tulips to focus their energy on making food for next season — recharging the battery!
Where do you trim the tulip stems?
Make your cut where the stem meets the leaves. You can wait until the petals fall off. Or you can cut the stems when the petals start shriveling up.
But fight the urge to cut off the leaves, even if they don’t look great.
You can put a flowerpot in front of your tulips to hide them. Or, you can grow other plants nearby to mask the leaves.
Don’t pull out those leaves until you can give them a gentle tug, and they come right out.
The leaves will likely be very yellow and limp.
If you give the leaves a gentle tug and they resist, they aren’t ready to come out yet.
They’re still helping the bulb recharge.
Another tip, don’t “wrap” the leaves.
You may see neighbors wrapping a rubber band around the leaves, tying them up into a little ball so they look tidier. Don’t do that. Remember, we want the leaves to act as solar panels. Tying up the leaves defeats this purpose.
#2: You can dig the tulip bulbs out.
Yep, you can dig the entire tulip out, including the bulbs in the ground.
The tradeoff is, you won’t have tulips next year unless you plant new bulbs in the fall.
But, if you really want your garden to look tidy and you don’t mind replanting your bulbs in the fall, it’s a good option.
Related topics that may interest you:
by Ann at Go West Gardener | Updated: May 20, 2026 | Flower Garden Basics, Gardening Tips and Tricks, Western Container Gardening With Flowers
You know you’ve entered the “joys of western gardening club” when…
It feels like summer one day… and the next day you’re bracing yourself for frosts, freezes and snow.
(I’m not crying. I have something in my eye.)
If you’d like your summer annuals — your one-season flowers — to stay alive, it’s helpful to find ways to protect them from Mother Nature’s cold snaps.
So, in this article, you’ll find 6 ways to help protect your tender flowers from frosts and freezes.
You’ll also find a tip to help protect your trees and shrubs, which can be vulnerable to sudden cold spells too.
Protecting your sensitive plants is about finding ways to keep them warm.
When you see your neighbors frantically covering their tender flowers, what they’re trying to do is keep their plants warm.
If you can keep your plants just 5 degrees warmer than the cold conditions around them, it often can make a big difference for your plants.
As you look for ways to protect your flowers, ask yourself:
“Is what I’m doing going to help generate or retain heat around my plants?”
If it’s not, skip it and look for another option.
Here are 6 ways to keep your flowers warm:
1) Thoroughly water the dirt (aka, “soil”) around your flowers.
If watering feels counter-intuitive when we’re talking about freezing temperatures, I’m with you.
But watering your soil before a freeze can actually help warm your plants. And remember, heat is the goal here.
Damp soil can keep the surface air around your flowers up to 5 degrees warmer than surrounding temperatures.
Why?
Because moist soil retains heat better than dry soil. It can warm up during the day and help offer heat at night.
Pro tip: It helps to water during the day. That way, the soil has time to warm up, and any water that splashes on your plants has time to dry before temperatures drop. (Wet leaves, flowers and stems freeze more quickly than dry ones.) When you’re done watering, be sure to unscrew your hose, so you avoid any issues with pipes freezing and breaking. Because we’re trying to remove headaches, not create them, am I right?
2) Move your pots of flowers to a warmer, protected area.
I know some flowerpots are too heavy to move, but move what you can.
A mudroom or an attached garage can work well as a temporary holding space when temperatures dip.
If you can’t bring your containers inside, even moving them to a dry, covered area on a porch or deck may help.
I would try to put your containers right next to your home out of the wind. Look for a spot where the walls may radiate some heat. Depending on how cold it’s going to get, you also may want to add on tip #3 below.
Keep in mind, warm air rises and cold air sinks, so avoid moving your pots to the low spots in your yard.
3) Build a “tent” around your flowers.
This one sounds a little complicated, but let’s keep it simple.
Here’s all you’re trying to do. You’re covering your flowers with a cloth fabric to keep the heat in, but you’re staking the fabric up (the best you can) so it doesn’t touch your plants.
The photo above may look like at an attempt at a spooky Halloween display, but it’s actually an impromptu tent for my cosmos flowers.
To create a tent, you can use:
- For your frame: Metal rods, tomato cages, lawn furniture, shepherd’s hooks for hanging flower pots, etc. Get creative!
- For your cover: Woven cloth fabrics like old bed sheets, pillow cases, towels, a lightweight picnic blanket… basically, the items you want to donate from your linen closet. You also can use “garden fabrics,” like a commercial-grade landscape fabric or heavier types of “floating row covers” (which are fabrics used in vegetable gardening). I would look for these garden fabrics at local, independent garden centers and online.
- For your clips: You can use safety pins, binder clips from your office, plastic clips, etc.
If you want to keep it really simple, I’ve given you a pre-made tent option at the end of this section.
So, why does using cloth fabric matter?
It all comes back to heat. Woven cloth fabrics offer better insulation than plastic materials. They don’t conduct the cold like plastic does.
Ideally, you want to extend the tent all the way to the ground.
I’d extend your tent all the way to the ground (even over a flowerpot), so you can capture the heat from the ground. Pin or clip the fabric together to keep cold air out and warm air in.
If you have gaps in your tent, you’re losing heat.
If possible, try not to let the fabric touch a plant:
- This helps keep the warm air circulating around your entire plant.
- And in some cases, if wet fabric touches your plant, you may accidentally cause the damage you’re trying to prevent.
If this sounds like too much work, there are pre-made frost protection tents for your plants.
You can see an example in the photo below.
Search online for phrases like:
- “Plant protection tents” or
- “Pop-up plant protectors”
These tents quickly pop up. They’re easy to use. And because they flatten up when you’re done, they’re easy to store.
4) Avoid using plastic sheets to cover your plants, unless you have no other option.
Why?
Because plastic doesn’t have the insulating properties of woven fabric. Plus, if plastic is touching your plants, it can conduct the cold and contribute to the damage you’re trying to prevent.
But if you don’t have other options, make it work, baby! It can be better than nothing. Just prop it up, so it doesn’t touch your plants.
5) Place empty containers over tender plants to trap warmth from the ground around your plants.
You can use boxes, buckets, recycling bins, garbage cans, empty flowerpots and other containers. These devices can work well if you’re going to get snow because they’re unlikely to collapse under the weight.
Just remove these covers during the day when it warms up.
6) Get creative with ways to generate heat around your flowers.
You may see your neighbors filling milk jugs with hot water or placing warm bricks near their plants. Both options can create warmth in the shelters you’re placing around your plants. It’s like a little campfire for your plants.
All these methods should work well for BRIEF temperature dips.
But if you’re going to get an arctic blast (especially one that lasts a few days), you may need a stronger heat source.
Or, you may want to try doubling up on the methods above.
Do you have to do anything when a frost or freeze is in the forecast?
If you’re reading this article in the fall, nope, you don’t have to do anything.
You can sit back and see what Mother Nature throws at you, especially if you’re ready for your flower season to be over. But if you’d like your flowers to last a little longer, it helps to protect your plants.
In the spring, it’s a good idea protect your newly-purchased flowers, especially your summer annuals. These are your tender flowers that grow for one season only and don’t like frost.
That way, you don’t have to buy replacement flowers!
Let’s chat for a sec about your trees and shrubs.
At our lower elevations in states like Colorado, we can get big temperature swings that are really hard on our trees and shrubs.
When temperatures plummet in the fall, your trees and shrubs don’t get the chance to ease into dormancy.
These plants haven’t had a chance to gradually turn the water in their veins into “antifreeze” yet.
Even when we aren’t facing big temperature swings, our trees are often drought-stressed.
And “stressed” is not the way you want them entering winter!
It can help to give your trees and shrubs a deep, soaking water before a freeze too.
If you have a newly-planted tree or shrub, water the root ball area.
Otherwise, soak the ground around the outer circumference zone of your tree (out where the branches of leaves end), rather than soaking the trunk area.
This outer area is known as your tree’s “drip line,” and it’s where your tree’s roots are actively absorbing water.
Going from a beautiful garden to a freezing mess stinks, but it’s part of gardening life in western states like Colorado, Wyoming and Utah.
If you think it’s tough to be a gardener here, remember it’s even tougher to be a plant!
But you’ve got this!
If you want to protect your tender flowers and keep them alive, I hope these tips help you feel more confident in what you’re trying to do.
Related topics that may interest you:

by Ann at Go West Gardener | Updated: May 20, 2026 | Flower Garden Basics
When I was first learning how to garden…
I used to think that 32 degrees was the temperature I needed to keep an eye on for my flower plants.
32 degrees is when water freezes, so that must be the point when my flowers will freeze too, right?
But over time, I’ve learned:
There are levels of frost and freezing that affect plants in different ways.
32 degrees isn’t the magic number for all plants.
(Because Mama Nature makes her own rules, y’all!)
So, in this article, I want to share tips I wish I had understood sooner, so you’re a step ahead as a gardener. As our temperatures dip in states like Colorado and Utah, I hope this article helps you understand:
- What’s going on with the annuals and perennials in your garden
- Which flowers you may want to cover and protect (if you want them to last longer)
- Why the heck some of your plants still look good — while others may be a mushy mess!
In gardeners’ terms, annuals are flowers that live for a single year, but don’t return. Perennials are flowers that come back for multiple years.
Here’s a quick summary:
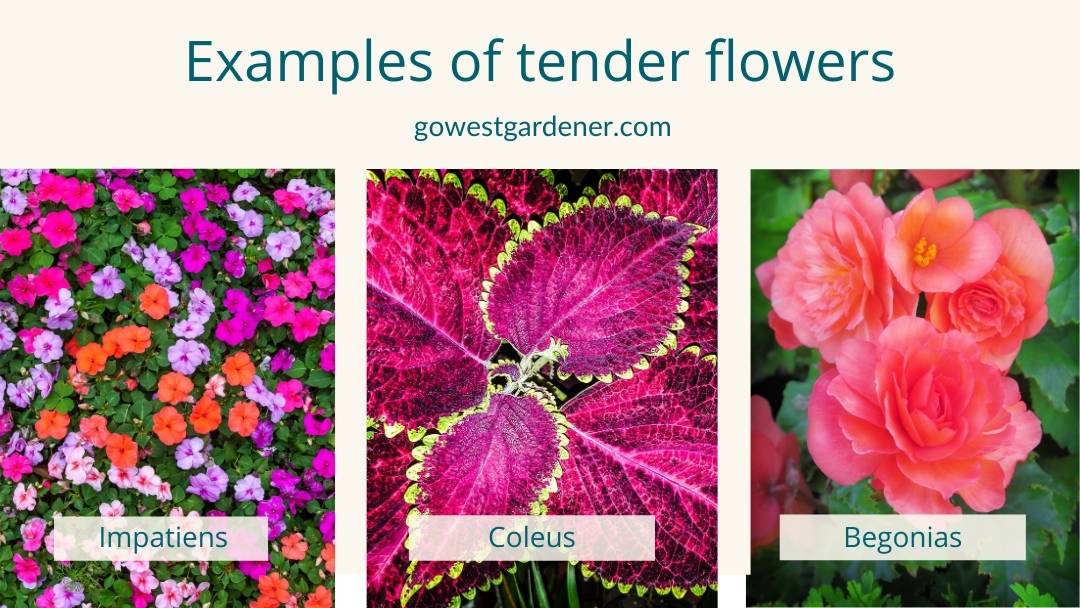
Between 36 and 29 degrees, your most vulnerable flowers are your “tender annuals.”
Tender annuals are your one-season flowers that like warm air and warm soil to grow. They like having “warm feet,” meaning they want their roots to be comfortably warm. These are the guys you definitely want to cover if you want them to last longer. (You can see examples further down this post.)
When you reach 28 degrees or below, more of your flowers will be affected.

Keep in mind, there are always exceptions with Mother Nature. I’ve shared some of them down at the end of this post. Nonetheless, this will give you a good overview.
Let’s start with frost because it often shows up first.
Frost
When temperatures reach 36 degrees (or below) AND the moisture conditions are right
Frost is a thin layer of water vapor that turns into ice on the surface of your plants. When ice forms on the surface of your plants, the water inside your plants can freeze too, causing the cells to rupture and lose all their water.
And this can damage or kill your plants.
If the moisture conditions are right for frost, you can get it when temperatures reach 36 degrees or below.
As I mentioned earlier, between 36 and 29 degrees, frost often has the biggest effect on your tender annuals.
Have you ever had a friend visit from a city like San Diego? When our temperatures are 50 degrees, you’re thinking about wearing shorts… but your friend wants to put on a parka. Your friend from San Diego is like your tender flowers. These plants do not adjust well to the cold.
These flowers are happiest when temperatures are warmer. They’re VERY sensitive to frosts and cold temperatures.
Light freeze
Between 32 and 29 degrees
You know the tender annuals we’ve been talking about? The temperatures in a light freeze will likely kill them. A light freeze takes place between 32 and 29 degrees. If you’re catching your local weather report, you’ll hear your weather forecasters call this a “freeze warning.”
What are examples of tender flowers? You may recognize some of the annuals below.
In my garden, sweet potato vine (pictured above) is ALWAYS the first plant to get nipped.
A light freeze also can damage how your hardier flowers look. Usually, though, it’s just cosmetic damage.
Hard freeze (National Weather Service language)
Between 28 and 25 degrees
A hard freeze should severely damage or kill most of your annual flowers — even your hardier flowers that are happier in chillier temps.
Master gardeners sometimes call this a “moderate freeze.” However, I’ve used the hard freeze language from the National Weather Service here because it’s what you’ll see on a weather app or hear on a forecast. When the weather forecasters say, “There’s a hard freeze warning tonight,” they’re talking about the threshold of 28 degrees or below.
It’s going to be destructive to your annuals if you don’t protect them.
This is the temperature zone where you may start noticing damage to some of your perennials too. For example, you may notice their leaves turning a dark color or becoming a little gooey.
Hard, severe or killing freeze
24 degrees (or colder)
This freeze will likely cause widespread damage to the exposed flowers, leaves and stems on many perennials. (It can depend on how protected your flowers are in your yard, and it also depends on the type of plant.)
This is also the freeze that kills most remaining annuals.
There are exceptions. Pansies and violets, for example, are tenacious little flowers that can survive these freezing temperatures. At lower (warmer) elevations in Colorado, you may see them planted in the fall for spring blooming.
Some exceptions to these guidelines!
Remember, Mama Nature makes her own rules.
Here are exceptions that are relevant if you’re gardening in Colorado, Utah or similar western states:
- If you have young or newly planted flowers, they’re more vulnerable to freezing (and dying) than your plants that have well-established roots.
- If we experience a really big temperature swing, your plants are more vulnerable to damage or death from freezes. In the Front Range of Colorado, we can get 50- to 60-degree temperature swings in the fall and spring. In the fall, this is confusing for our plants (especially our trees). They don’t have time to naturally prepare for hibernation mode, known as “dormancy.” And in the spring, they’ve often started to wake up from dormancy when we get these cold temperature swings.
- If you have flower buds that are opening in the spring, I’ve found they’re more vulnerable to getting dinged by freezes than leaves. The freezes likely won’t kill your plants. You just may not get flowers that year.
- If you’re growing flowers in a protected area of your yard (like along a south-facing fence that’s shielded from the wind), your plants may stay warmer when temperatures drop. I often have flowers that freeze in my front yard, while those same flowers are wide awake and happy in the backyard, which is more protected.
- There are some perennials (plants that come back) that are evergreen. They keep the color in their leaves all winter. You may not notice freeze damage on those plants.
The dates for the first fall frost
We have such varied elevations and conditions in Colorado and Utah, it depends on where you live.
The Front Range of Colorado usually gets its first frost in early- to mid-October. But hey, it’s Colorado. We also can get it in early September. (I’m looking at you, 2020.)
And if you live at a higher elevation, your garden may be at risk for frost year-round.
How to find the spring and fall frost dates in your area
In the fall, if you’d like to find the “average first frost date” for your area, I suggest googling:
- Average first fall frost in {your city}
In the spring, you may want to search for the “average last frost date”:
- Average last spring frost in {your city}
Just a final bit of garden lingo… The “average last frost date” means you’ve reached the point when it’s now less than 50 percent likely you’ll get a frost after this date.
Related topics that may interest you:
by Ann at Go West Gardener | Updated: May 20, 2026 | Gardening for Pollinators, Gardening Tips and Tricks
Black-eyed Susan (officially, Rudbeckia — Rude-bek-ee-uh) is an easy-to-grow flower that can add big color to your western garden, particularly in the late summer.
But often, gardeners plant Black-Eyed Susan… and it doesn’t come back
If this happens to you, you may find yourself thinking: “Well, that article was a load of crap.”
Or worse, you may think: “I guess I just don’t have a green thumb.”
I’m here to tell you this isn’t the case! But there are helpful things to know about Black-Eyed Susan that don’t always get mentioned at the garden center.
So, in this article, you’re going to learn…
How to tell the difference between short-lived vs long-lived Black-Eyed Susans (“biennials” vs “perennials”)
I’m going to use a little garden lingo later in the article (bring on the Latin!), but I promise I’ll explain what it means.
Some types of Black-Eyed Susan are much shorter-lived than others.
So, what are some ways to know what you’re buying?
- Take a good look at the plant
- Look at the botanical name on your plant tag (the Latin jibber-jobber I’ll explain in a sec)
The plants below are Black Eyed Susan.
What do you notice?

In the Plant A photos, do you notice the hairy leaves and stems? When you touch them, they feel fuzzy.
If your Black-Eyed Susan is fuzzy, you likely have a shorter-lived plant
Your fuzzy Black-Eyed Susan plants are likely Rubeckia hirta. They tend to be shorter-lived.
If you’re new to plant names: Rudbeckia describes a group of plants with similar traits. Hirta is like a descriptive adjective. It loosely translates to “hairy” or “rough” in Latin.
To keep things basic, plants with the botanical name, Rudbeckia hirta, include different types of hairy Black-Eyed Susan.
We’ll chat about why plants are hairy at another time. (Does this make your list of topics you never thought you’d talk about today? “Hey, why are plants hairy?”) But for now, don’t let the hair distract you. The hair itself is not why the plant is shorter-lived. It just happens to be a clue you can use to assume you have a shorter-lived plant.
It also helps to look for the botanical name, Rudbeckia hirta, on the plant tag. Unfortunately, growers use ALL kinds of names on plant tags, so this isn’t always a sure thing.
The next question you may be wondering is,
“Okay, so how long do hairy Black-Eyed Susan plants live?”
Generally, Rudbeckia hirta are “biennials” or “short-lived perennials.”
They go through a 2- and sometimes 3-year life cycle, and then they’re done.
Depending on your garden center, you may find young, leafy Rudbeckia hirta in the “perennials” section of the store — the section with plants that come back.
But, Rudbeckia hirta can be sold in the “annuals” section of the store too. Annuals are the flowers that give you colorful flowers for one season, but typically don’t return next year.
(Because it’s never simple, oye!)
When the plant is in the annuals section, the garden center is likely selling it in its second of growth. Your plant is flowering, and it’s near the end of its life cycle.
You can just enjoy varieties like these for the summer and fall, and pull them out at the end of the growing season.
But if you have them in your flowerpots and you WANT to see if they’ll come back, you also can move them to the ground in the early fall to see if they’ll return next year.
Depending on where you live, these plants may survive a winter or spread through their seeds.
Even though Rudbeckia hirta plants tend to be short lived, they CAN make new plants from their seeds, so Black Eyed Susan may keep reappearing in your garden year after year.
Bonus! More plants!
(But reseeding is a topic for another day.)
Okay, back to our comparison photos.
What do you notice about Plant B?
Plant B has smooth stems and leaves.
It’s a different species of Black-Eyed Susan. Specifically, it’s the longer-lived type of Black-Eyed Susan known as Rudbeckia fulgida. Fulgida loosely translates to “shiny” or “glimmering.”
Think of it as a shiny-leafed Black-Eyed Susan.
Below, you’ll find some examples you may find at your garden center.
‘Goldsturm’ a is popular variety. It was the 1999 Perennial Plant of the Year — an award given to plants that are standouts from other varieties. This plant should return for many years.
‘Goldsturm’ is happier with moderate watering, so you may not want to plant it in a dry, hot garden.
Which Black-Eyed Susan is native?
A native plant is one that has existed naturally in an area for hundreds of years. It wasn’t introduced through European settlers.
The answer to this question depends on where you live.
Rudbeckia hirta — hairy Black-Eyed Susan — is native to Colorado, Wyoming, New Mexico, the central United States and eastward. It’s highly attractive to pollinators, and it’s a host plants for many butterflies (meaning they seek those plants out for their young).
So, for my fellow westerners, if you’re interested in native plants and/or you want a pollinator-friendly garden, you may prefer growing Rudbeckia hirta.
Rudbeckia fulgida is native to areas east of the Mississippi River (with some exceptions in the central U.S.).
Bring on the Black-Eyed Susan!
These aren’t the only species of Black-Eyed Susan, but they’re popular ones. And they’re a great place to start for your western garden.
The next time you’re at the garden center, look for Black-Eyed Susan plants. Touch the leaves and stems to see if they feel fuzzy.
If you feel hair, you’ll know what that clue is telling you: You likely have a shorter-lived plant.
Parting thoughts: This article is intended as an overview. It’s good to check the plant tag, or even better, read an online plant description from a grower for the specifics on the plant you’re buying, such as how long it should live, its plant hardiness zones, etc. There can be many nuances among individual plant varieties.
Related topics that may interest you:
by Ann at Go West Gardener | Updated: May 20, 2026 | Flower Garden Basics, Gardening Tips and Tricks, Western Container Gardening With Flowers
If I could go back in time and tell myself one thing as a new gardener…
I would say it’s worth finding pretty flower pots. They’re like a good pair of shoes or a nice piece of jewelry. They can really elevate the look of your container garden.
But how do you choose? And should you buy big or small flower pots?
Here are practical questions to consider, so you can choose the best flower pot for YOU.
As you cruise through this article, keep in mind that you don’t have to buy new flowerpots. You can find them used instead. This can be good for your wallet (and Mama Nature too).
#1: Do you want to water less often?
Look for big flower pots.
Big containers tend to dry out more slowly than small pots.
#2: Do you want to have more design options with your flowers?
Look for flower pots with bigger openings (typically, big pots).
You can fit more flowers in a big container with a wide opening, so it offers more design options. You also can plant bigger flowers.
When you see flower pots that are exploding with color (like in mountain villages or outside the mall), chances are you’re looking at larger pots of flowers.
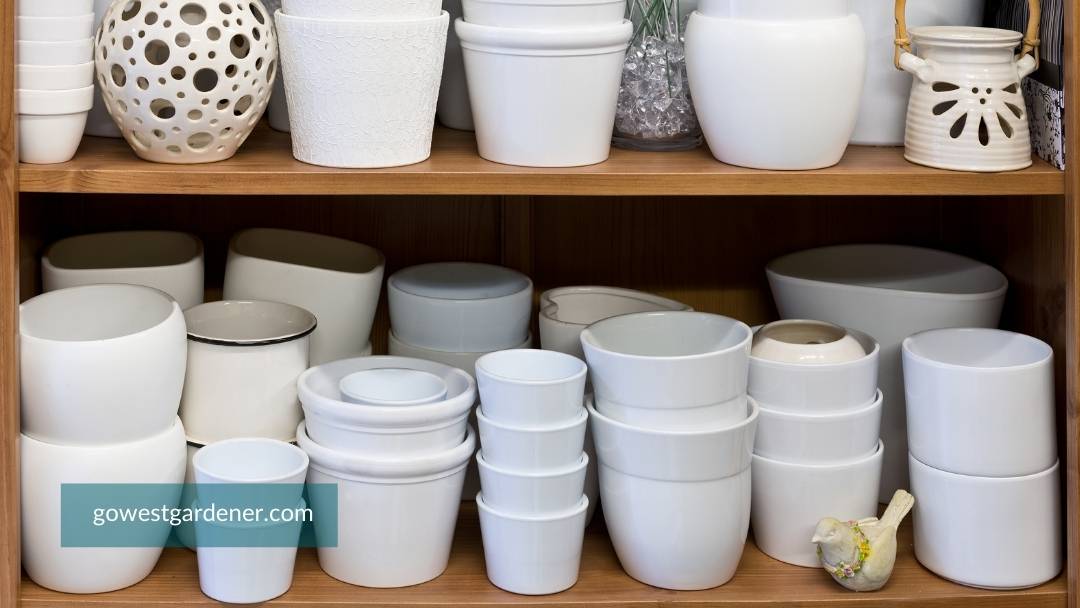
Does this mean you can’t create a beautiful container garden with medium size or small pots?
Not at all!
If you have smaller pots and you’d like to increase your design options, one thing you can do is to group pots together. That can create a really pretty look with interesting textures and heights. It also allows you to include more flowers.
You can see an example below with medium size pots.
#3: Would you like to keep your plant roots happy, which can play a role in beautiful flowers?
Look for a bigger flower pot — one that has room for plant roots to grow.
As your flower plants leaf out and grow above the soil, their roots are growing proportionally below the surface too.
Bigger containers offer more room for plant roots to grow.
And plants that have more roots are usually happier and healthier plants.
Avoid tiny pots or very shallow pots.
They’re going to look super-cute at the garden center, but it’s best to skip them for your outdoor flowers. (Use them for your indoor houseplants instead.)
#4: Do you live someplace with blazing hot summers?
Get a big pot if your flowers are going to get afternoon sunlight.
Big flower pots allow for more soil and moisture, which can do a better job keeping the roots of your plants cool and hydrated.
#5: Do you have limited space on your balcony, patio or front porch?
Look for smaller flower pots—or tall, skinny flower pots.
They work well in small or narrow spaces.
#6: Do you want to be able to move your flower pots in bad weather?
Smaller flower pots can be easier to move.
This is something to think about if you live someplace that gets hail or fluke snowstorms. Because gardening in states like Colorado, Wyoming and Texas is an adventure, y’all!
However, a small pot can still get heavy.
Plus, there are things you can do to make big pots easy to move in hailstorms, like keeping them on “plant caddies.” Plant caddies are plant stands with wheels. Get the scoop on hailstorm protection here.
#7: Are you on a budget? Or, are you interested in reusing rather than buying new?
Then, the size will vary.
Smaller flower pots will require fewer flowers and less potting soil, which can reduce your costs.
And small, decorative pots are usually cheaper than big, decorative pots at garden centers. With that said…
You can find deals on any size container if you get creative.
For example, you don’t have to buy a new container.
- If you’re moving into a home, ask if the previous owner wants to leave any garden supplies — like flower pots. People are often transitioning to different stages of life. (This is how I scored many of my garden tools and a collection of pots!)
- You can look for flower pots at estate sales.
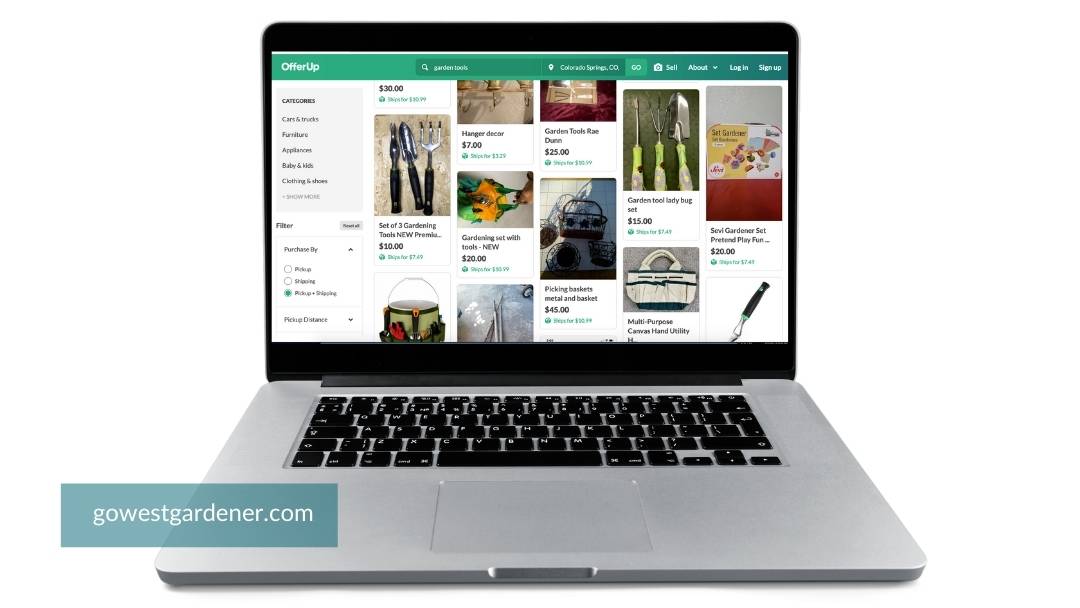
- Neighborhood websites like Facebook Marketplace, Next Door, Craig’s List or OfferUp can be a good source of garden supplies, including flower pots.
In the early spring, places like Costco and HomeGoods (TJ Maxx) often carry flowerpots that won’t break the bank.
And in the fall, flower pots often go on sale at garden centers and boutique-type stores.
#8: Want to make sure your flower pots have the most important feature of all?
Look for flower pots with a hole.
You’ll save yourself extra steps and have happier plants.
Why do they make so many flower pots without holes? It’s weird!
Holes are important.
A flower pot without a hole is like a bathtub without a drain. It can lead to problems.
When water can freely drain from your pots, your plants will have much healthier roots. And healthy roots make a big difference in growing long-lived plants that look GOOD. Cheers to that!
Related topics that may interest you:
by Ann at Go West Gardener | Updated: May 20, 2026 | Flower Garden Basics, In-ground garden
Spring can be one of the best times to plant perennials — the flowers that come back.
“Cool temps are ideal for planting perennials…” wrote David Salman, respected western plantsman of Waterwise Gardening LLC, in 2022. “Perennials thrive in cool weather, putting their energy into growing robust root systems.”
And healthy root systems lead to healthy plants!
When you plant your perennials on mild spring days with cool nights, their roots have a chance to get a head start before summer. They’re better prepared when our roasty summer temps arrive.
So, the question is:
When should you plant perennials in the spring?
I’d love to give you a simple answer—or better yet, a date.
Yep, a specific date would be nice. But Mama Nature makes her own rules, and she can be a fickle gal, especially in Colorado and similar western states. Plus, it depends on where you live and what you’re planting.
Nevertheless, here are helpful guidelines.
You should be able to plant perennials when all of the following occur:
1) Your ground isn’t frozen.
According to the Colorado State University (CSU) Extension, you should theoretically be able to plant hardy perennials when you can work the soil (your dirt). In other words, you can get a shovel in the ground.
If the ground isn’t frozen, your plants’ roots also should have access to water.
In the Front Range of Colorado, this is often April.
2) The ground isn’t too damp.
Digging in wet dirt can compact your soil. (This is a fancy way of saying: You can accidentally smoosh your dirt.)
Compaction is a common issue in clay soil—which many of us have in Colorado and the intermountain west. It can cause problems that last a long time. For example, compacted soil can make it tough for water and air to get to your plants’ roots.
If you’ve been getting snow or rain, hold off on digging in the dirt. Let your soil dry for a bit.
3) Your perennials have been actively growing outside for a while.
This is important. Let’s dig into why.
Perennials that have been growing outside are tougher. They’re better equipped to handle the intense sunlight, drying winds and yo-yo temperature swings that we can get in Colorado and similar states.
In contrast, perennials that have been growing inside are tender. They’ve had warm, comfy conditions—like their own spa. They aren’t used to outdoor conditions yet.
Greenhouse plants are more vulnerable to sunburn outside (yep, that’s a thing), as well as frost and freeze damage. They can become stunted, weak or die. These flowers “are best planted after the danger of frost has passed in the spring,” says the CSU Extension.
When you bring home perennials that have been growing indoors, it’s also a good idea to toughen them up before you plant them outdoors. This is known as “acclimating” or “hardening off” your flowers. (Here’s how to harden off flower plants.)
On a related note, if most of the plants in your garden are still dormant (winter hibernation mode) and you see leafy perennials at the store, it’s too early to buy those plants… unless they’re going straight into a greenhouse at your house. Those leafy, greenhouse perennials will not do well in our spring freezes in Colorado.
4) Your temperatures are mild rather than hot.
Moving your flowers from their nursery pots to the ground can be stressful for your plants. And hot temperatures can add to your plants’ stress.
Look for days with mild temperatures to plant your perennials. Avoid planting on summer-like days in the spring, if possible. Cloudy days can be excellent days to plant.
Here’s my approach to planting perennials in the spring in Colorado.
I live in the Front Range of Colorado.
Typically, I’ll start moving and dividing perennials that are already planted in my garden in early April, depending on the weather. The ground usually isn’t frozen and these plants have been growing in my garden, so I know they’re used to the conditions.
If we’ve been getting a lot of snow or rain, I’ll hold off on moving plants to avoid planting in wet soil. I don’t want to compact my soil (smoosh my dirt).
Depending on the weather, I’ll bring home new perennials starting in late April. I harden off the perennials I get from mail-order websites and garden centers before I plant them. Tip: If you see plants outside at a store and you don’t know if they just arrived from a greenhouse or not, I would err on the side of hardening your plants.
We can get yo-yo temperature swings in Colorado in the spring, from summer-like days, to freezing cold nights. So, I keep my eyes on the forecast. If the forecast says temps could drop into the upper 20s (or below) or we could get snow (because, yay, it’s Colorado), I’ll typically wait to plant them. I protect my leafy, newly-purchased perennials from freezes.
Gardening is both science and intuition.
I have a gardening friend who shared an observation I adore:
Gardening is both science and intuition. What works for one gardener may not work for the next.
If you want to know when you should plant perennials in the spring in Colorado (or a similar state), I hope these guidelines help you hone in on what works well for your western garden.
Related topics that may interest you:
by Ann at Go West Gardener | Updated: May 20, 2026 | Flower Garden Basics, Gardening Tips and Tricks
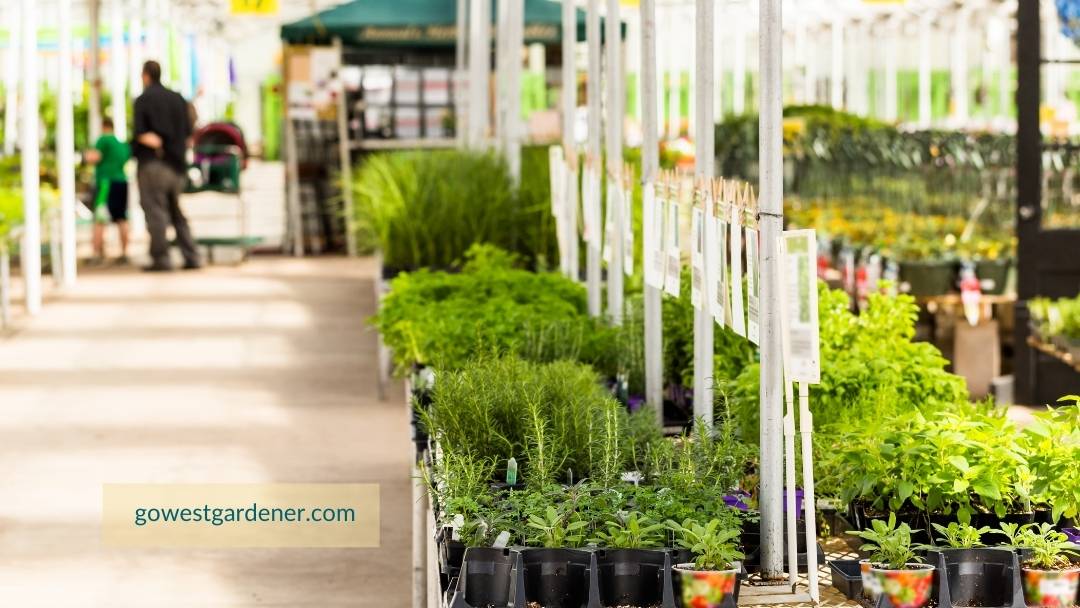
So, you walk into your local western garden center…
And you see row after row of flowers. You may find yourself thinking one of two things:
- “Ahhhh, I’m in my happy place.” You feel like a kid in a candy store.
Or …
- “HOLY. CRAP.” There are sooooo many choices. You suddenly feel a strong urge to breathe deeply into a brown paper bag.
Both are natural reactions!
Here are 5 tips to help you navigate your local garden center and make awesome flower choices.
Tip #1: Western garden centers may not sell the flowers you recognize from other parts of the country or from magazine photos
And that’s actually a good thing.
Here’s why.
Colorado and similar western states are tough on plants.
Really tough.
It’s dry here. Windy. Our high-altitude sun is more intense on our plants. Our soil lacks nutrients. We get hail and 60-degree temperature swings.
Down at our lower elevations (3500-6000 feet), our summers can get H-O-T with very little rainfall.
And up at our higher elevations — like in our mountain valleys — we can get frost in the summer.
(Aren’t you glad you’re becoming a gardener here? )
The point is, we need hardy-plants that can handle these types of conditions.
Typically, the pin-worthy flowers from Southern Living magazine and other lifestyle magazines prefer a lot of moisture, different soil, a more temperate climate, etc.
You’ll be much more successful and have to replace fewer plants in states like Colorado and Utah if you’re planting flowers that do well in our crazy, western conditions.
So, get ready to discover some new types of flowers as you browse the aisles!

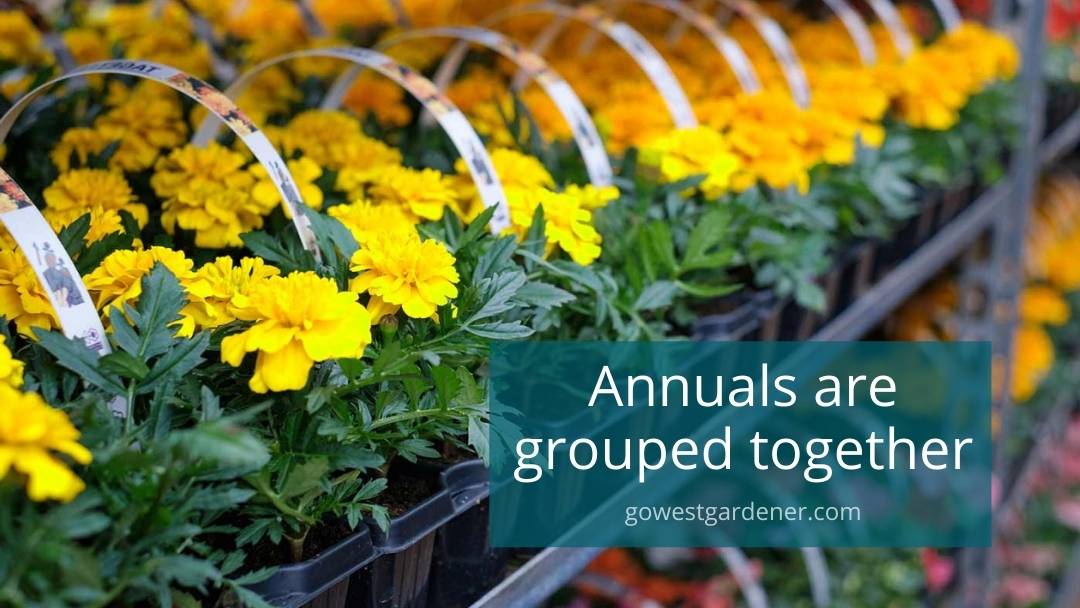
Tip #2: Flowers are often arranged together based on whether they grow for one season or return every year
In other words, there is a method to the colorful madness.
You want big, showy color all summer, particularly in your flowerpots?
You’re probably looking for annuals. Annuals give you a lot of color for one growing season, but they don’t come back the next.
You want pretty flowers in the ground that come back year after year?
You’re looking for perennials. Perennials return every year, but they typically bloom for a shorter window of time — often, only a few weeks.
The good news is your garden center likely has organized its annuals together and its perennials together.
The annual section usually has a lot of flowers together with bright, showy color.
If you aren’t sure which section is which, please ask. People are happy to help.
In addition, in the perennial section, plants that love sunshine are often separated from plants that prefer shade …
Though, not always. (I’m looking at you home improvement stores.)
In outdoor garden centers, the shade-loving plants will likely have a screen or a cover over them. This is always a helpful clue that they prefer less sunlight.
Tip #3: Perennials bloom at different times of the summer, so it’s helpful to return to the garden center every 2-4 weeks to see what’s blooming
When I planted my first garden in Colorado, I was so excited to buy flowers.
I went to the garden center in early June, and I bought a variety of colorful perennials (the flower plants that come back year after year).
Over the next few years, my garden looked GOOD … in May and June.
But by the time July arrived, everything would stop blooming.
I had very little color for the rest of the summer.
What happened?
Perennials bloom at different times during the summer — usually for 2 to 3 weeks at a time.
I bought the perennials that looked pretty at the garden center in the early summer. They were the flower plants that bloom in May and June.
I didn’t realize that I needed to pace myself.
If you’d like color in your garden across the w-h-o-l-e summer, it’s helpful to return to the garden center to see what blooms during different months.
Your garden center will likely be getting new plants in.
Plus, plants you didn’t notice before may be blooming now.
Don’t have time to make multiple trips to the garden center to look at perennials?
In that case, be sure to look at the plant tags (tucked in each pot) when you buy your flowers.
The plant tags should tell you when your perennial will bloom.
Look for perennials that bloom at different times of the summer. That means you may need to look for plants that aren’t flowering at the time you’re at the garden center.
If you live at a high elevation in a western state like Colorado, you’ll have a shorter growing season. You may want skip the “early fall” bloomers. Your growing season may not be long enough for those flowers to bloom. You also may have more summer options if you start flowers from seed.
Tip #4: The size of the flower plant in the store isn’t its final size
Perennials take up to 3 years to reach their full size.
So, when you see a pretty perennial at the garden center and it’s flowering and you can totally picture the perfect spot for it in your garden …
Pump the brakes.
Read the plant tag (tucked in the pot) to find out how big the plant will grow and how much space it needs.
When you read the tag, you may find yourself thinking:
“This adorable little plant needs 24 inches in width and is going to be 3 feet tall? Nah!”
Yep.
It just may take a few years to get there.
Here’s what this means:
Your garden may not look “full” in the first year or two, but this is totally normal.
You can always fill in with flowerpots of annuals.
Putting each plant in the right place for its needs will help you keep your plants from competing for water, nutrients and sunlight.
Translation: You’ll have happier, healthier plants and less work for the long term.
By the way, almost every gardener has ignored a plant tag and had to move — or remove — a plant when it’s gotten too big (myself included).
So, if you’ve done this, you’re in good company!
There’s nothing like planting a perennial in the front of your garden, only to discover that your plant has turned into the tall kid in the school class picture — and you have it standing in the front row.
And if you like having the tall kid in the front row, great!
Nature is wild and unruly, and it can be part of the fun of gardening too.
Just make sure your tall kid isn’t crowding out your other plants (for example, blocking their sunlight or water).
The other thing to keep an eye on is whether your tall kid’s roots may be growing into other plants and taking their nutrients.
Tip #5: A big flower plant growing in a small container can be a problem, so look for containers that are proportional to the plant
As plants grow bigger above the soil, their roots are elongating below the soil.
So, when you see a big plant growing in a small pot — for an amazingly low price, no less — you may not be getting the deal you think you’re getting.
Why?
Because when plant roots have nowhere to go, they start circling around the inside of the container, growing tighter and tighter.
The plant’s roots will begin to strangle and kill the plant.
This is known as: “root girdling.”
Sometimes, there are things you can do to loosen up the roots when you get your plant home, but these steps take extra work and you can end up damaging the roots.
Your flower plant may not recover.
What’s another sign that the roots are too big for the container?
You may notice a lot of roots growing out of the bottom of the pot.
Poor lil’ dudes are trying to escape!
Root girdling is a bigger issue in perennials (and shrubs and trees), than in annuals. After all, your annuals are only going to last for one season.
Nonetheless, be wary of plants that have outgrown the size of their containers.
You may be buying a problem.
Being observant can help you set yourself (and your plants) up for more success in your garden. And cheers to that!
Related topics that may interest you:
by Ann at Go West Gardener | Updated: May 20, 2026 | Flower Garden Basics, Western Container Gardening With Flowers
Wondering how to get started with flowerpot gardening?
Pop in your ear buds, find a comfy spot and listen to this 30-minute episode of the @liveblissedout podcast!
I was honored to be a guest and chat about flowerpot gardening in Colorado, Utah and the West. Click the blue play button below to listen.
In this flower gardening podcast, you’ll discover:
- How to feel more confident growing flowers — even if you’ve struggled or you’ve never grown a flower before
- What to think about when choosing flowers for pots, so your flowers live longer
- How to INSTANTLY make your flowerpots prettier
- How to know how many flowers to buy, so you don’t waste money
- Where to buy flowers if you like unique flower blooms (beyond the home improvement stores)
- And more!

The Live Blissed Out podcast is an educational variety show focusing on how you can achieve happiness through awareness and taking action. I loved being a guest.
Related tips that may interest you: