by Ann at Go West Gardener | Updated: May 20, 2026 | Best Flowers for Colorado, Utah & Similar States, Gardening for Pollinators, In-ground garden, Waterwise Gardening in the Intermountain West
During the spring of 2020, my husband and I re-worked part of our yard with new garden beds. (Any other weekend warriors out there?)
I wanted to include drought-tolerant red flowers that would grow well in Colorado’s poor soils and hot, dry climate.
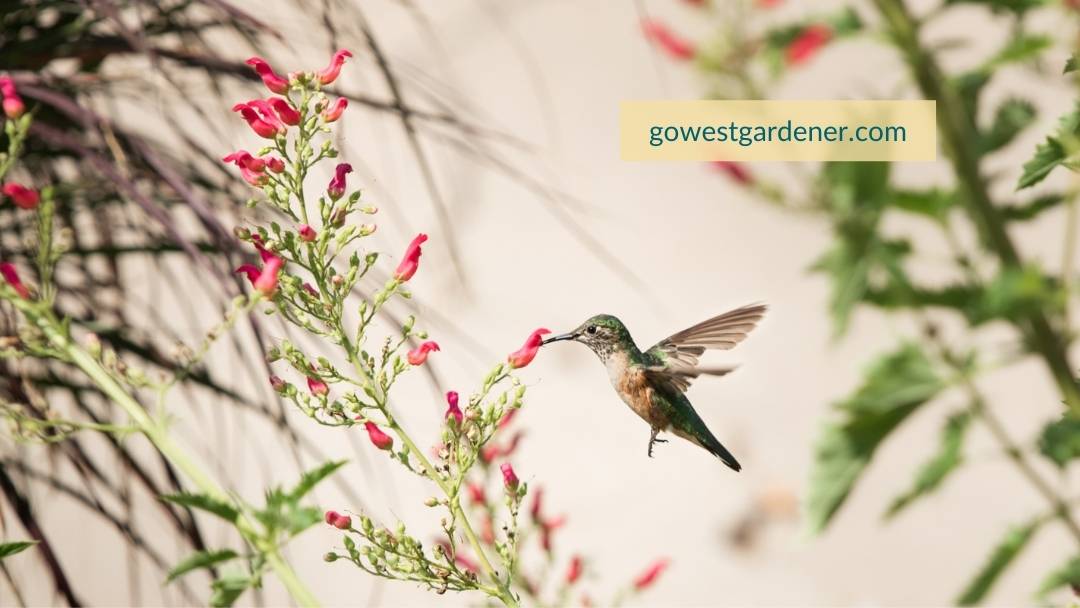
And that’s when I fell in love with a flower called Red Birds in a Tree… and so did our local hummingbirds!

Hummingbirds LOVE this flower.
My husband walks inside every morning after walking the dog and announces, “The hummingbirds are outside. Again.”
Here are 5 reasons to consider adding Red Birds in a Tree to your western garden:

Photo courtesy of Plant Select
1) Unique flowers
The flowers on this plant look like little pinkish-red birds sitting on tree branches.
Aren’t they so cute?
This flower plant isn’t the showiest one I have in my garden, but it’s the one that my neighbors always ask about.
It’s an attention-getter because it’s unusual.
2) Long-lasting color
Red Birds in a Tree is a perennial (a flower that returns each year).
Most perennials bloom for a short window of time — sometimes only a few weeks!
But not this one.
This plant blooms for a LONG time.
Over the last two summers, this flower has started blooming in my Denver garden in late June. Once it starts flowering, it keeps going and going. I’ve had blooms into early October. I get the showiest color in the first 4-6 weeks of blooming.
Are you familiar with plant hardiness zones? They tell you whether a plant is likely to survive the coldest winter temperatures that are expected where you live. Red Birds in a Tree is ideal for gardens in plant hardiness zones 4-9.
3) It’s very drought tolerant
When you first plant Red Birds in a Tree, you’ll want to water it consistently while it’s a young plant. But once it gets established in your garden, this plant is VERY drought tolerant.
You can even grow this plant in xeric gardens. Xeric gardens get their water from Mama Nature, and that’s about it. There’s almost no supplemental irrigation. Do you have a spot in your yard that doesn’t get irrigation from a sprinkler system? Red Birds in a Tree could be a great plant for that area.
Red Birds in a Tree can handle up to moderate irrigation too.
But my understanding is, if this plant gets more frequent watering and your dirt is “loam” (meaning you have well-balanced soil), this plant may not live for as many years.

Photo courtesy of Plant Select
4) It’s easy going
Red Birds in a Tree grows well in all kinds of sunlight. It isn’t picky. You can put it in sunny spots or in partly shady spots. Personally, I’ve had more success with it in afternoon sunshine.
This plant also grows in different types of soils (the dirt in your garden). This is a good thing because western soils can be a pain in the booty.
This flower plant is adaptable.
And it’s good for elevations up to about 8125 feet.
5) It’s a western regional native
Red Birds in a Tree is native to the mountain slopes of New Mexico, and it’s on the flight path of migrating hummingbirds. If you want to buy regionally native plants, add this one to your list.
Where to buy Red Birds in a Tree
Red Birds in a Tree is a Plant Select plant. Plant Select is a western plant introduction program. It introduces smart and sustainable plants inspired by the Rocky Mountain region. (It’s a non-profit collaboration between Colorado State University, Denver Botanic Gardens and the western green industry.)
You should be able to find this plant at local, independent garden centers that carry the Plant Select brand.
You also can google, “Red Birds in a Tree,” to find online retailers.
Just so you have it, the botanical name is Scrophularia macrantha.
(Try saying that 3 times quickly. Ha!)
Please visit the Plant Select website if you’d like more details about Red Birds in a Tree.
Related topics that may interest you:

by Ann at Go West Gardener | Updated: Jun 12, 2026 | Best Flowers for Colorado, Utah & Similar States, Gardening for Pollinators, Waterwise Gardening in the Intermountain West
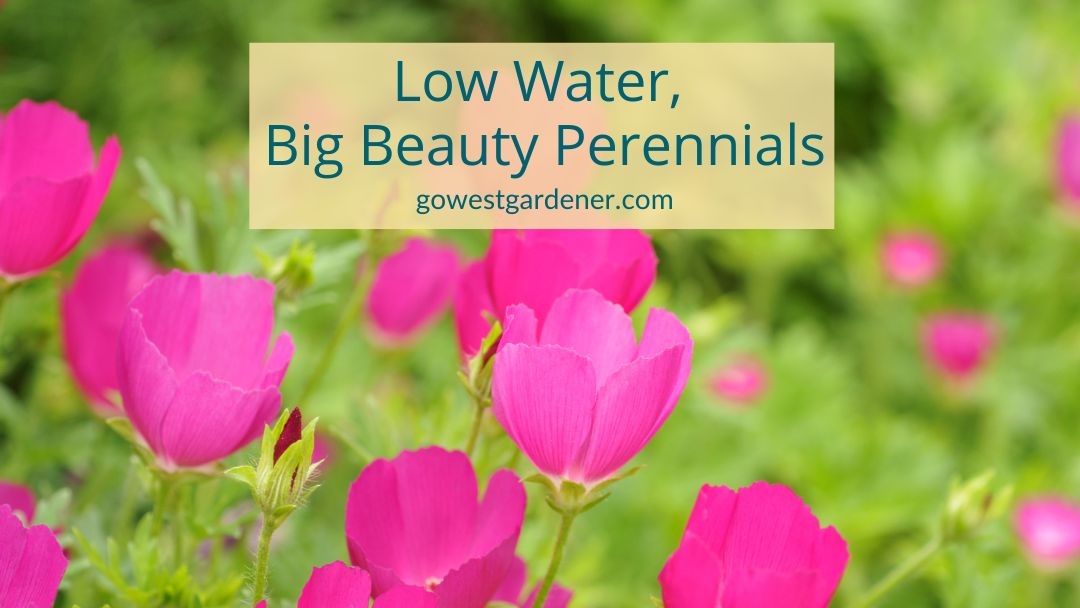
Think low-water gardens have to look dull, desert-like, or weedy? Nope! Waterwise landscapes can be lush, vibrant, and pollinator friendly. Plus, they’re often a lot less work.
If you’re looking for ways to save water and get more blooms for your buck, here are a variety of beautiful, low-water perennials to inspire your Colorado garden.
You can mix and match these plants.
Key: * = Plant Select plants. Select photos courtesy of Plant Select.
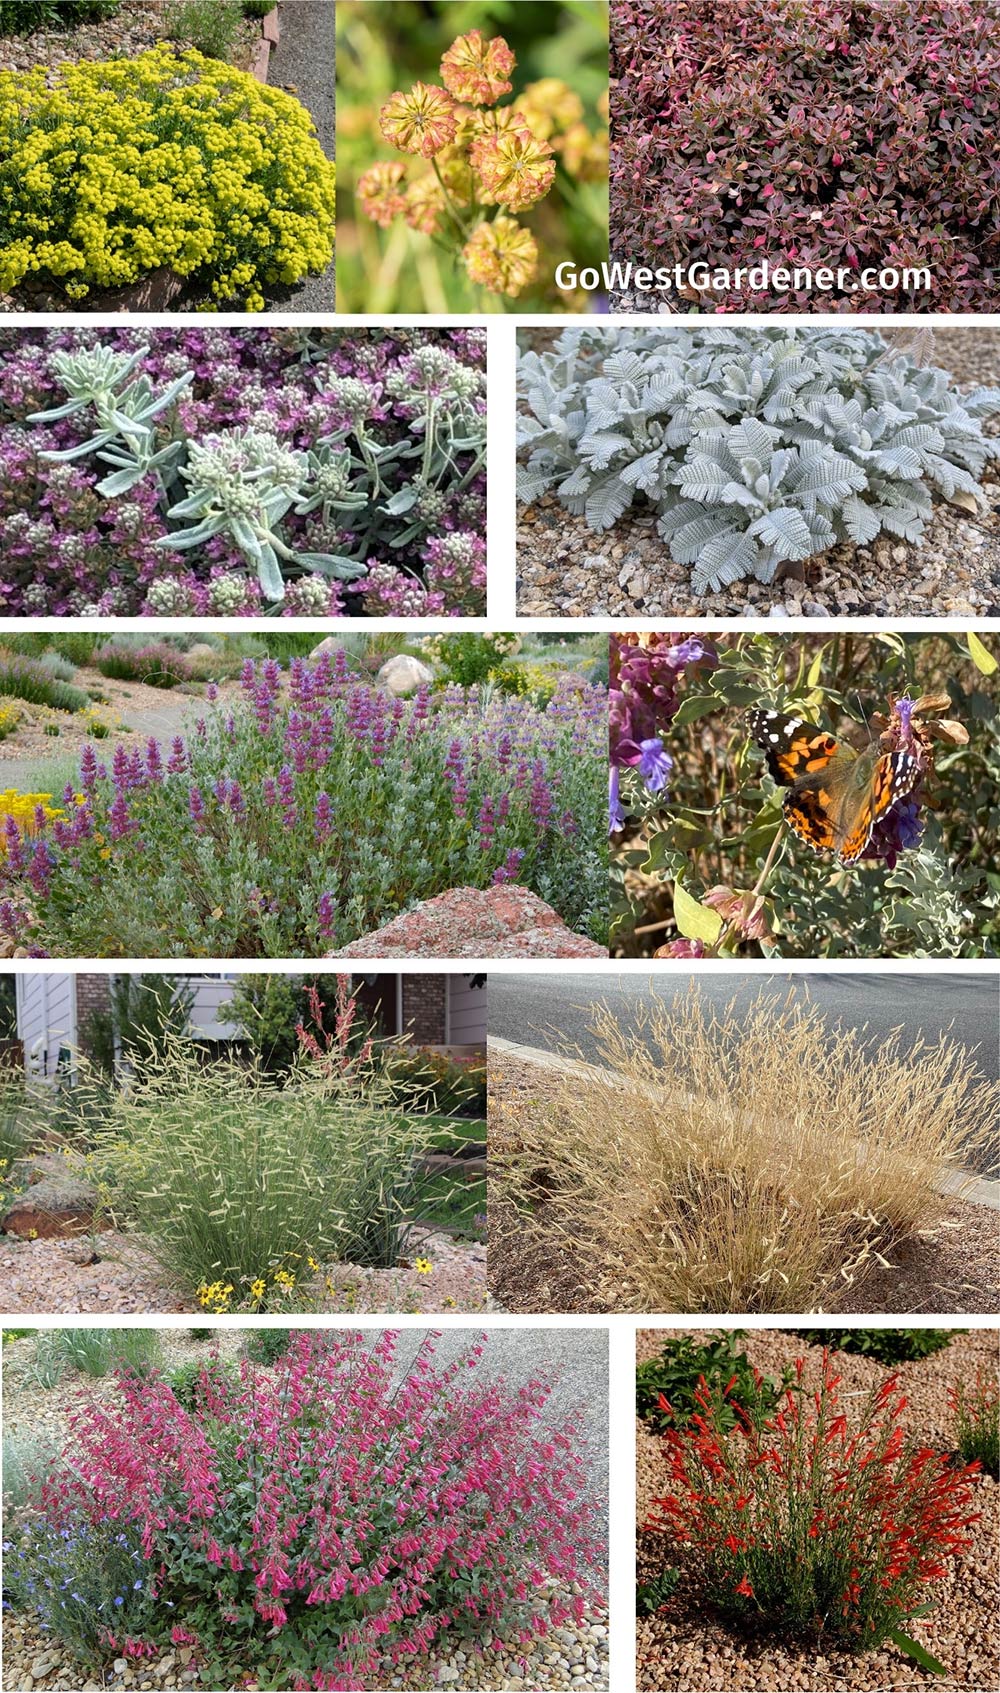
Awesome starters: Colorado native plants
Native to Front Range/southeastern Colorado
Pollinator friendly and very low fuss
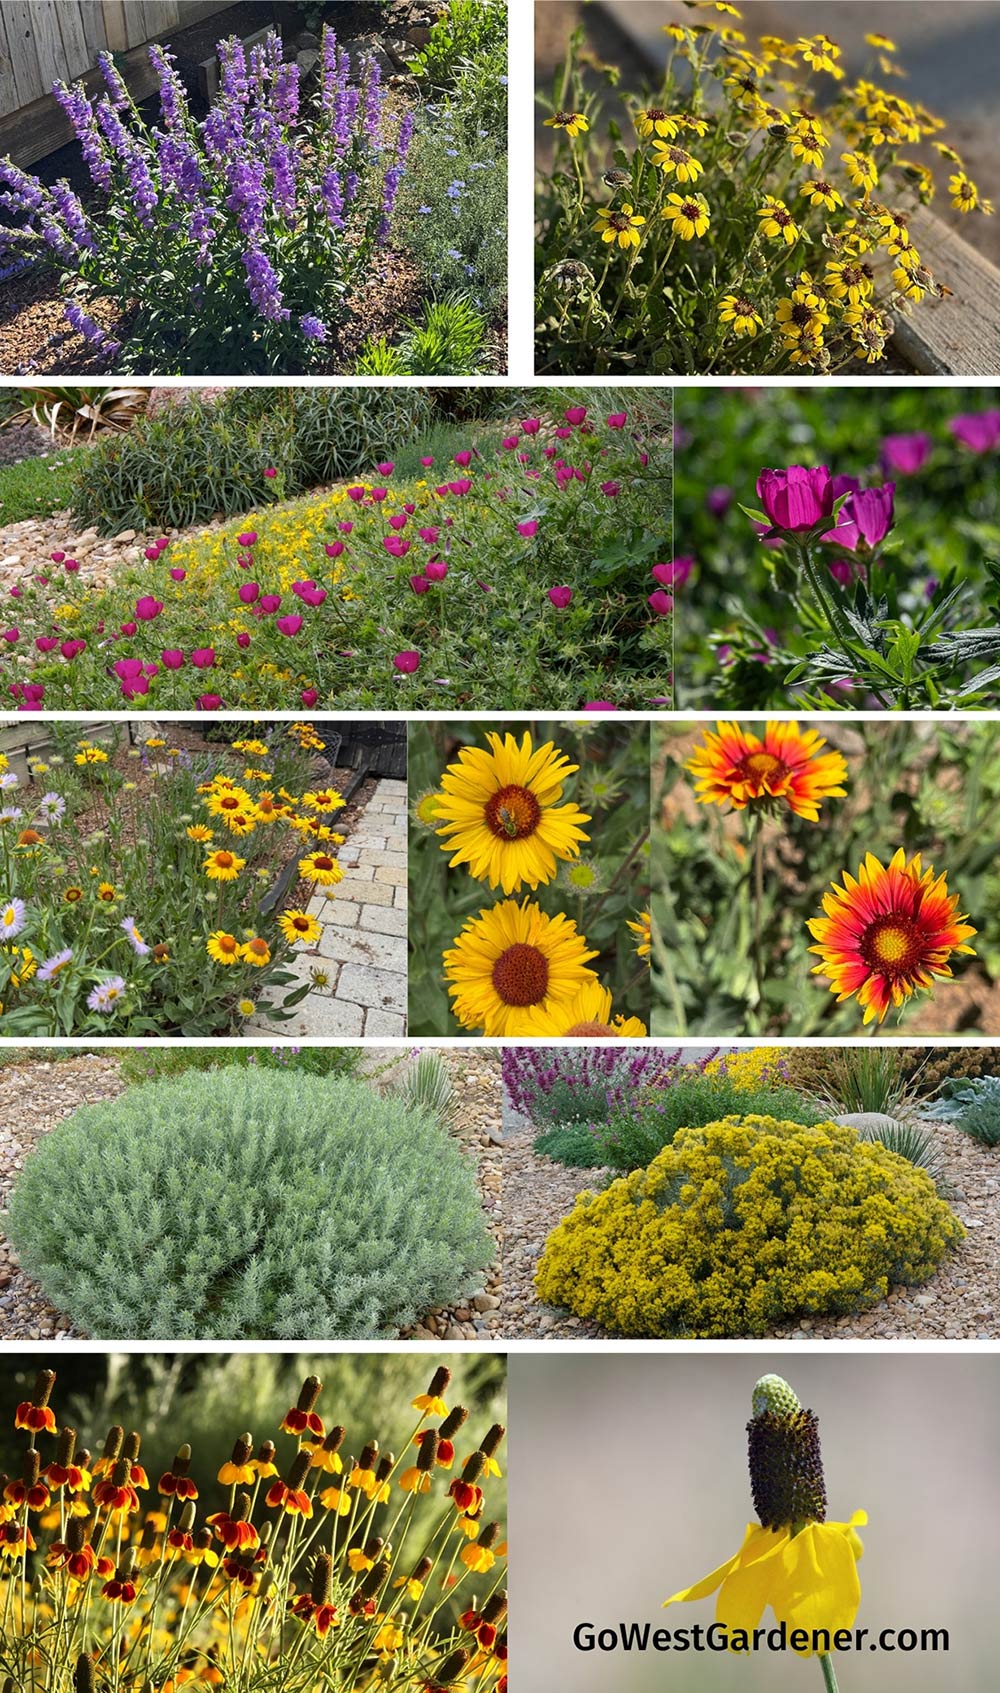
This is an attractive combo of Colorado native plants if you’re just getting started with low-water gardening and/or you want to support pollinators. These native plants adapt well to many soil types, and they’re relatively forgiving.

- Rocky Mountain penstemon (Penstemon strictus)
- Chocolate flower* (Berlandiera lyrata) – Note: The blooms on chocolate flower close in the heat of the day
- Winecups / purple poppy mallow* (Callirhoe involucrata)
- Blanket flower (Gallardia artistata)
- Dwarf rabbitbrush/Baby Blue rabbitbrush* (Ericameria nauseosa var. nauseosa)
- Honorable mention: Prairie coneflower/Mexican hat (Ratibida columnifera)
Note: Scroll down for a longer list of native plants that thrive in Denver and Front Range gardens.
Awesome starters: Drought-tolerant perennials with a more classic look
Low water, low fuss… yes, please!
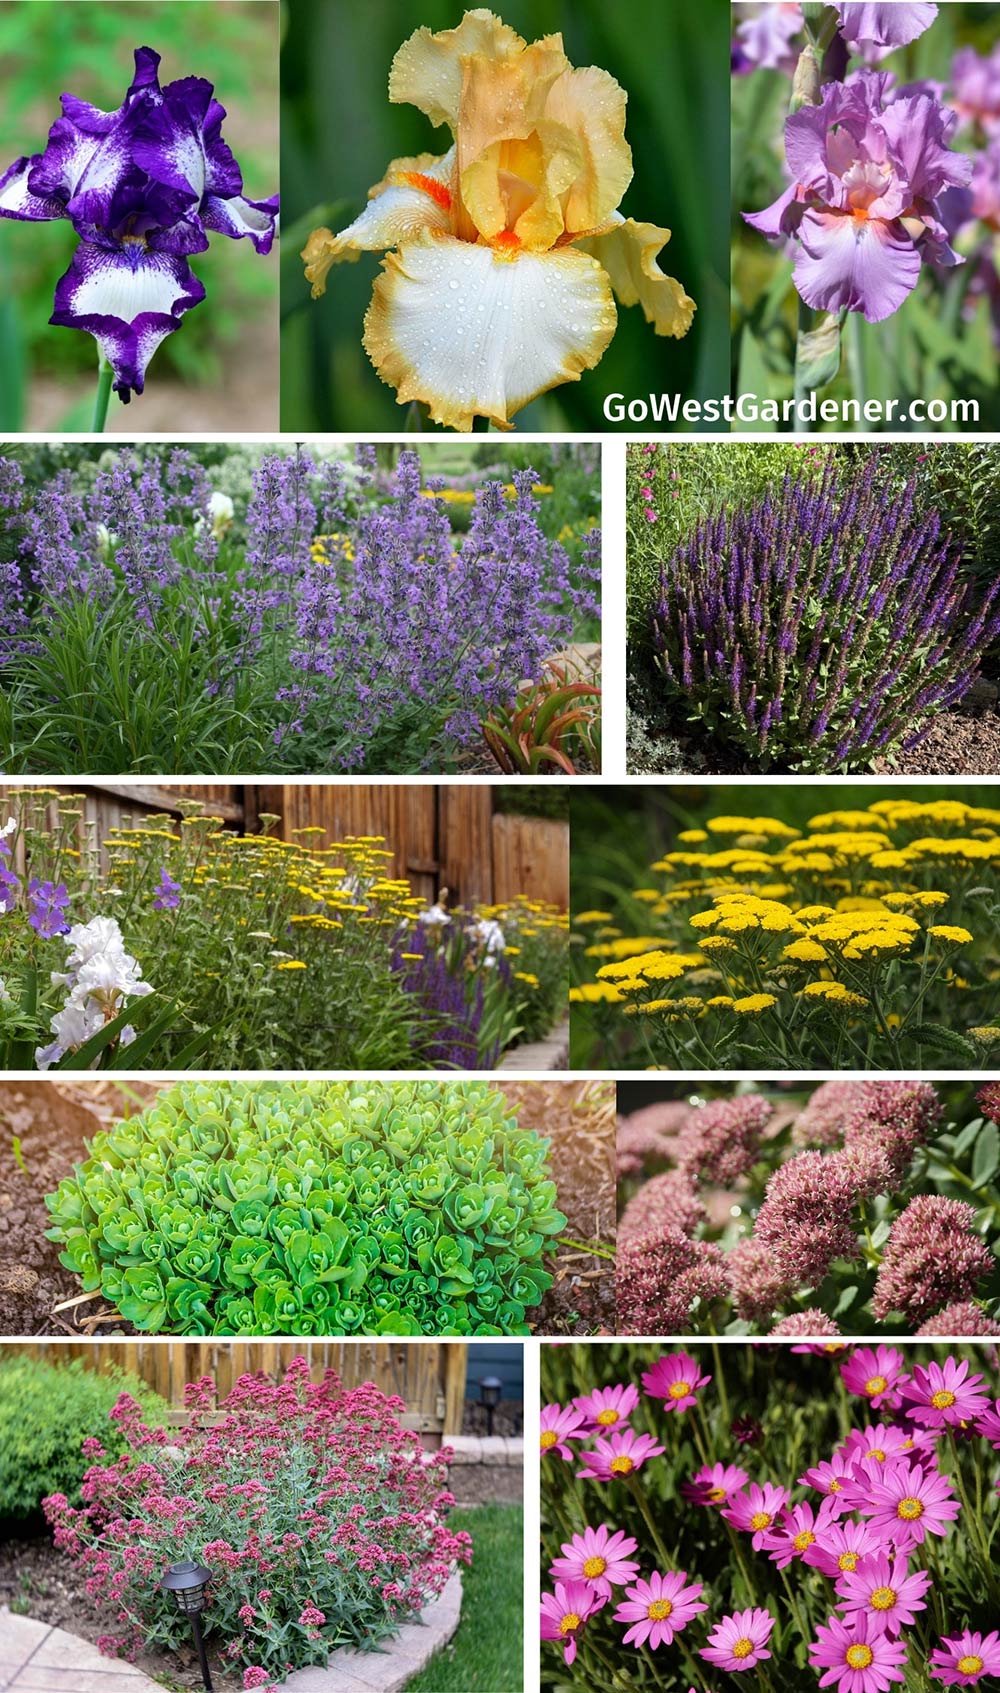
Let’s say you want to use less water, but you’d like a more classic look. Here are low-water perennials to get started. Once again, they’re quite forgiving.
- Tall-bearded iris (Iris x germanica)
- Little Trudy catmint* (Nepeta ‘Psfike’)
- Little Night European meadow sage (Salvia sylvestris ‘Little Night’)
- Moonshine yarrow (Achillea ‘Moonshine’)
- Autumn Joy sedum (Sedum spectabile ‘Autumn Joy’)
Honorable mention: Jupiter’s beard (Centranthus ruber)
Sun daisies (Osteospermum) like Purple Mountain*, Mandy*, or Avalanche White*
Lavenders (Lavandula angustifolia) like Wee One*, Hidcote, and Munstead – these lavenders prefer well-drained soil
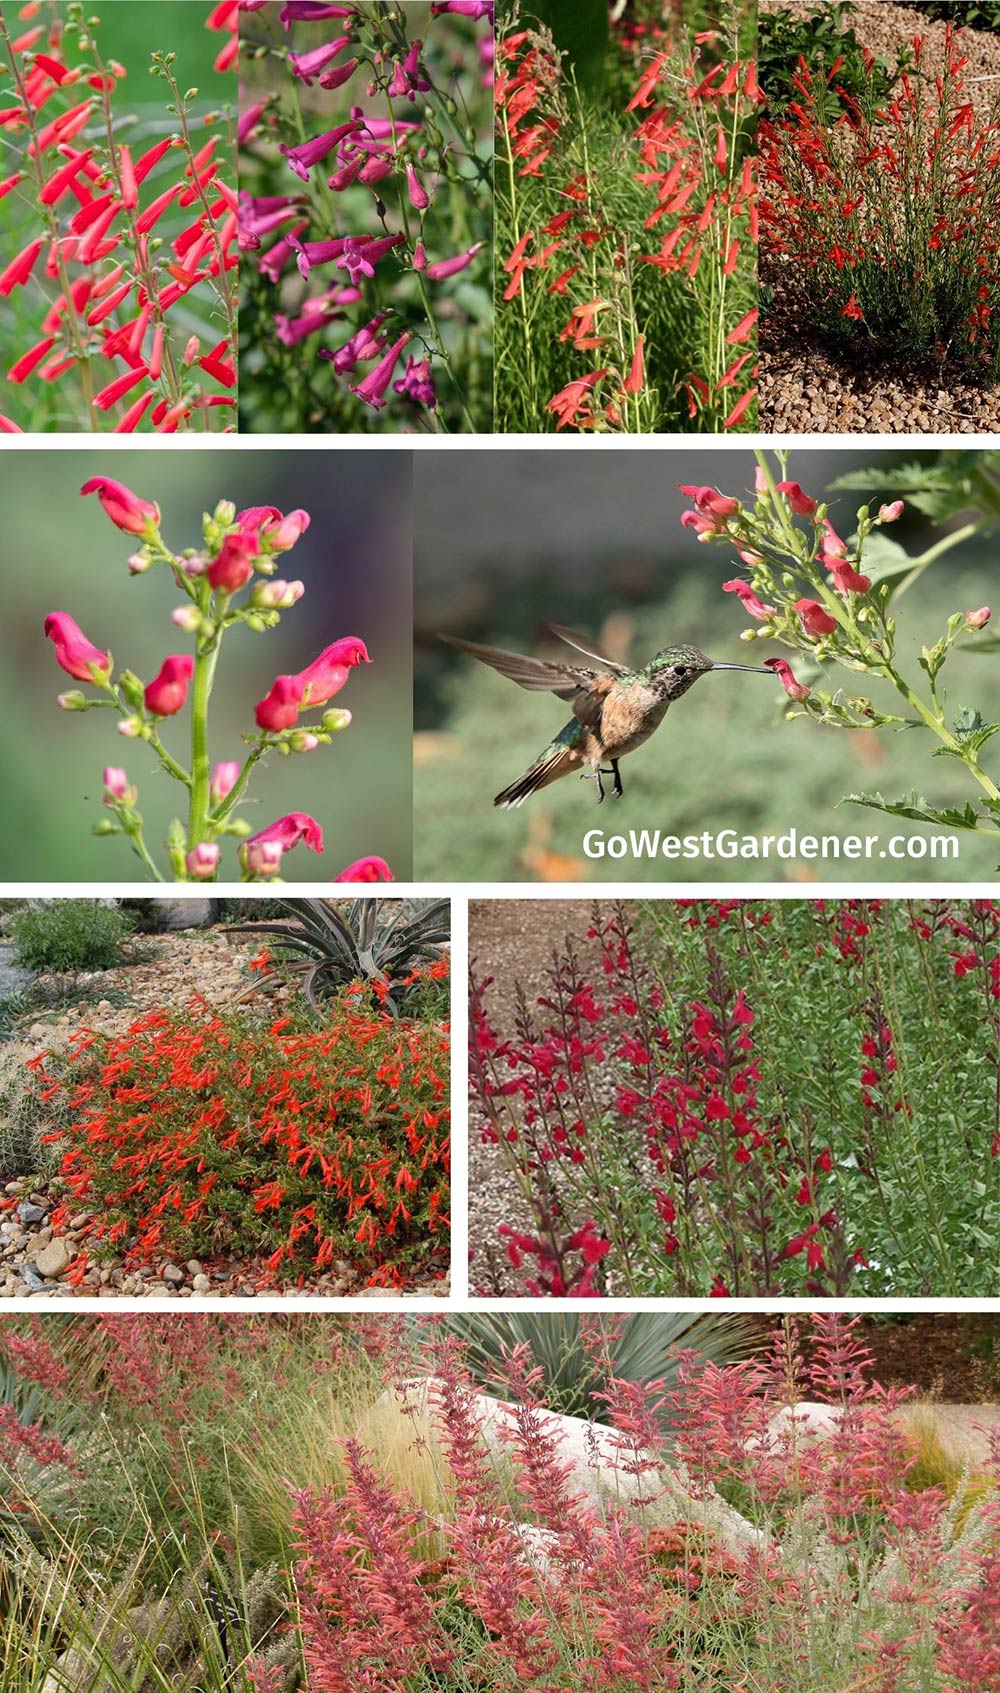
Hummingbird faves
Ring the dinner bell (and breakfast and lunch bells) for hummingbirds
Find more hummingbird plants for Colorado gardens here >
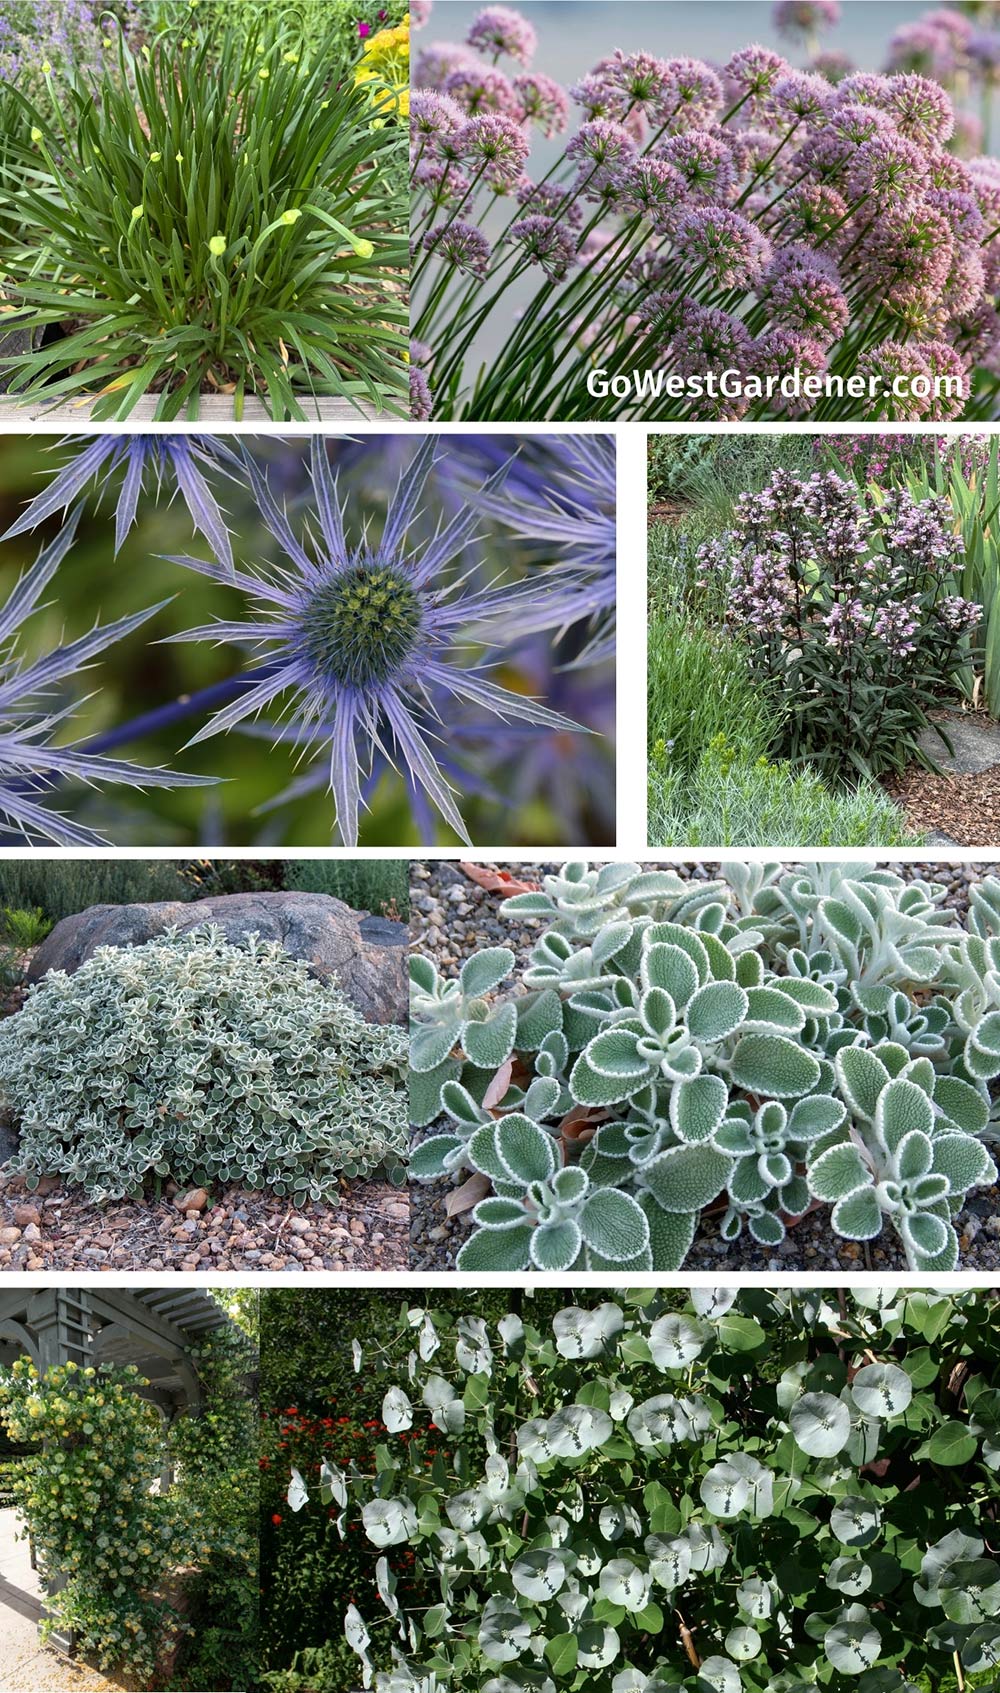
Perennials for winter interest
These plants can jazz up your winter landscape, adding beauty in the off-season
“What’s that?” plants
Unusual, low-water plants that turn heads
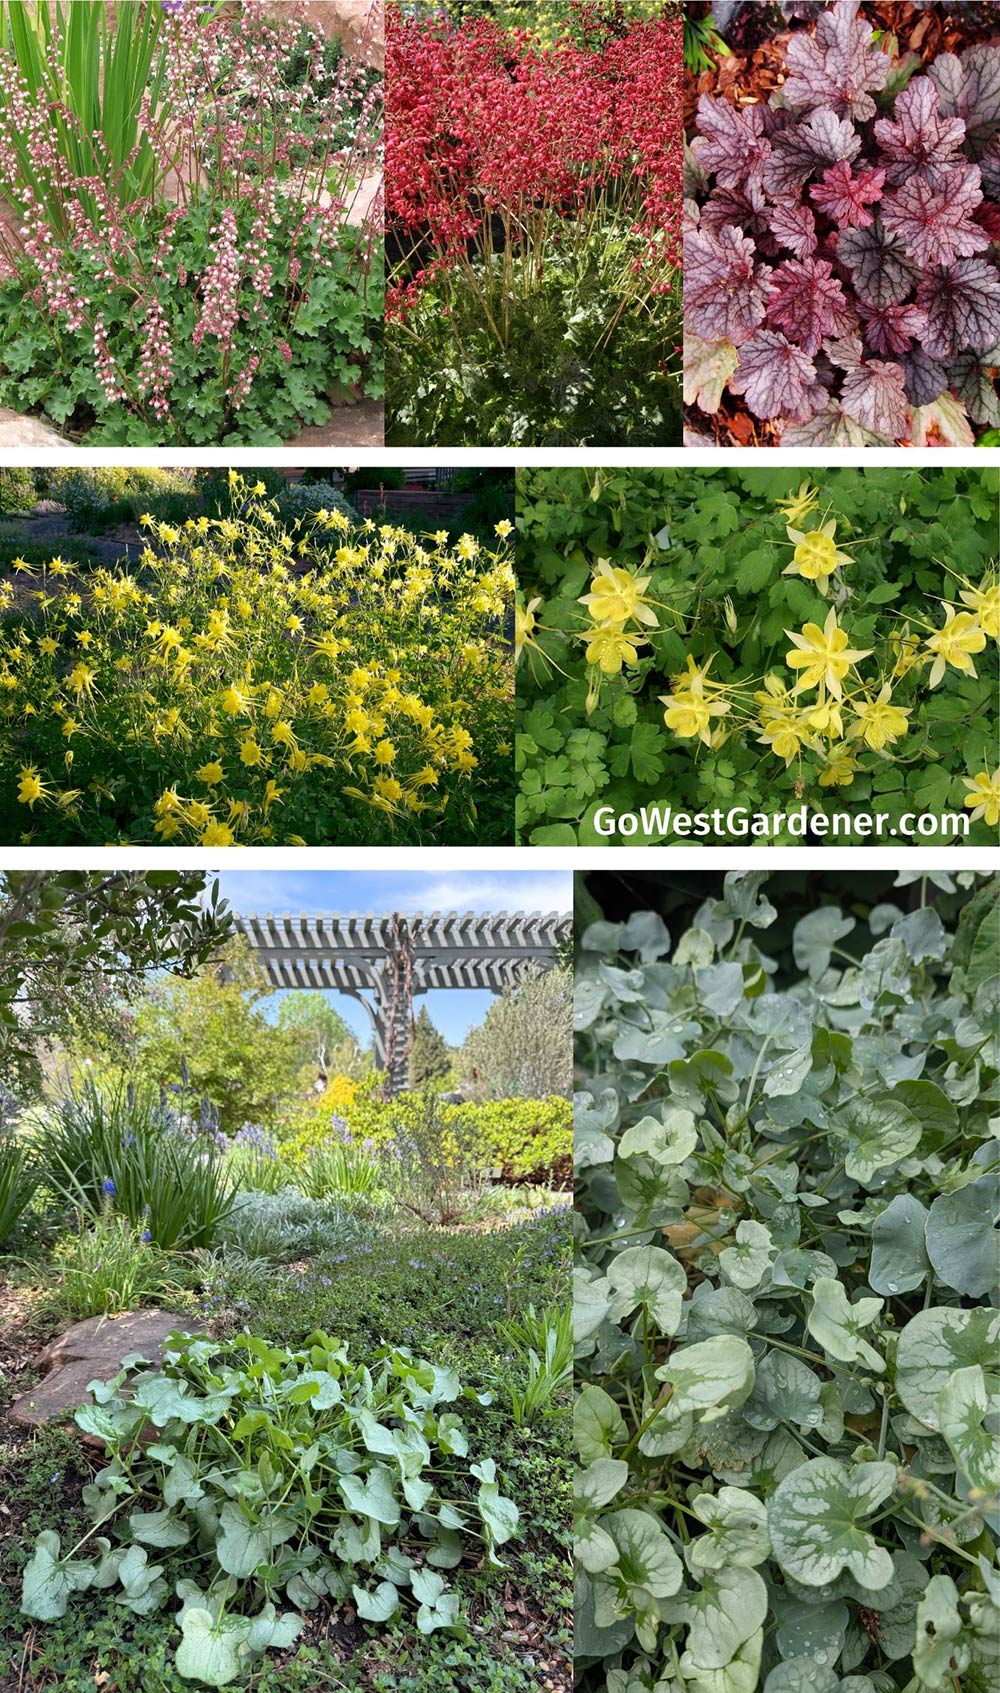
Dry shade perennials
Drought-tolerant plants for spots with tough light
More drought-tolerant native plants for Colorado gardens
Attractive to pollinators; this list includes selections of wild species
Additional resources that may interest you:

by Ann at Go West Gardener | Updated: Jun 20, 2025 | Gardening Tips and Tricks, In-ground garden, Western Container Gardening With Flowers
In my opinion, there is nothing that will suck the soul from your gardening body like hail
You can have your flowers looking SO DARN GOOD … And after a few minutes of hail, your Instagram-worthy flowers have become a sloppy, shredded mess.
Ugh.
Mama Nature doesn’t always play nice.
If hail destroyed your garden or your flowerpots, I’m so sorry. It’s demoralizing. You may be at a loss for where to even start cleaning up the hail damage.
If you’re wondering, “What do I do now?”, let’s chat about how to care for your plants after hail.
1) How to reduce your plants’ stress, so they perk up
Prozac for plants
It may be weird to think that your plants can get stressed, but they can. And a hailstorm counts as a VERY stressful event for your flower garden — not to mention, for you too!
Luckily, there are products that can help.
The micro-nutrients in seaweed and kelp can help your plants reduce stress. You may want to give your plants a mild, liquid plant food that contains seaweed or kelp, like Age Old Fish & Seaweed or Age Old Kelp.
Think of these products like Prozac for plants.
Your local, independent garden center should carry products that can help with plant stress too. If you visit your local store, ask them what they have in stock that they recommend for reducing plant stress.
2) How to clean up your perennials after hail, so they stay healthy
Perennials are your plants that return every year
Let’s chat about the hail damage you may see on your perennials.
Is there a lot of debris on the ground?
Rake it up. If you leave it, it can collect moisture and be a home for pesty insects or disease.

Do your perennials have broken stems?
If yes, trim off those stems. Take your finger and run it down the stem BELOW the break. Stop just above the first set of leaves you reach or at the first intersection with another stem. This is where to make your snip.
Did the hail break or destroy your flower blooms?
If yes, trim them off too.
Similar to trimming off broken stems, take your finger and run it down the stem below the destroyed flower bloom. Stop just above the first set of leaves you reach or at the first intersection with another stem. This is where to make your snip.
(Are you familiar with “deadheading?” This is basically what you’re doing here.)
Do you see tattered or hole-y leaves?
If the leaves are really shredded or dangling, cleanly trim off.
But if your leaves have mild damage, you may want to leave them. Why? Because the leaves are where photosynthesis happens. This is where your plant is making food and energy for itself, so it can grow new leaves and/or return next year.
Are your perennials bent over, but the stems aren’t broken?
A few days of sun and water may help your plants perk up. (It depends on the plant.)
There are some perennials you can aggressively trim back, and they should grow new leaves and flowers.
Two examples are Salvia (Salvia sylvestris) and Catmint (Nepeta), pictured below.
You can cut these plants back to just above the first or second set of leaves from the ground. They should push out new leaves and flowers for you over the next 3-4 weeks.
Don’t shear (cut) straight across the plant, though. Instead, trim each stem just above a leaf — like you’re deadheading.
Keep these plants well-watered after you give them an aggressive haircut.
It’s worth noting that timing matters.
Later in the summer, it’s best if your plants focus on getting ready for winter, rather than using their energy on new growth. If you get your hailstorm in the latter half of the summer, you may not want to aggressively trim back your plants. I know they may not look the best after hail, but this way, they can put their energy into becoming more “hardy” for winter.
If you’re unsure whether to cut your flowers way back or not, take photos before you go to your garden center for “plant Prozac.” Show them your photos and ask whether you can aggressively trim back the plants in your garden.
3) How to clean up your annuals after hail
Annuals are your one-summer flowers
Your clean-up depends on how bad the damage is.
Just a few minutes of hail can make a real mess of annuals.
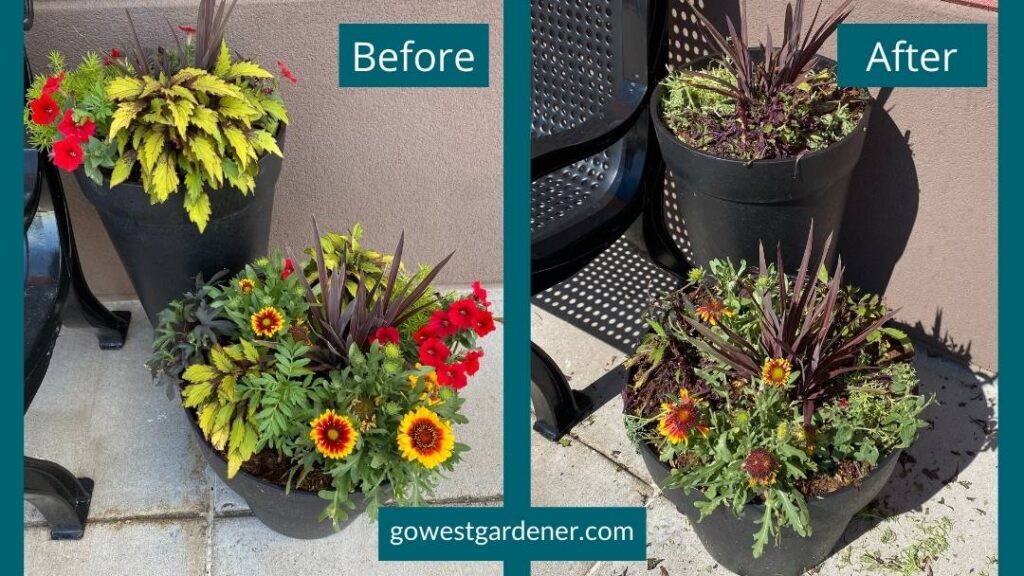
In the photo below, you’ll see a before and after picture of flowerpot hail damage. This is what flowerpots look like before and after hail. Oye!
The flowers that held up the best are the center red plants (Cordyline Spikes) and the red and yellow flowers in the foreground (a perennial known as Gaillardia or Blanket Flower). But most of the annuals in these flowerpots are in rough shape.
So, what can you do?
You can always follow all the steps above to see if they help. If the damage isn’t too bad, your plants may bounce back in a few days.
But if your annuals are mushy or they just don’t bounce back over the next few days, I’d pull them out.
Composting is a topic for another time, but if you do have a compost pile, you should be able to add these plants to the pile. To ensure you’re adding healthy plant remains to your compost pile, the key is to clean up soon after the storm.
If your hailstorm happens early in the summer…
You can plant new annuals.
Later in the summer…
The garden centers should have pretty flowers that look autumn-y. You can plant them if you’re really missing the color.
Otherwise, wait until next year and give it a fresh start.
4) Take photos
I know the last thing you may want to do is document the devastation, but we tend to have short memories as gardeners.
Or maybe we just block hail damage out of our memories!
It’s helpful to take photos of your plants before you clean them up, so you remember which plants did better in hail than others.
Then, create a folder on your phone called: Garden Hail Damage. Put the photos in it, so they’re easy to find.
If you continue to get hail storms, you may want to transition to plants that are more hail-resistant.
A word of encouragement…
I have a flower lover on my email list who closely followed all these tips after a “heartbreaking” hail storm last summer. She said her plants came back bigger and more beautiful than before the hail storm.
So, please know, there’s hope!
Related tips that may interest you:
by Ann at Go West Gardener | Updated: May 20, 2026 | Gardening Tips and Tricks, Western Container Gardening With Flowers
9 ways to prepare for hail to minimize damage to your western garden
Hail can leave you wanting to yell, “WHHHHYYYYYYYY?????” to Mama Nature. Sometimes, thunderstorms pop up so suddenly, there’s very little that can be done except for cleaning up the damage.
But other times, you may see thunderstorms in the forecast, and you can plan ahead.
In this tip, you’ll find options for how to protect your flowers from hail.
With a little planning, you can reduce hail damage and keep your sanity (and garden) intact.
Here’s how to protect your flowers from hail.
#1: Plant drought-tolerant flowers in your garden.
One of the easiest ways to minimize hail damage and reduce your clean-up after a hailstorm is to plant drought-tolerant flowers. These waterwise plants are more than just pretty. Many of them are as tough as heavyweight champs.
You’ll see a couple examples of drought-tolerant flowers that are more resistant to hail below, such as Coreopsis and Salvia (sometimes called Meadow Sage).
Find out why drought-tolerant plants are more resistant to hail and see examples here >>
#2: Plant your annuals in flowerpots, rather than in the ground.
Annuals are your flowers that bloom for one summer, but typically don’t return.
Unfortunately, they tend to be vulnerable to hail.
When you plant your annuals in pots, you can keep them on covered porches or under overhangs, so they’re out of harm’s way. If you want to put your pots in your garden, you can quickly move them to a protected spot in a hailstorm (assuming the pots aren’t too heavy).
I pull my pots under an overhang on our porch when severe thunderstorms are in the forecast or when I see red storm cells approaching on the radar.
#3: Proactively move your flowerpots to a protected spot if hail is in the forecast.
I know some of your pots may be too heavy to move, so let’s focus on your pots that aren’t too heavy.
You may want to get “plant caddies” to help you.
Nope, you aren’t recruiting anybody from the local golf course.
Plant caddies are devices with wheels that make it easier for you to roll your pots. I keep my flowerpots on plant caddies all the time. That way, I’m ready to roll them when bad weather is coming in.
The home improvement stores often carry plant caddies. You also can google them to find more decorative versions.
If you can pull your pots under a tree, that sometimes helps too.
#4: Cover vulnerable plants in your garden when hail is in the forecast.
Get creative!
You can use a variety of materials to cover your vulnerable plants.
For example, you can:
- Cover your plants with trash cans, laundry baskets, cardboard boxes, buckets, empty flowerpots and plastic storage bins turned upside down.
- Use outdoor lawn furniture to cover your plants.
- Hang fabrics and netting that protect against hail.
Some netting is specifically made for hail, like “anti-hail netting.” But these fabrics can be hard to find when you need them, and they can be pricey.
So, don’t be afraid to get creative!
I know many gardeners who use other fabrics, such as breathable netting from a fabric store or metal hardware cloth.
I even have one neighbor who makes tents over her flowers with old shower curtain liners.
(How’s that for creative?)
Ideally, what you’re trying to do is reduce the force of the hail and lower its kinetic energy, so it does less damage.
Hopefully this goes without saying, but don’t use anything as a cover that you don’t want to get destroyed. If your hailstorm is intense enough, it can damage just about anything.
#5: Don’t cover your flowers for long amounts of time.
If you’re using something that isn’t breathable to cover your plants, don’t keep the cover on for too long.
You don’t want to accidentally cook your flowers, particularly on warm days.
If you’re going to work for the day and hail is in the forecast, cover your plants with a material that’s breathable, like netting. Or, use something like a laundry basket or a lawn chair, so the air can still move and you aren’t trapping heat.
#6: Be on the lookout for thunderstorm clouds.
Thunderstorm clouds start out as tall, white, puffy clouds that resemble cauliflower heads.
Often, right before hail, part of the sky has an aqua green color to it. Check out photo below, so you can see what I mean.
The second I see that aqua color in the sky, I jump into action!
These are your signals to leap into flower plant protection mode if you have vulnerable plants that you want to protect.
#7: Watch for orange, red or purple storm cells on your weather app.
Be on high alert when you see orange, red or purple storm cells on the radar moving your way. These colors indicate severe storm cells.
Hail may not be far behind.
Photo credit: Weather.com
#8: Find a neighbor who shares a love for flowers and create a buddy system.
Let each other know when hail is coming.
#9: Think about what kind of mindset you want to have as a western gardener.
There are two ways to think about hail:
- You can be proactive in trying to prevent it, following tips like these to protect your flowers from hail.
- You can go with the flow. You can choose not to worry about hail, welcoming whatever Mama Nature throws at you — rain some days, hail some others. You’ll let Mama Nature do her thing and see what happens.
Full disclosure, I fall into the first category. But I have friends in the second category, and they certainly have a more carefree gardening experience.
It’s up to you!
If these tips were helpful, you may also like:
by Ann at Go West Gardener | Updated: May 20, 2026 | Best Flowers for Colorado, Utah & Similar States, Gardening Tips and Tricks, Waterwise Gardening in the Intermountain West
When you live in states like Colorado, Wyoming and Texas, you may not get hail every year, but some years, you’ll get it 2 … 3 … 7 times.
(I’m not crying. I have something in my eye.)
It’s like playing the lottery, except hail is a prize you DON’T want to win.
In this tip, you’ll get the scoop on plants that do better in hail than others, so you won’t have as much damage and clean-up.
Flower plants that are “drought tolerant” or “xeric” — meaning they need less water — tend to do better in hail than others.
If “drought tolerant” makes you think you can only plant cacti, I have good news.
You have LOTS of options for beautiful, drought-tolerant flowers. They just may not be the flowers you know from other parts of the country.
In the photos below, you’ll find examples of drought-tolerant, hail-resistant plants.
Hyssop (Agastache)
Salvia (Salvia greggii)
Ice plant (Delosperma)
Salvia or Garden Sage (Salvia nemorosa)
Coreopsis
So, why can drought-tolerant plants resist hail?
Often times, drought-tolerant plants have narrow leaves, small leaves or heavier, waxy leaves.
Many of them also tend to stand more upright in a garden.
On sunny days, these features help protect them from the sun’s intense rays and help the plants hold onto water.
But it turns out these traits also come in handy when it comes to hail.
Typically, drought-tolerant plants don’t get as damaged by falling ice chunks.
This means you’ll have less plant debris to clean up after a hailstorm. (Less work!) It also means these plants bounce back better after hail.
So, as you plan your western garden, think about planting drought-tolerant flowers.
Keep in mind, it all depends on the hailstorm you get. Every plant has its limits. Unfortunately, there is no perfect plant for hail.
Ornamental grasses tend to do better in hail too.
Some ornamental grasses are more drought tolerant than others.
Regardless, ornamental grasses do share traits in common with drought-tolerant plants.
For example, they tend to have really narrow leaves.
You know that expression, “Bend, but don’t break?”
Your grasses may get flattened by hail, but they may not break. This means they may perk back up with some sunshine and water.
Once again, the damage to your grasses depends on how bad your hailstorm is.
Plants that thrive in other parts of the country tend to struggle more in hail.
Plant that are vulnerable to hail damage include:
- Woodland plants with larger leaves
- Plants with big flower blooms and
- Most types of annuals (the colorful flowers that bloom through the summer but won’t return next year)
They’re easily shredded by hail stones. This means you’ll have more clean-up, and you may need to replace destroyed plants.
Below you’ll find examples of plants that are vulnerable to hail damage.
Hostas
Begonias
New Guinea Impatiens
What does hail damage look like?
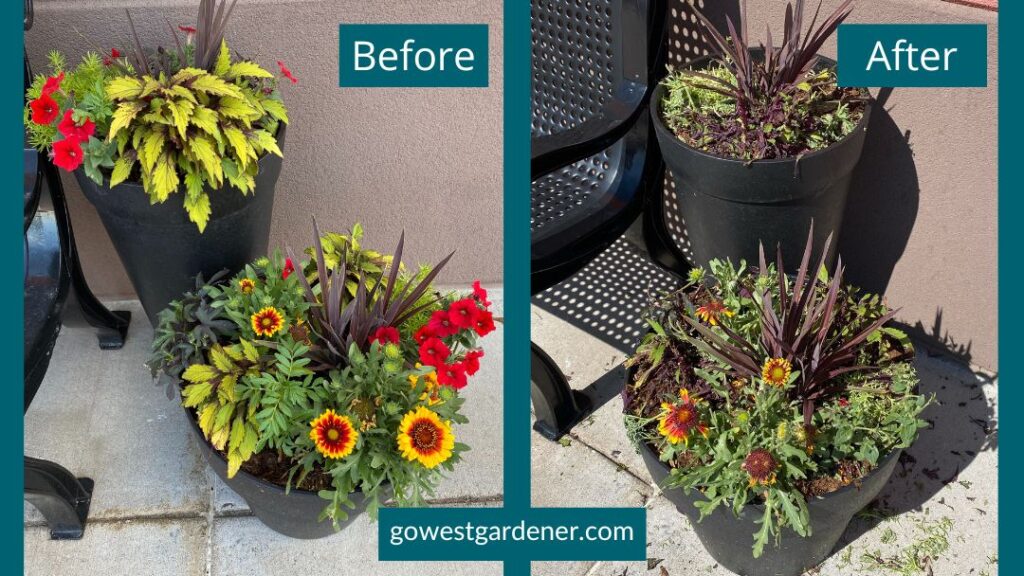
Check out the flowerpots below: pre- and post-hail. I took these photos one week apart. Ugh!
The flowers that held up the best are the center red plants (Cordyline Spikes) and the red and yellow flowers in the foreground (a perennial known as Blanket Flower or Gallardia). But most of the annuals in these flowerpots have been shredded. There is very little left of them.
Related tips that may interest you:
by Ann at Go West Gardener | Updated: May 20, 2026 | Gardening Tips and Tricks
Trimming off the dead blooms from your flowers can make them look even prettier.
It’s like giving them a fresh, new haircut!
But when you remove the dead blooms, should you pluck them by hand or with a tool?
I got this question and wanted to chat about it here.
For many flowers, using your fingers to remove the dead blooms is fine.
Once you get the hang of trimming off the dead blooms on your flowers (known as “deadheading”), you’ll be casually passing by your flowerpot with a cup of coffee in hand, and those dried-up flowers will be calling to you.
It’s hard to resist the urge to stop and pinch them off with your fingers.
Tip: It helps if you have longer fingernails, and you aren’t wearing gloves.
But, as I’ve learned the hard way…
Pinching off dead flowers with your fingers has its drawbacks.
- You may accidentally break off parts of the plant you didn’t intend to. And for me, it always seems to be a really pretty flower that’s about to open or a whole stem with new buds. (Ack!!!)
- It’s hard to be 100% accurate where you’re pinching a plant with your fingers. The stems don’t always break off cleanly or where you wanted. You can end up with some cuts that aren’t great for the plant and leave dead, stick-like stems. Not exactly the look we’re going for!
- Your hands can get sticky, depending on the plant. (I’m looking at you, petunias.)
- Some flower stems are just too thick to pinch with your fingers.
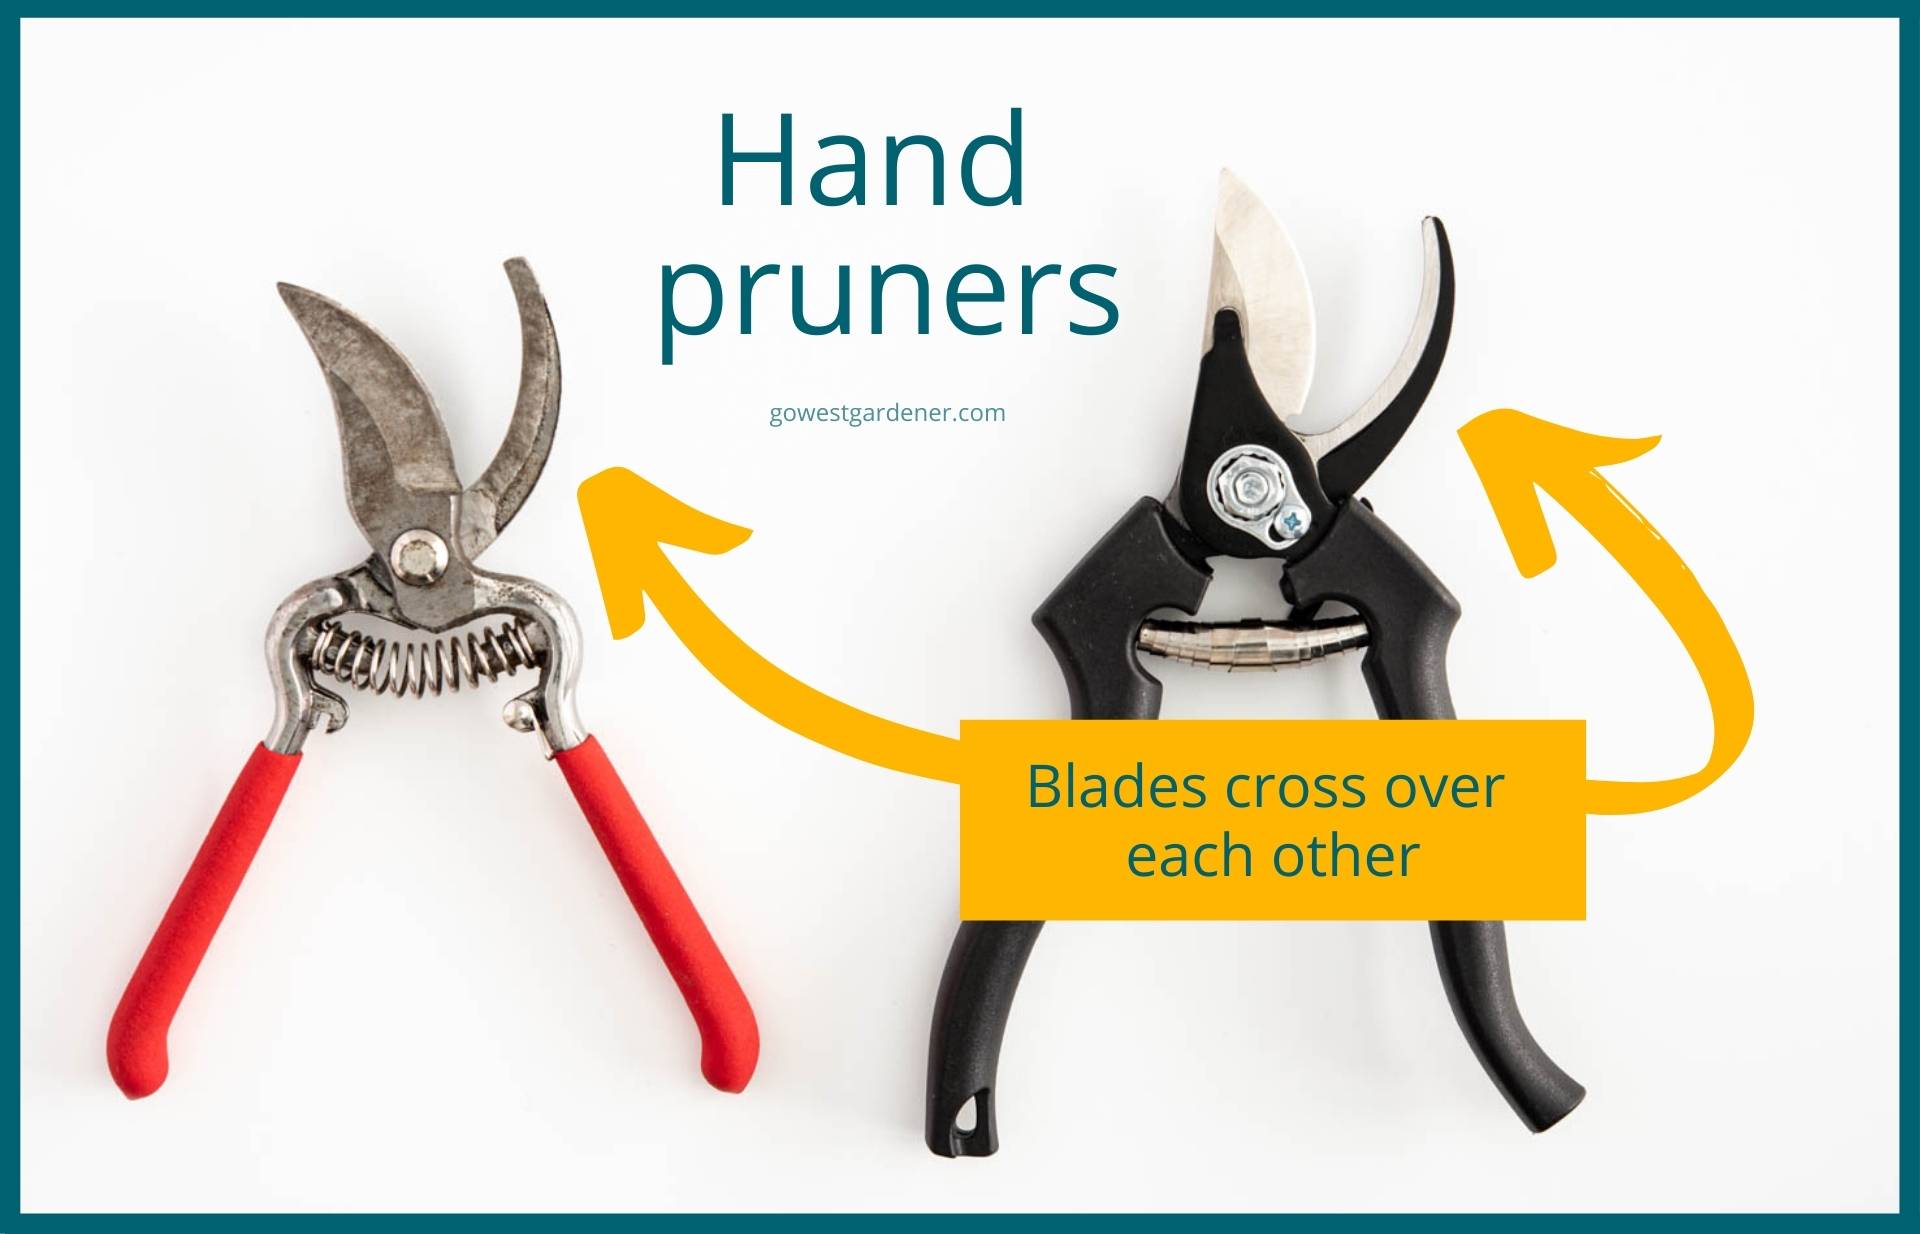
So, instead, consider using floral snips or hand pruners.
I use floral snips most of the time.

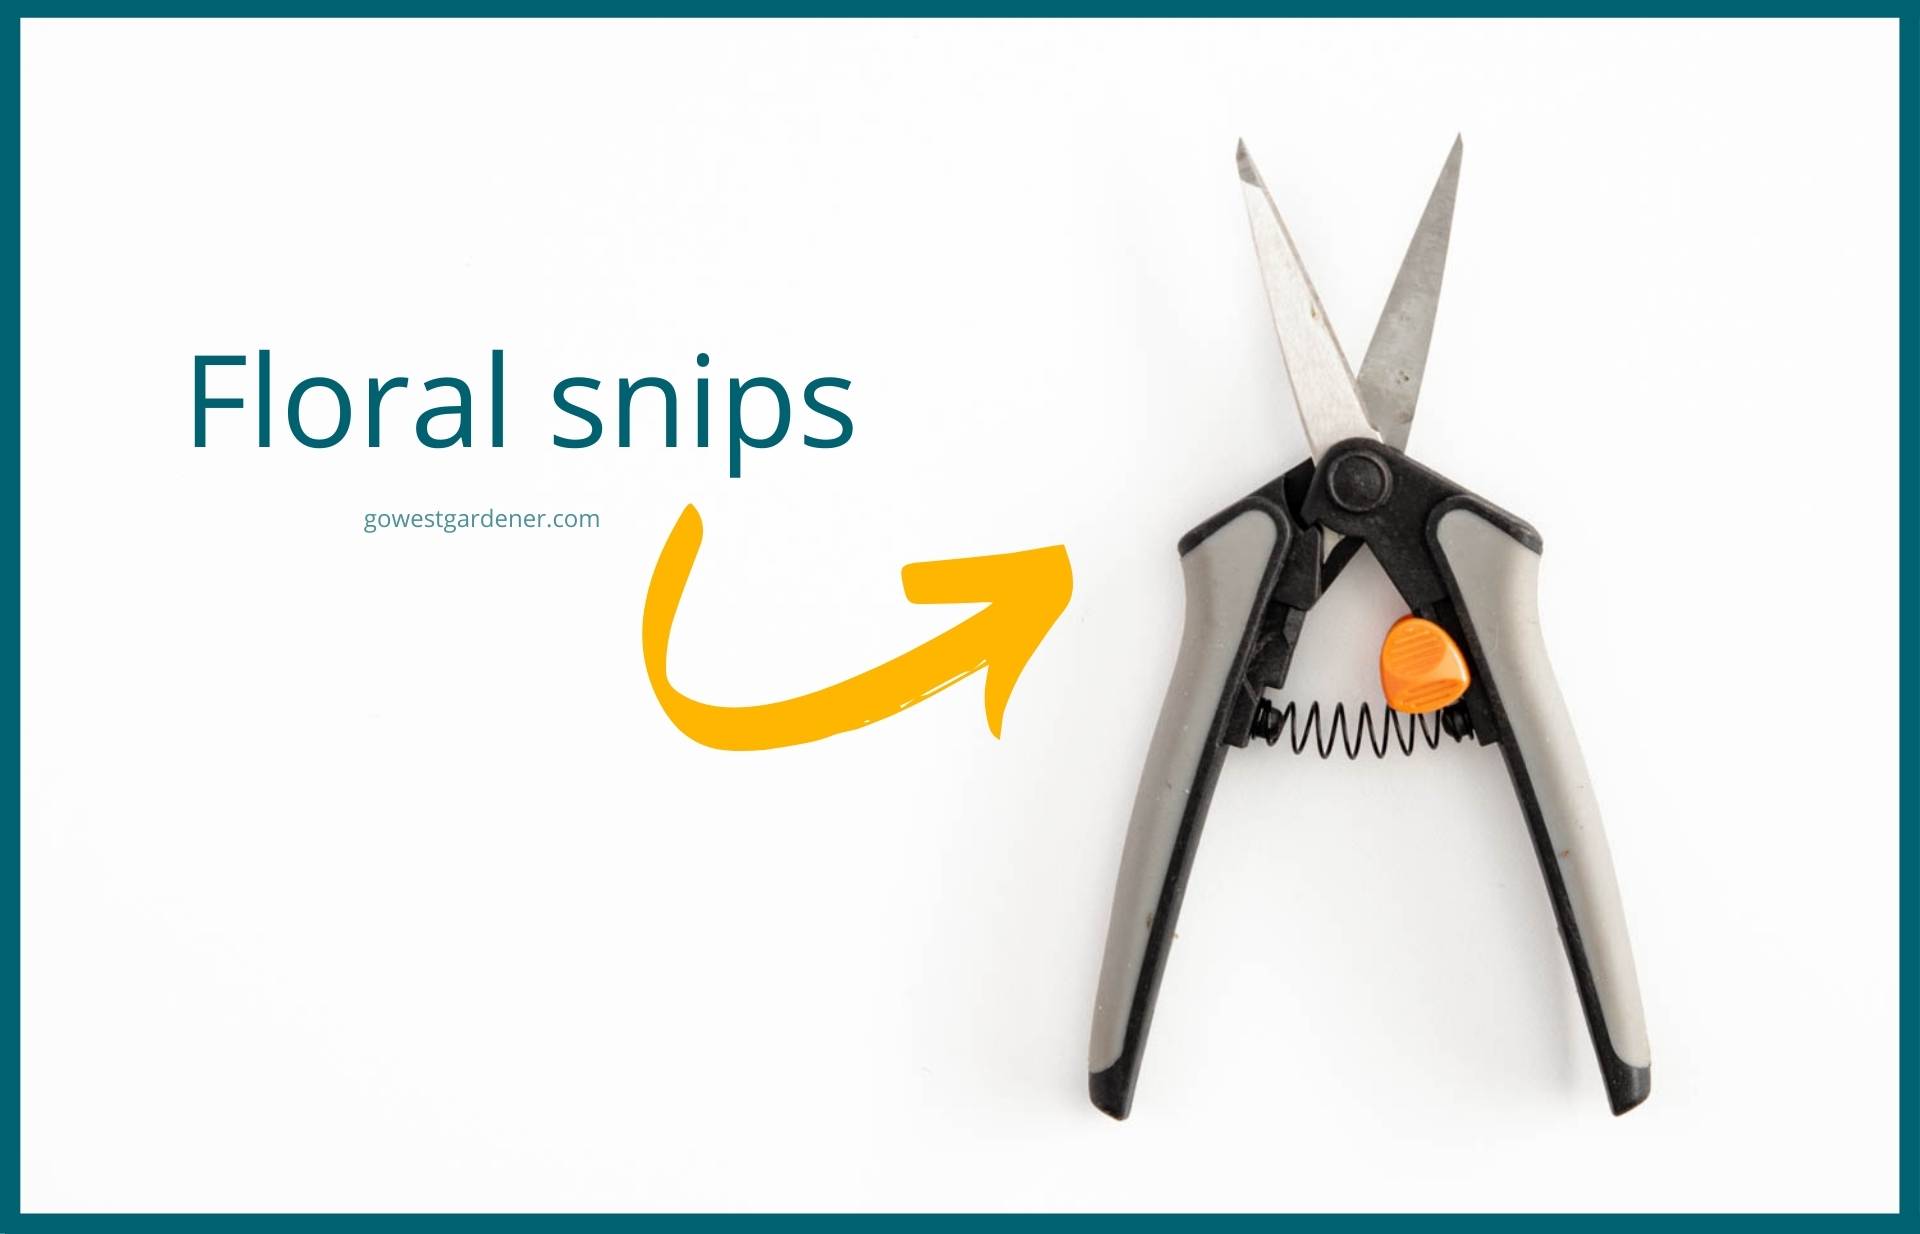
Floral snips are a small pair of scissors for trimming plants.
Tip! I leave my floral snips in an inconspicuous spot outside my door, so I can quickly pick them up when I walk outside. This helps me resist the urge to trim dead blooms with my fingers.
It also helps me trim dead blooms as I see them, rather than waiting until the plant is full of them.
(Translation: Keep those colorful blooms going!)
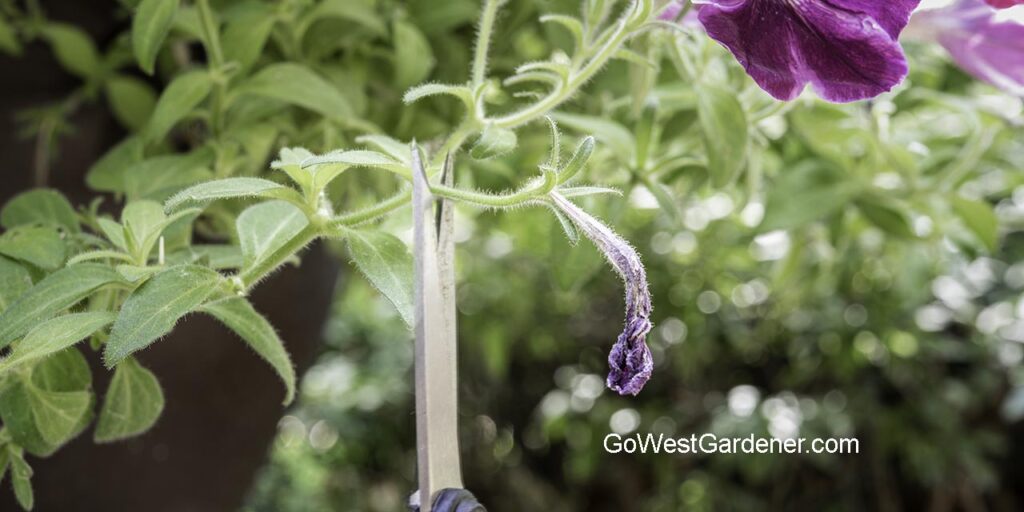
Floral snips are awesome because you can be VERY accurate in where you’re making a snip.
In the photo below, check out the precision you have when trimming off a petunia bloom.

Plus, if you want, you can wear gloves to keep your hands clean.
Floral snips work really well on flowers with thin stems, which are probably most of the flowers in your containers and many of the flowers in your garden.
But learn from my mistakes!
Don’t use your floral snips to cut thick-stalked plants.
You can accidentally squeeze the plant stems (not good) and really dull your snips.
Also, this may go without saying, but keep your floral snips for trimming plants.
My husband likes to borrow my floral snips for impromptu sprinkler projects, like cutting lines of tubing. The snips are never the same afterwards.
Moral of the story:
Hide the floral snips from your industrious Honey. 🙂
If you’re cutting a thicker-stemmed plant like a rose stem or a “cut flower”…
I suggest using hand pruners.
Hand pruners are a sturdier and bigger tool.
“Cut flowers” are the flowers you see in bouquets. Often times, they have thicker stems.
When choosing hand pruners, make sure the metal blades cross beside each other, rather than meeting at a center point.
This gives them extra strength for cutting.
It also ensures you won’t break or squeeze your flower stalks.
Where to find floral snips & hand pruners (new or used)
You can find new floral snips and hand pruners at your local garden center.
In the spring and early summer, you’ll often see them at places like Costco too.
If you prefer used garden tools, check out estate sales or websites like NextDoor, Craig’s List or OfferUp.
When you get used garden tools, clean them with soap and water and a disinfectant when you bring them home. This will help you lower the risk of spreading weeds or diseases to your plants.
I like the Fiskars brand for floral snips and hand pruners.
I’m not an affiliate for them. I’m just sharing their name for your convenience.
Related topics that may interest you:
by Ann at Go West Gardener | Updated: Jan 28, 2026 | Gardening for Pollinators, Gardening Tips and Tricks
I originally published this article in 2022. Enjoy!
Have you ever gotten a puppy or kitten?
Chances are, you did a few things to get your home ready:
Bought special food… Stocked up on toys… Rolled up rugs… Shut bathroom doors, so Buddy (or Mittens) didn’t turn your toilet paper rolls into New Year’s Eve confetti…
The point is, you made a few, small tweaks, so your home was safe and welcoming for your furry friend.
The same is true for pollinators.
You can make your garden MUCH more welcoming for bees and butterflies with just a few, small tweaks.
For example:
- Plant flowers that bloom in the early spring and fall, as well as the summer. You’ll give pollinators nectar and pollen when it’s hard to find.
- Wait to clean up your garden until the spring—yep, put your feet back and relax in the fall. You’ll give your pollinators a safe place to spend the winter.
- Skip using landscape fabrics (aka, weed barriers). They make it hard for bees to nest in the ground. Not to mention, they break down over time, and weed seeds can still get in.
Here are 10 simple ways to make your garden a 5-star destination for bees and butterflies.
Of course, even if you’re diligent, puppies and kittens can leave their mark on your home.
Many of us have chew marks on a coffee table or scratch marks on a sofa to prove it.
Or both.
(Ahem.)
The idea of having a perfect home goes out the window with furry friends.
It helps to have similar expectations with pollinators.
If you want to create a garden where they can thrive (and we’re on Team You if you do!), then know that they may leave their mark.
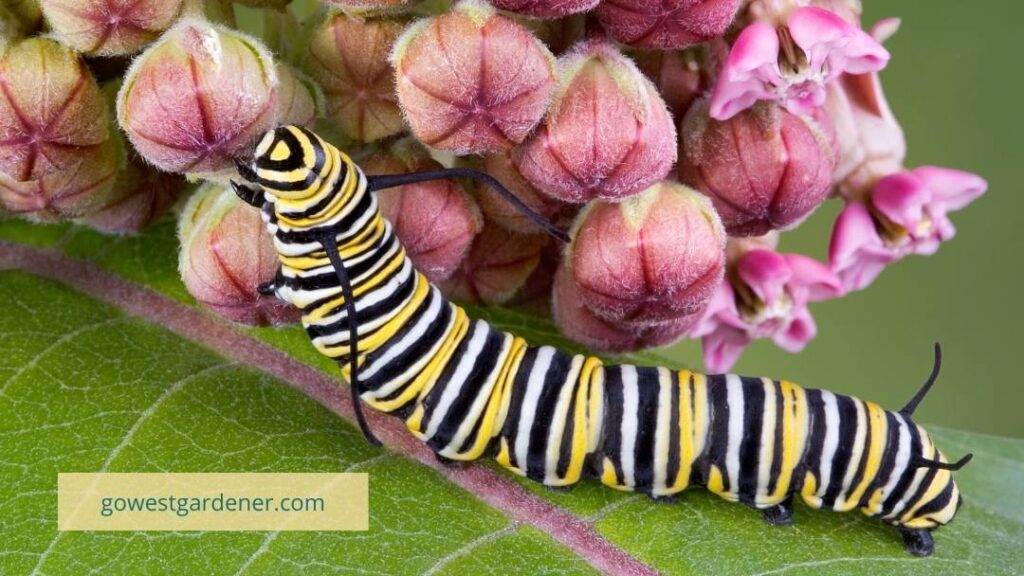
For example, some bees—known as leafcutter bees—will cut round holes in plant leaves. They use these leaf parts to make little nurseries for their baby bees. The holes typically don’t harm your plants. They’re just cosmetic.
Butterflies have babies—caterpillars—that may chow down on certain plants like hungry-hungry hippos.
Yep, whether you’re welcoming a puppy or kitten… or a bee or a butterfly… there’s often a wee bit of chaos that comes with it.
So, why not let go of flower garden perfection?
Embrace the perfectly imperfect.
And pat yourself on the back that you’re creating an amazing home for pollinators.
Related topics that my interest you:
by Ann at Go West Gardener | Updated: May 20, 2026 | Best Flowers for Colorado, Utah & Similar States, Gardening for Pollinators
Despite their growing popularity, some native plants can be tricky to find at many garden centers. Here are different places to buy native plants in Colorado.
Plant sales at local botanic gardens
These events are often held at local botanic gardens in the late spring. I’ve had good luck finding native plants that have been difficult to source in garden centers and plant nurseries. Not every botanic garden offers plant sales, but many do.
Native plant sales and swaps with local non-profits
There are a variety of non-profits in Colorado that offer native plant sales, seed swaps and native plant swaps. If you’re new to a seed or plant swap, think of it like a cookie exchange. You bring plants or seeds to share, and you return home with new additions for your own garden. Often times, you don’t even have to take plants or seeds to share. (Though, it’s appreciated if you do!)
Here are just a few examples:
Local, independent garden centers
There are local, independent garden centers that carry native plants and/or seeds. The Rocky Mountain Audubon Society has compiled a list of some standout garden centers in Colorado for native plants (as well as native plant seed companies). On your next visit to your favorite independent garden center, ask about their selection of native plants.
Tip: Native plants often don’t look as showy at the garden center as other flower plants. Don’t let that deter you! Plant Select has put together a quick video with a few helpful buying tips for native plants.
Native seed companies
Native seed companies can be a good place to look for native plants, especially native grasses and plants you can’t find elsewhere. Seeds also can be a cost-effective way to buy plants.
Online retailers
You can find online retailers that sell native plants—for example, High Country Gardens, Prairie Moon Nursery and Prairie Nursery. Worth noting, online retailers are located across the country, and they sell plants to people in different regions. With that in mind, look for plants that are native to our region of the country. And be sure to read the description of the plants to make sure they fit our growing conditions.
Here’s just one reason why: Many plants that are native to places like the upper Midwest and East Coast need a lot more water than we get in Colorado and the semi-arid West.
Gardens in a Box from Resource Central
Resource Central is a Front Range non-profit that offers Gardens in a Box—pre-planned flower gardens that are well adapted for Colorado. The majority of their plants are native plants. Gardens in a Box go on sale mid-winter and mid-summer for pick up in the late spring and early fall.
Related topics that my interest you:
by Ann at Go West Gardener | Updated: May 20, 2026 | Garden design Ideas, Gardening Tips and Tricks, Western Container Gardening With Flowers
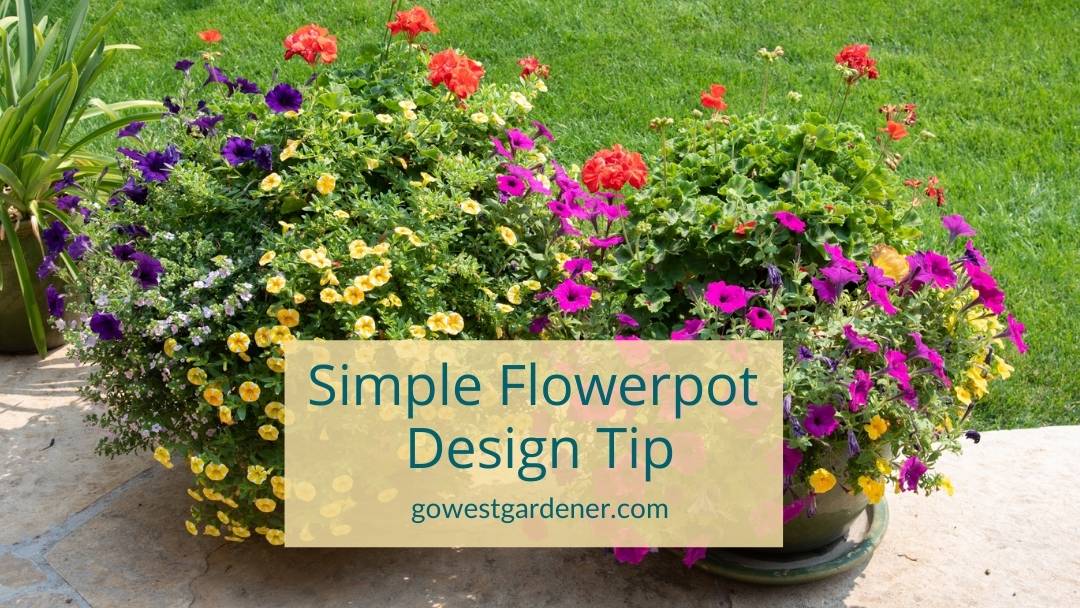
Looking for a design tip to make your flowerpots look prettier this summer?
Combine flowers of different heights!
Planting flowers of different heights can help you create visual interest.
Think of a city skyline or a beautiful mountain range. There are different layers that make things interesting, right?
The same is true for the flowers in your flowerpots.
In gardening lingo, this design concept is known as thrillers, fillers and spillers.
- Thrillers are your tall flowers.
- Fillers are your mid-size flowers.
- Spillers are your flowers that spill out of the flower pot.
if you find these words hard to remember or confusing, then…
Think about this flowerpot design tip in western terms.
You want your flowerpots to have mountains, foothills and waterfalls.
Your mountains are your tall flowers that add height and a strong focal point to your flowerpots.
For example, you could use a tall ornamental grass or a gorgeous red canna lily, like the one pictured below. (Just like the mighty peaks in a mountain range, these tall flowers are your thrillers.)
Your foothills are your mid-size flowers that add interesting textures or pops of color, like the yellow Marguerite daisies below. (These flowers fill your flowerpots.)
And your waterfalls are your flowers that spill out of your flowerpots and cascade down the sides, like the light-green licorice plant and lime-green sweet potato vine in the photo below. (These flowers are your spillers.)
When you go to the garden center, how do you know whether a flower will make a good mountain, foothill or waterfall?
1. Notice which direction the plant is growing.
Even in the garden center, you can usually tell whether a flower is growing upright or growing down.
If you hold up a plant that seems to be trailing from its container, it could be a great flower to spill from your flowerpots like a waterfall. The pink petunias below are a good example.
2. Look at the plant tag to check your flower’s final height.
Often times, the size of the flower in the garden center is only a fraction of how big that flower will grow by the end of the summer.
For example, a flower that’s about 8” tall in the garden center may grow several feet tall over the summer!
When you pick up flowers at the garden center, check their plant tags to see how tall they’ll grow.
If you pick up a flower that grows 14” to 36” tall, it could make a great mountain.
Flowers that aren’t quite as tall — 6” to 14” in height — can make great foothills.
Keep in mind, the height suggestions above are just that: Suggestions! Gardening is personal, so you can do whatever looks good to you.
For this flowerpot design tip to work, do you have to include mountains, foothills AND waterfalls?
This is a matter of personal preference.
Personally, I love all three together.
But you can definitely go with just two.
The flowerpots below are hanging in my neighbor’s yard. The pots are small, so she just used foothills and waterfalls. She didn’t have enough room for all three.
And the flowerpot below is really big, but the gardener made a strong statement with just mountains and foothills.
If you liked this flowerpot design tip, you may also like: