by Ann at Go West Gardener | Updated: Sep 12, 2025 | Best Flowers for Colorado, Utah & Similar States
It may seem like a strange time to chat about spring flowers…
… when we have pumpkins and Halloween decorations appearing in stores.
But if you’re interested in growing spring flowers…
Autumn is the ideal time to plant spring bulbs in most parts of the West.
For example:
- In most elevations of Colorado, the ideal times to plant spring bulbs are typically late September and October.
- In northern Utah, the ideal times are usually October and early November.
Yep, you plant these flowers in the fall — not the spring!
Weird, right?
Okay, technically, you plant their bulbs.

Think of a bulb like a battery for the plant.
It stores energy (food and water) for the flower.
It may seem counter-intuitive that you plant spring bulbs in the fall, but:
- Bulbs need to go through a cold period, so they can come up and give you big, showy color in the spring.
- They also need a little time to establish their roots before the ground freezes.
Here are 3 popular spring flowers for western gardens.
These spring flowers offer beautiful pops of color, and they’re relatively low maintenance. (Cheers to that!)
Once planted, these flowers can return for several years with minimal effort.
Tulips
(officially, Tulipa)
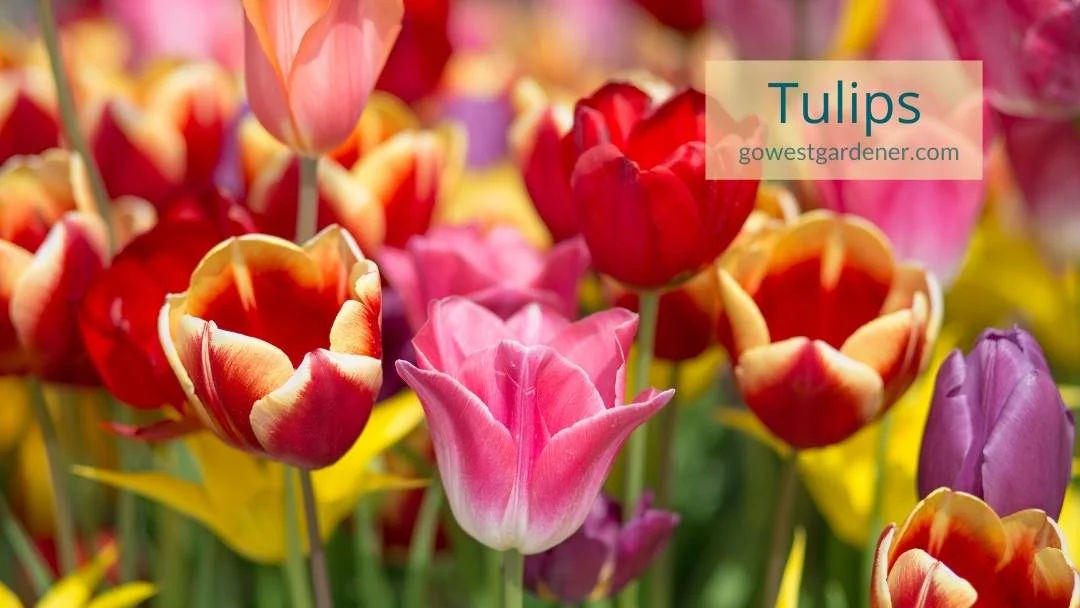
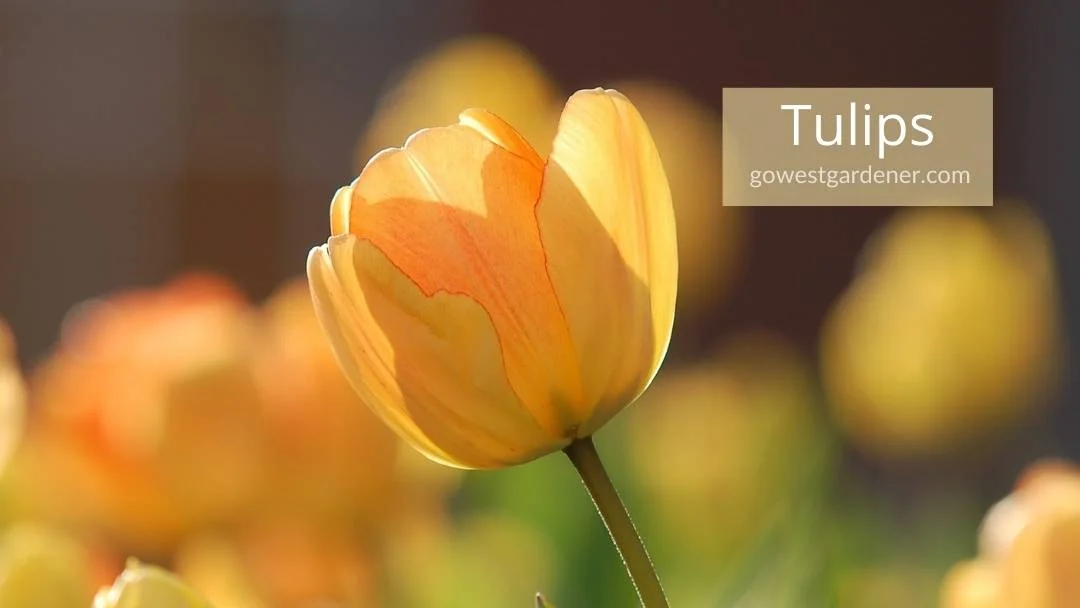
This is what tulips look like. They come in a WIDE range of colors.
Tulips bloom in the spring, but not all at one time.
There are early, middle and late spring tulips.
This means that some start blooming earlier than others.
The package of bulbs you buy or the signage at the garden center should tell you when the tulips will bloom (early, middle or late spring).
That way, you can pick bulbs with the bloom at different times, so you can get longer-lasting color.
Tulips like sunny conditions and soil that drains well.
If you have a damp spot where water sits in the ground or if your soil is dense clay, it’s probably not the best place for tulips.
What’s dense clay like, you ask?
Imagine sticking your shovel in the ground, and the soil sticks to your shovel like bubble gum to a shoe.
When clay soil is damp, it’s sticky, heavy and dense. It’s tough for water to drain.
Tulips don’t mind if the ground is on the dryer side during the summer, which is good for our semi-arid summers in the West.
In my opinion, the biggest downside to tulips is…
… that animals LOVE them.
Deer, rabbits, squirrels, voles. Take a number!
In my back garden, squirrels decapitate my tulips every spring, just as the petals are opening.
I’ve tried a variety of suggested remedies, from animal-repellent sprays to cayenne pepper. (Seriously.)
The only thing I’ve found that works is to fence the tulips off.
Not the prettiest look, ahem.
So, if you have critters, you may want to check out the other spring flowers below.
Daffodils
(officially, Narcissus)
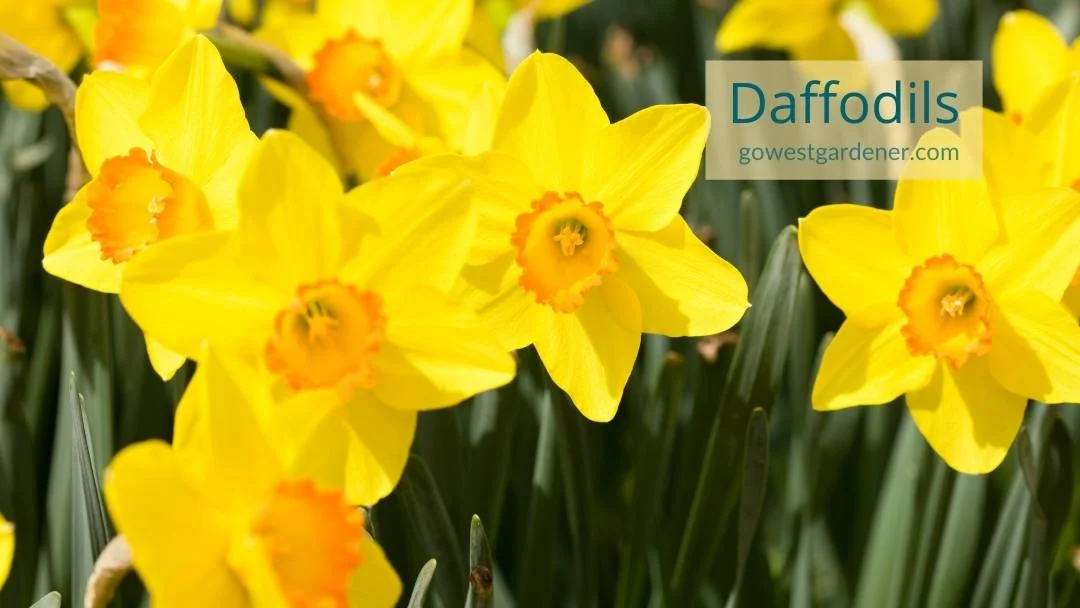
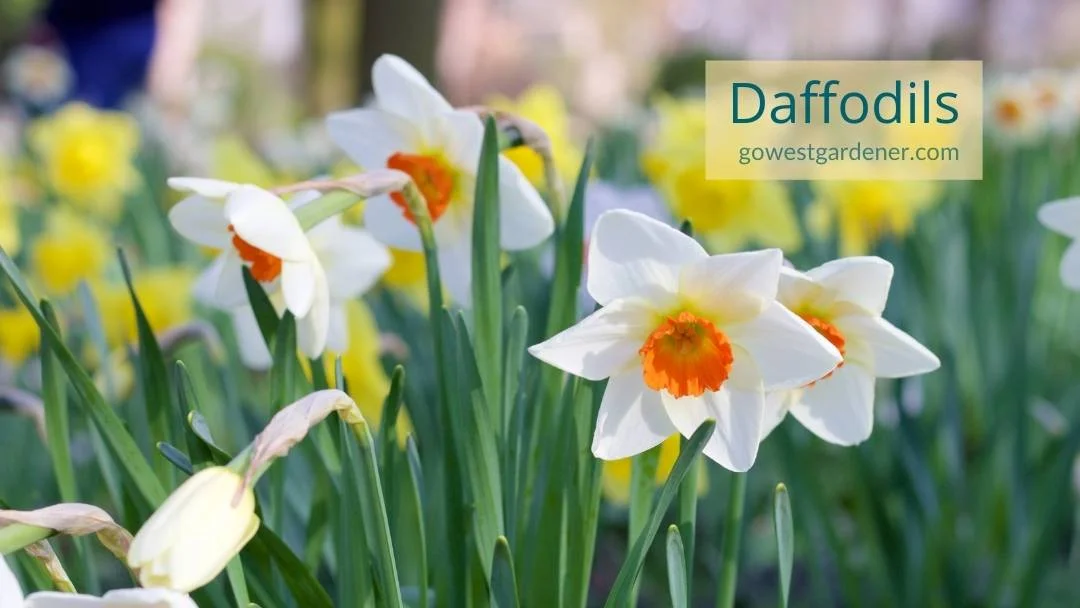
These are daffodils. They come in colors like yellow, white, orange, peach or pink.
Typically, daffodils prefer sunny conditions and soil that drains well.
You may be able to get away with a partially sunny spot, but your daffodils may not bloom as well.
In the semi-arid west, you may want to plant your daffodils near a downspout or a low spot in your garden.
Why?
Daffodils tend to be happiest with moist (but not wet) soil.
If the ground is too wet, daffodil bulbs will rot.
Daffodils are not only beautiful, they’re also resistant to many animals.
YESSS!!
Normally, deer, rabbits and other rodents avoid daffodils. That’s a plus if you live in an area with your fair share of critters.
(Daffodils can be toxic to dogs, so keep that in mind if you have fur babies.)
Allium
(commonly known as Ornamental Onion)
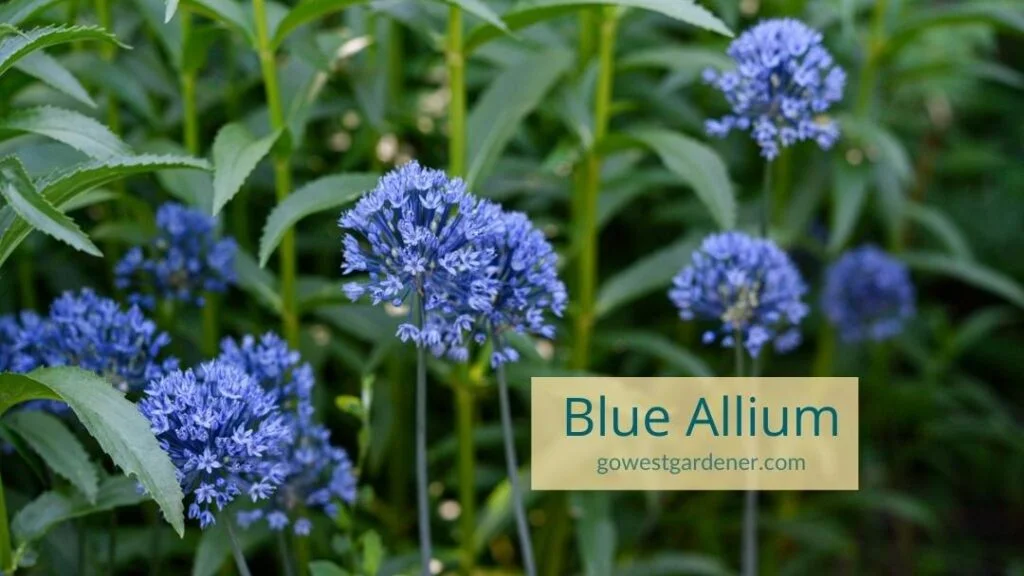
Allium flowers add a hint of whimsy to your garden. They look like giant lollipops!
They’re one of my favorite spring flowers.
You can find allium flowers in purple, white and even blue.
Yes, BLUE!

Similar to tulips and daffodils, allium will give you the best show when you plant them in places in your garden that get a lot of sun.
And like the other spring flowers we’ve discussed, allium flowers bloom at staggered times.
Allium are related to onions.
In fact, they’re commonly referred to as “ornamental onions.”
Deer are not big fans of these plants.
Rabbits tend to avoid most allium as well.
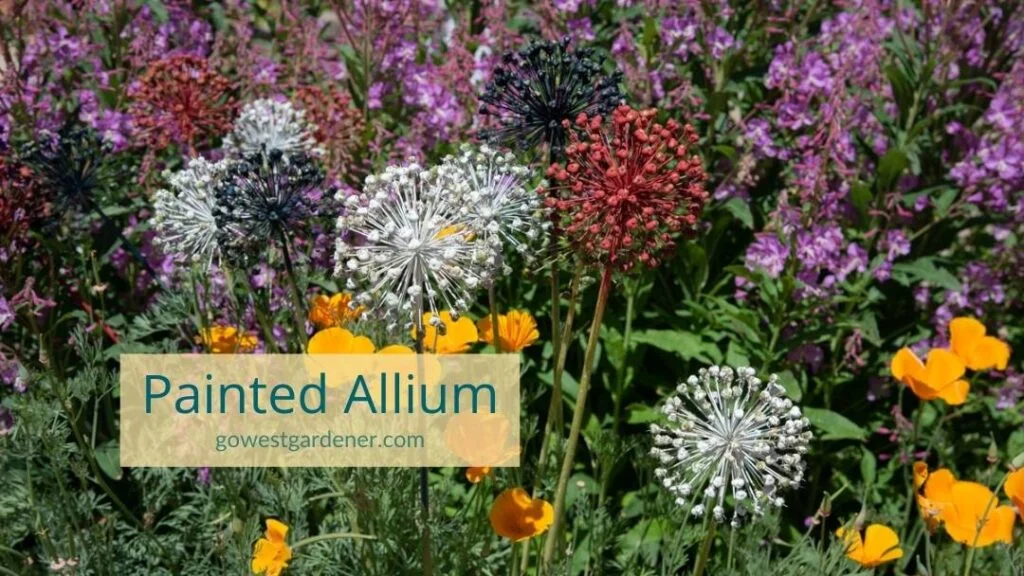
When allium flowers are done blooming, you may see gardeners spray-paint the finished blooms.
Check out the photo below for an example.
I think this is a fun trick to highlight the colorful, round shapes after the flower petals fall off.
You also can just snip off the dead blooms.
That way, the plant can focus its energy on recharging its bulb for next season.
If you live in Idaho, Oregon or Washington: Your states have special restrictions on buying allium bulbs. The University of Idaho Extension has a helpful publication explaining the rules for Idaho.
Do you live someplace with really cold winter temperatures?
Some types of tulips, daffodils and allium do better than others in frigid temperatures.
If you have a mountain garden or you live someplace with really cold winters, make sure the bulbs you’re buying grow well in your “plant hardiness zone.”
Not sure what a plant hardiness zone is? Get the scoop here.
Related tips that may interest you:

by Ann at Go West Gardener | Updated: Sep 10, 2026 | Best Flowers for Colorado, Utah & Similar States, Garden design Ideas, In-ground garden, Waterwise Gardening in the Intermountain West
Put your hand up if want a pretty winter garden!
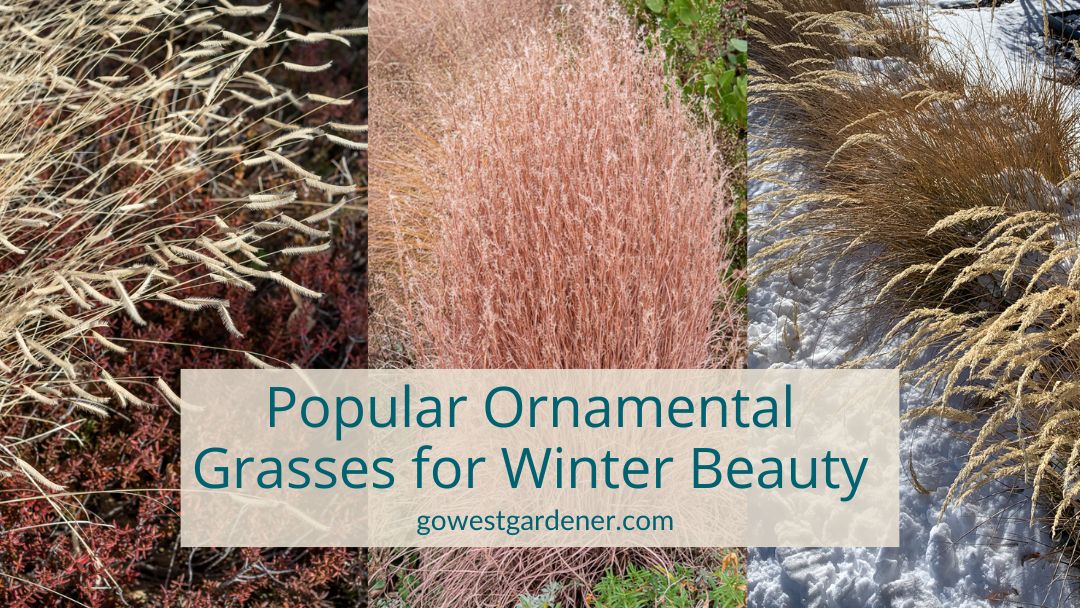
Ornamental grasses can make your winter garden look good. They add visual interest to your winter landscape (aka, “winter interest”), and they’re easy to grow.
But how are you supposed to know which grasses to pick? A lot of grasses look similar, right? And which ones hold up well to snow?
In today’s tip, I want to give you a peek at 5 popular ornamental grasses — and what they look like in winter gardens in the semi-arid West. That way, you can start figuring out which ones you like.
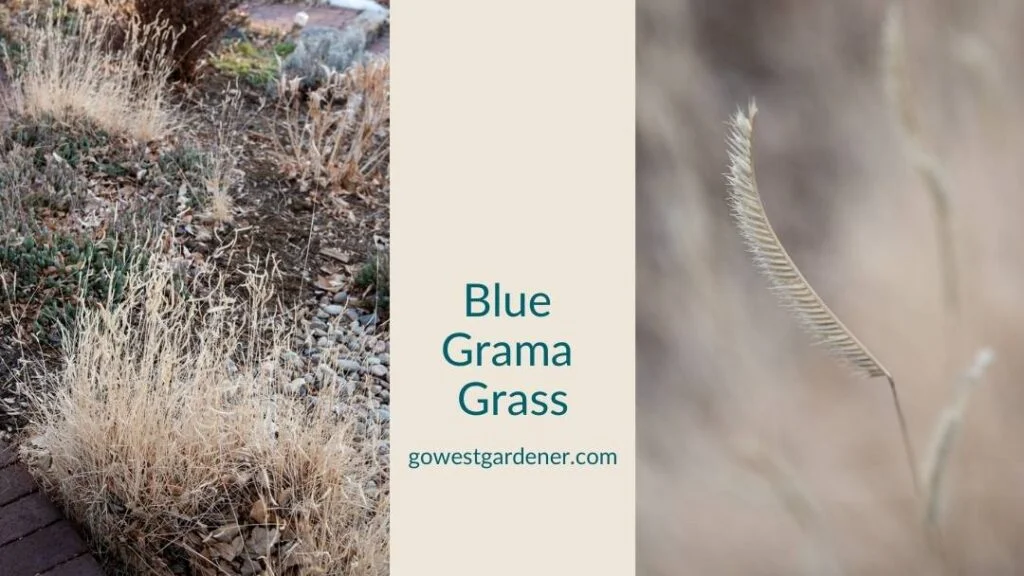
Blue Grama Grass (Bouteloua gracilis)
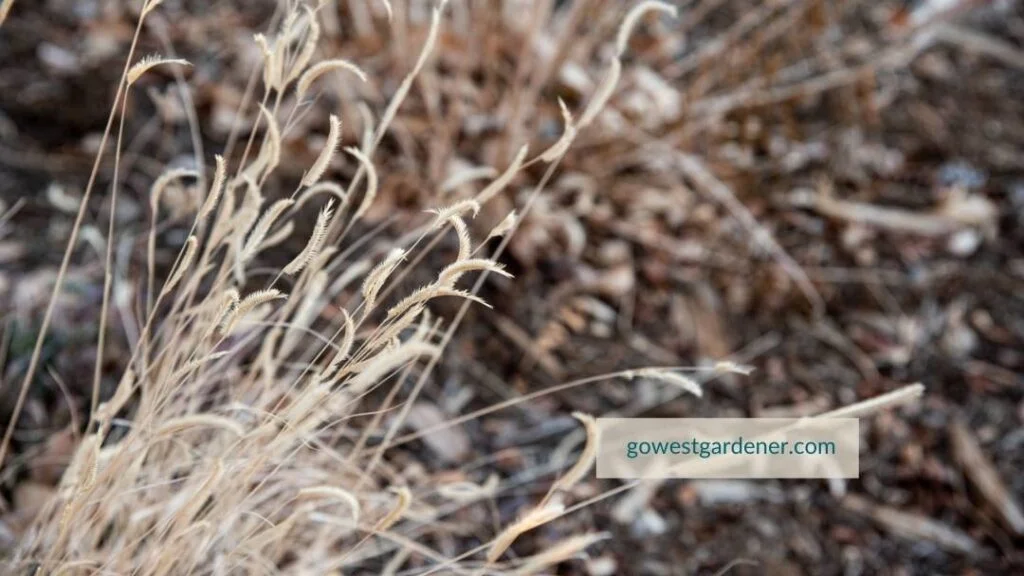
These ornamental grasses have horizontal seed heads that look like eyelashes. Aren’t they so cool?
Blue grama grass tends to hold up very well to winter snowstorms, which makes it an awesome grass if you want a prettier winter garden.
Blue grama is the state grass of Colorado, and it’s native to many states. You can see its native range here.
This lovely grass is quite drought tolerant. It happily grows in areas that get just 10 to 15 inches of annual rainfall. So, along the Front Range of Colorado, it shouldn’t need much supplemental watering, if any.
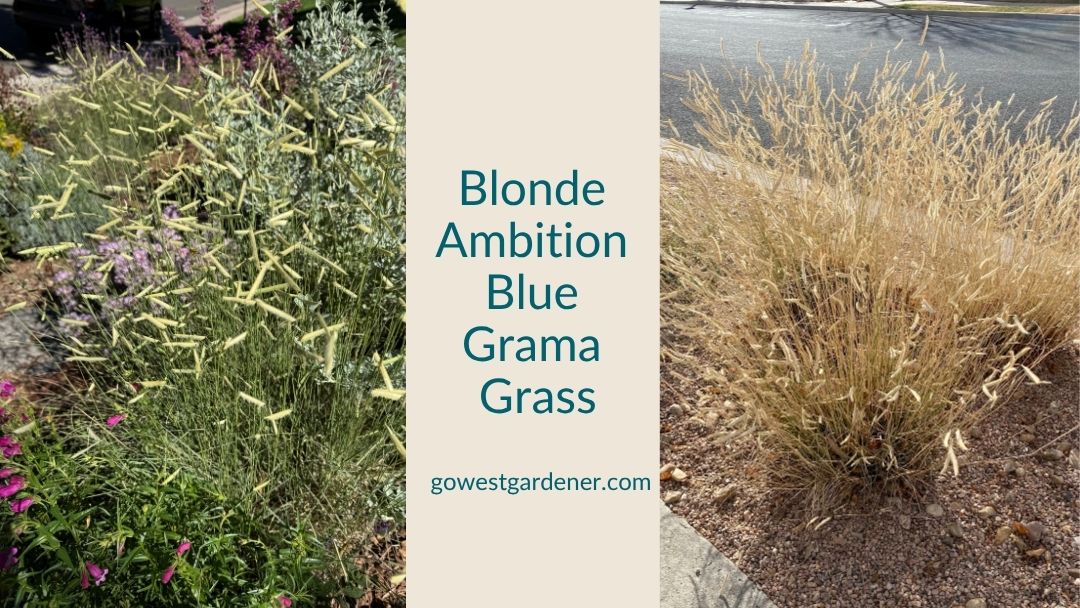
I have a blue grama grass in my landscape called ‘Blonde Ambition.’ It’s a cultivated form of blue grama grass. I like it because it looks pretty across seasons, particularly in winter. It catches the winter sunlight and sways in the breeze.
Blue grama grasses could be a great fit for you if:
- You have a dry, sunny spot in your landscape that doesn’t get much moisture
(like a hot, western-facing or southern-facing section of your yard) - You’re planning a low-water landscape (aka, a waterwise garden)
- You’re known to forget to water (no judgment!)
- You want to plant a native grass.
Water this grass well the first season. This helps it get established in your garden. But you should be able to lighten up the watering after that. I water my Blonde Ambition blue grama grass every 10 days in the heat of July and August.
Pro tip: If your garden gets regular moisture or has a wetter area, blue grama grass may not be the right ornamental grass for you. My understanding is moisture can turn it into a happy seed spreader.
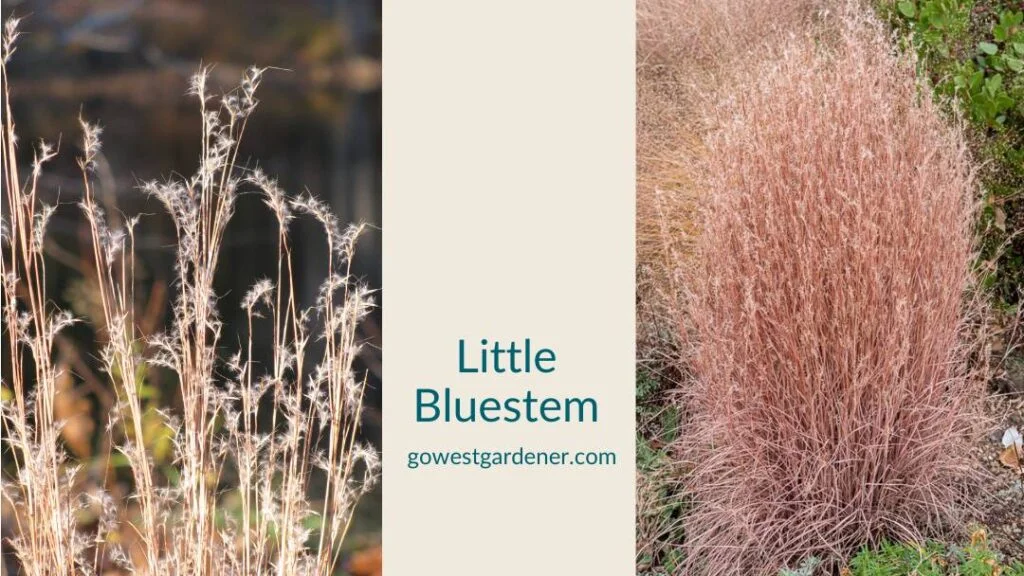
Little Bluestem Grass (Schizachyrium scoparium)
Typically, little bluestem grass grows in an upright shape. This makes it ideal for a variety of smaller settings, like compact gardens.
It doesn’t need much water to thrive, and it can handle clay soils (dirt) like a champ.
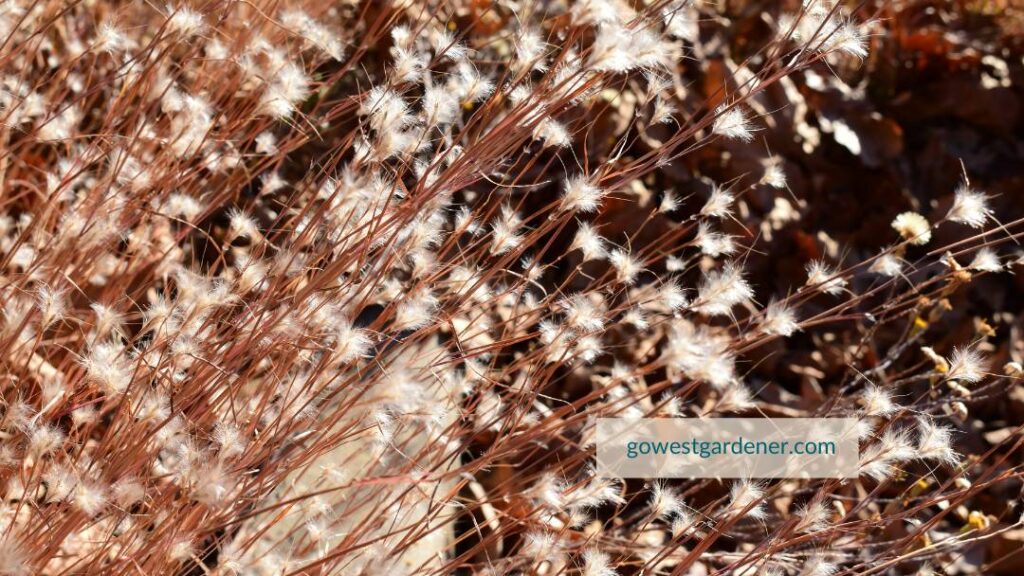
Little bluestem has a bluish-green color in the summer. But in the fall and winter, it can turn a reddish-bronze color and get airy seed heads. The winter color will vary slightly by the type of little bluestem you choose. (Some popular selections include: ‘Blaze,’ ‘Standing Ovation’ and ‘Prairie Blues.’)
This lovely grass is native to the majority of the United States, including Colorado, Utah, Wyoming and Idaho. You can see its native range here.
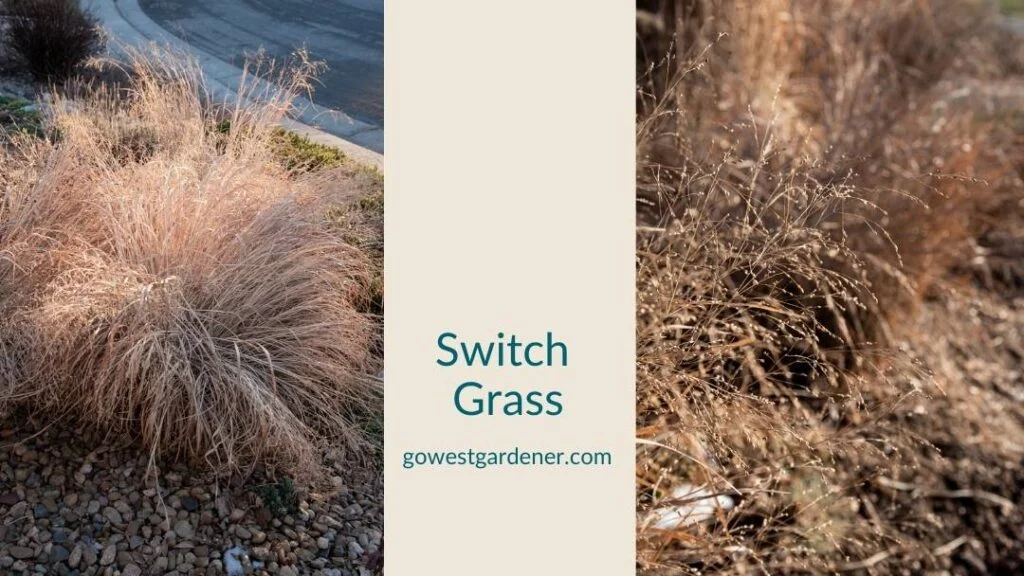
Switch Grass (Panicum virgatum)
Switch grass may not be the showiest grass for a winter garden. However, it can be really pretty in the summer and fall, so I couldn’t resist including it on this list. It’s also a native grass to Colorado. You can see its native range here.
Generally, switch grasses tend to prefer more moisture.
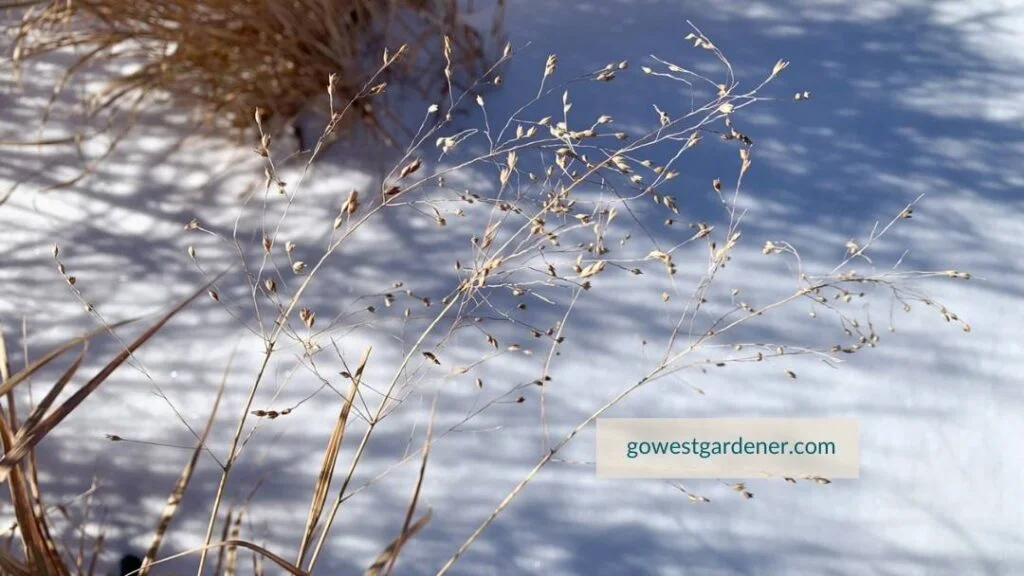
If you’d like a more drought-resistant type, look for the switch grass known as ‘Shenandoah.’ In the fall, its leaf blades turn burgundy. It gets delicate, pink seed heads in the fall. They lose their color in the winter, but they still have a lovely airiness to them.
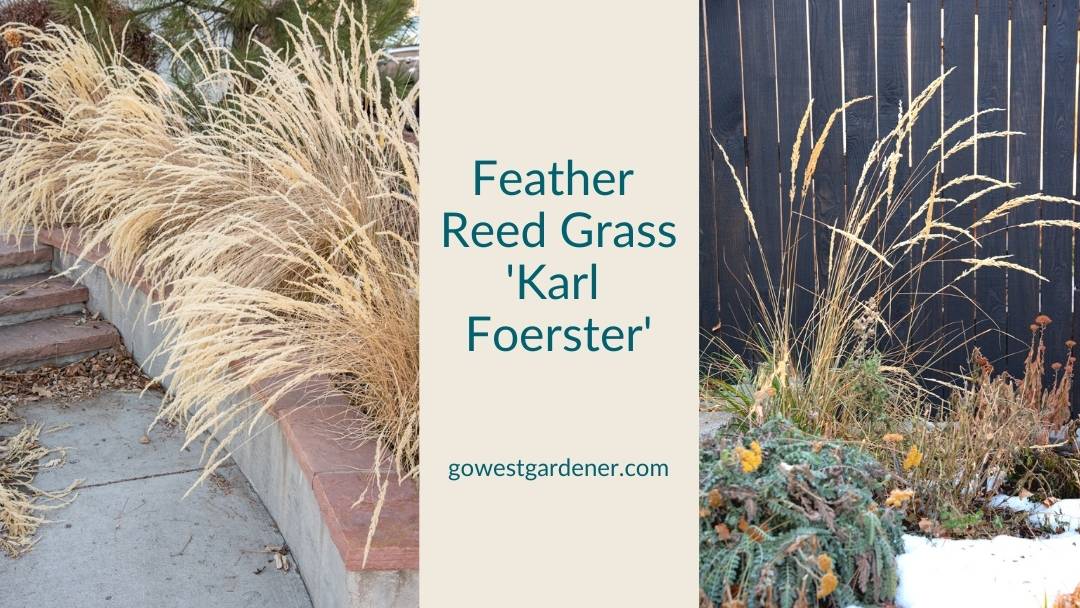
Feather Reed Grass (Calamagrostis)
Feather reed grass is another grass that glows in a winter garden. Similar to switch grass, feather reed grass prefers more moisture than some of the other grasses on this page.
There is one type of feather reed grass — known as ‘Karl Foerster’ (pictured above) — that is very popular. You’ll see it in a lot of landscaping around homes and shopping centers. It holds up really well to heavy snow.
Feather reed grass grows in an upright direction (like a column), making it a good grass for a smaller garden or a garden with limited space. It’s also very pretty against a darker background, like an evergreen tree or a stained fence.
If you like the look of feather reed grass but you want one that’s more unique, look for Korean feather reed grass instead. The seed plumes are soft and pretty. Korean feather reed grass can grow in partly shady conditions too. In winter, the one drawback to Korean feather reed grass is that it doesn’t stand up as well to heavy snows as some other grasses.
Giant sacaton grass (Sporobolus wrightii)
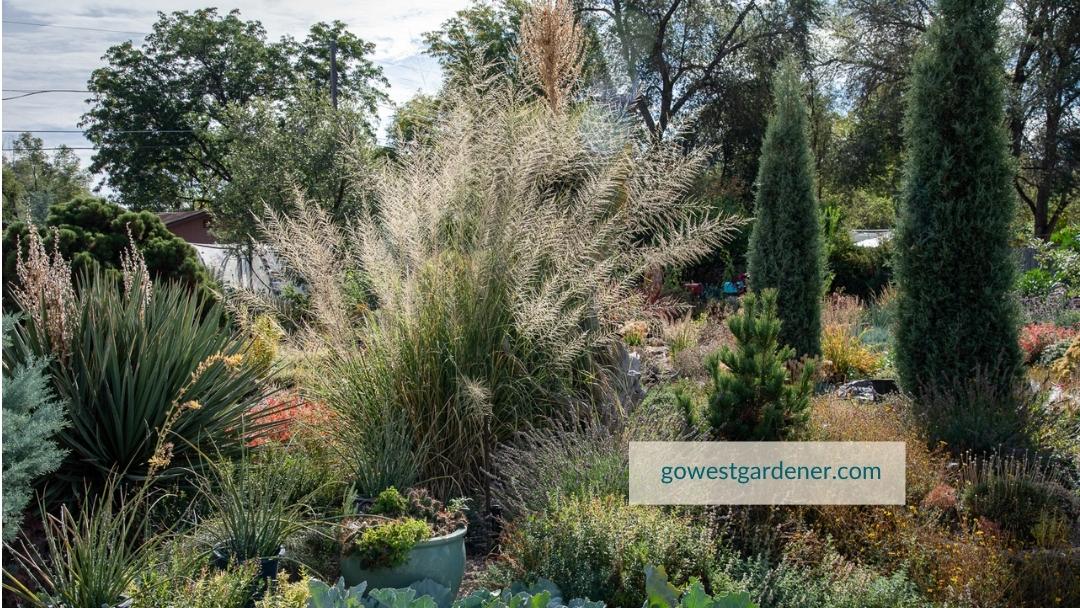
Giant sacaton grass is a big grass that’s native to the Southwest. You can see its native range here.
This grass will take up some real estate. It grows up to five feet wide and up to seven feet tall. And yes, it’s very drought tolerant. It thrives in hot and dry locations that get a lot of sun.
I don’t have a winter image of this grass, but you can see it in summer below.
Giant sacaton grass is an interesting grass to consider if you have:
- A big yard that could use a focal point
- A deep garden that could use some height in the back
- An area of your yard where you want to draw your eyes away from something (like an electrical pole)
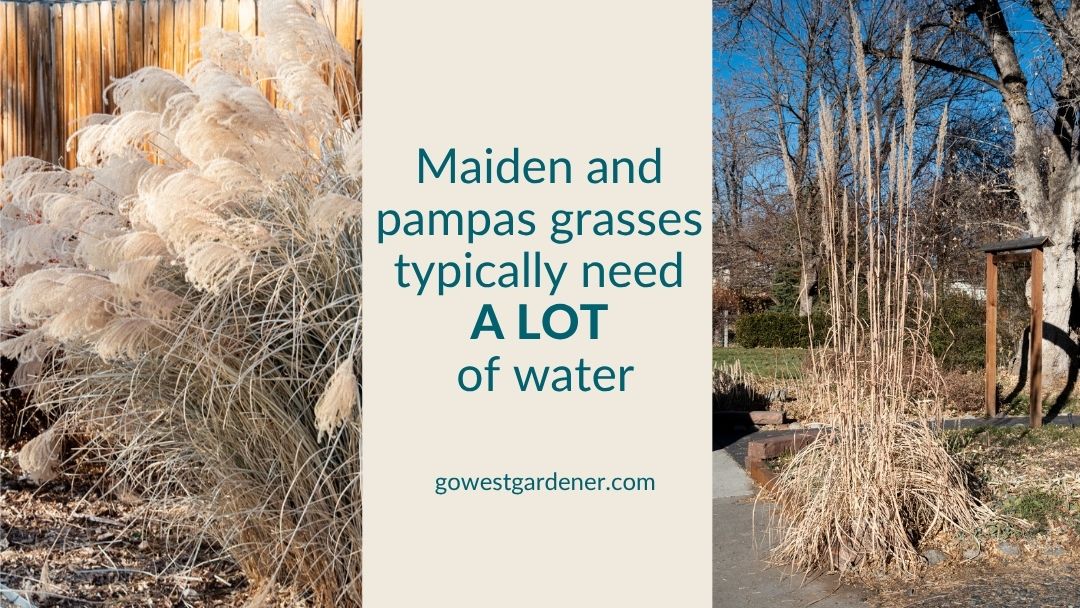
Giant sacaton grass is also an excellent substitute for large, moisture-loving grasses like maiden grasses (Miscanthus) and pampas grasses. While beautiful, maiden and pampas grasses use a lot of water, and they can be invasive in some parts of the country.
Consider planting giant sacaton grass instead!
Where to learn more about ornamental grasses
The Colorado State University Extension has a useful web page about ornamental grasses, including which grasses like dry conditions versus which grasses need more water, how tall grasses grow, and what they can handle in elevation.
Related tips that may interest you:
by Ann at Go West Gardener | Updated: May 20, 2026 | Gardening for Pollinators, Gardening Tips and Tricks, In-ground garden, Waterwise Gardening in the Intermountain West
I first published this article in 2022. I hope you find it helpful today!
I would love to introduce you to Ann Winslow. (Yep, another Ann!) She spent time creating a native pollinator garden in her Colorado yard during the Covid shutdown in 2020.
She wanted to attract more pollinators—like native bees and hummingbirds—to her yard, so she decided to create a garden using native plants.
If you’re new to native plants…
They are plants that have naturally existed in an area for hundreds of years. They weren’t introduced through the European settlers.
Many of the flower plants we find at the garden center can trace their heritage back to places like the East Coast or Europe, where the climate, local insects and wildlife can be quite different.
Native western plants offer high-quality sources of food and shelter for native bees, butterflies, birds and more. These plants and critters have evolved together and sometimes depend on each other.
Ann kindly agreed to let me interview her and share her story—from her tips on creating a native pollinator garden in Colorado, to the lessons she learned, to what she would do differently next time.

Go West Gardener (GWG): Ann, thanks so much for sharing your garden with me today.
Ann Winslow: My pleasure!
GWG: Why did you decide to create your garden?
Ann W: I wanted to attract and support native pollinators.
I’ve read several books by a man named Doug Tallamy that were life changing for me. His recent book, Nature’s Best Hope, is all about how to create environments in our yard that are supportive to pollinators. He suggests looking at our yards as small national parks that can serve as wildlife habitats.
GWG: When did you create your native pollinator garden?
Ann W: Back in 2020 during the summer of the lockdown. It was a crazy time, but it was wonderful therapy to be creating a garden in Colorado.
GWG: So true! I think a lot of us spent time outside in our yards. Have you ever created a pollinator garden before?
I created a waterwise garden at my last house, but no, this was my first time trying anything like this.
GWG: I understand that some of your yard was lawn before you started. How did you go about getting rid of your grass?
Ann W: We hired a local guy who dug it up with shovels.
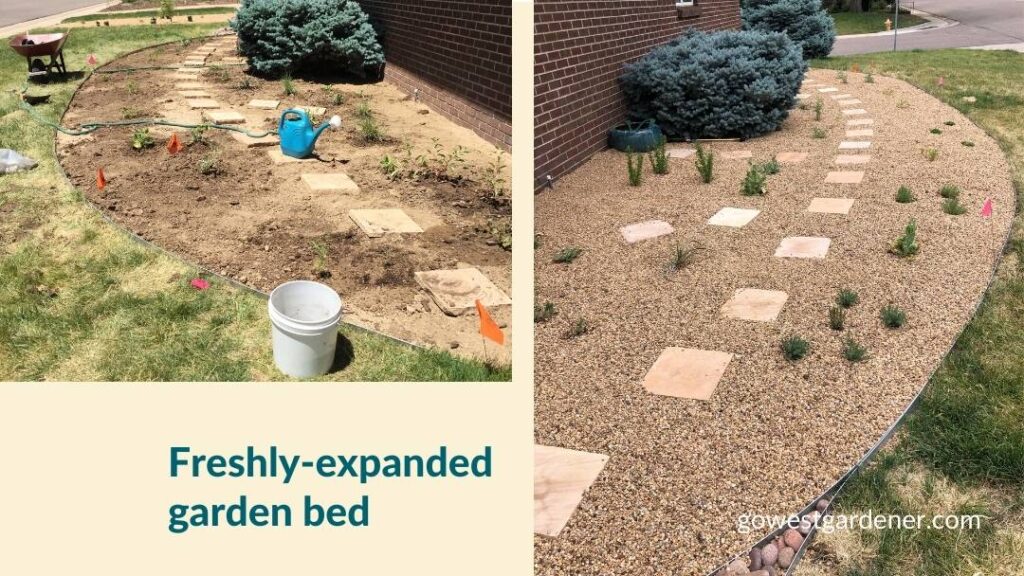
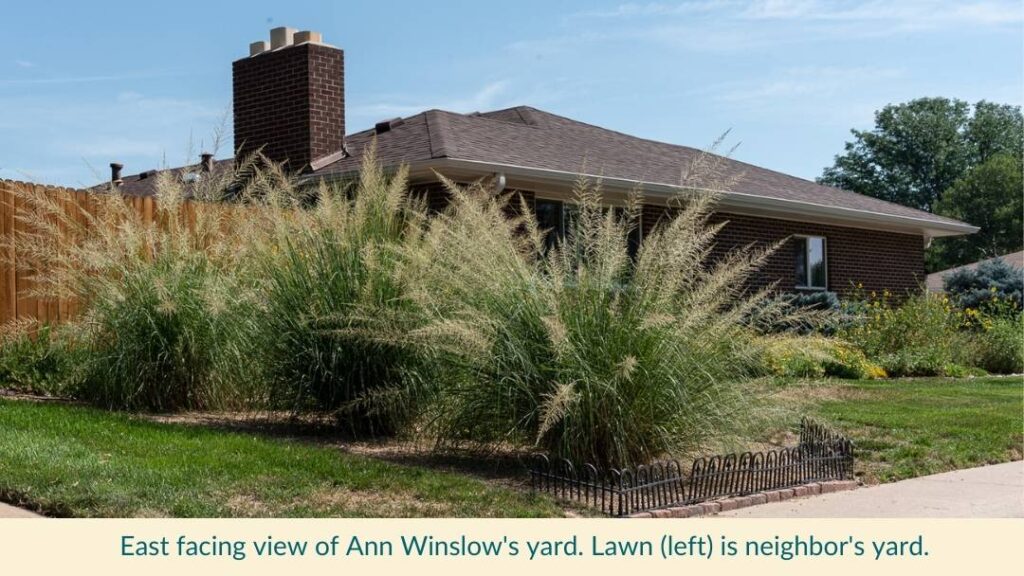
The garden bed existed from the previous homeowners, but we changed the shape and took out some grass. We also took out the turf grass on our property next to our neighbor’s house.
And my husband and I removed most of the existing shrubs and an overgrown arborvitae.
GWG: How did you go about figuring out which native plants you wanted to include in your garden?
Ann W: I looked for plants that were native to Colorado first. Then, I branched out to plants that were native to our region of the country.
I started with the plants that the Colorado Native Plant Society and the Colorado State University Extension talk about on their websites. I also looked at the City of Boulder website because they have helpful information for their citizens.
I used Plant Select too.
Plant Select is a non-profit collaboration between Denver Botanic Gardens and Colorado State University. They test and select plants that thrive in the high plains and intermountain west, including native plants.
The main thing I looked for was whether the plant had a simple flower that pollinators could get into. If a flower bloom is too profuse, sometimes the pollinators can’t get in there.
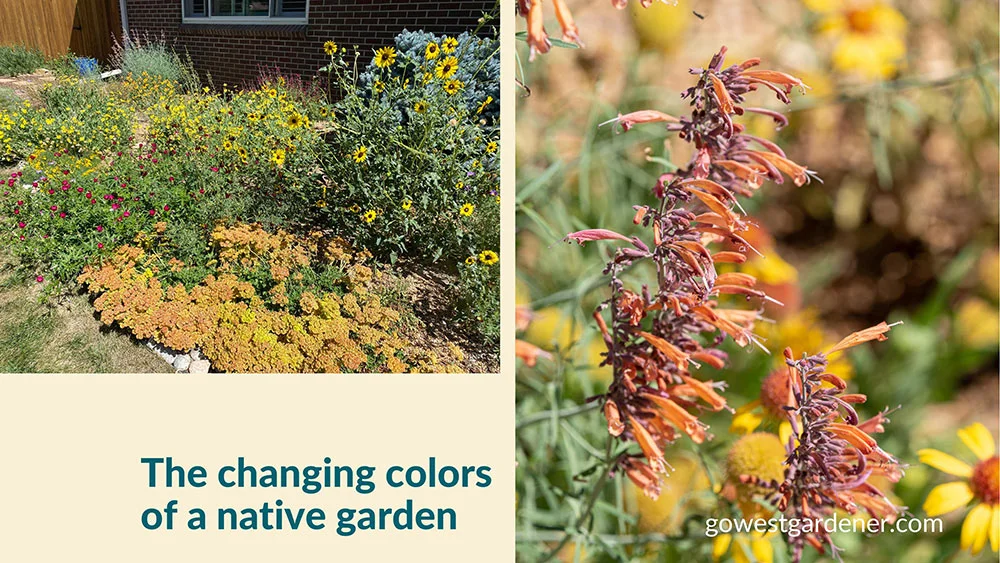
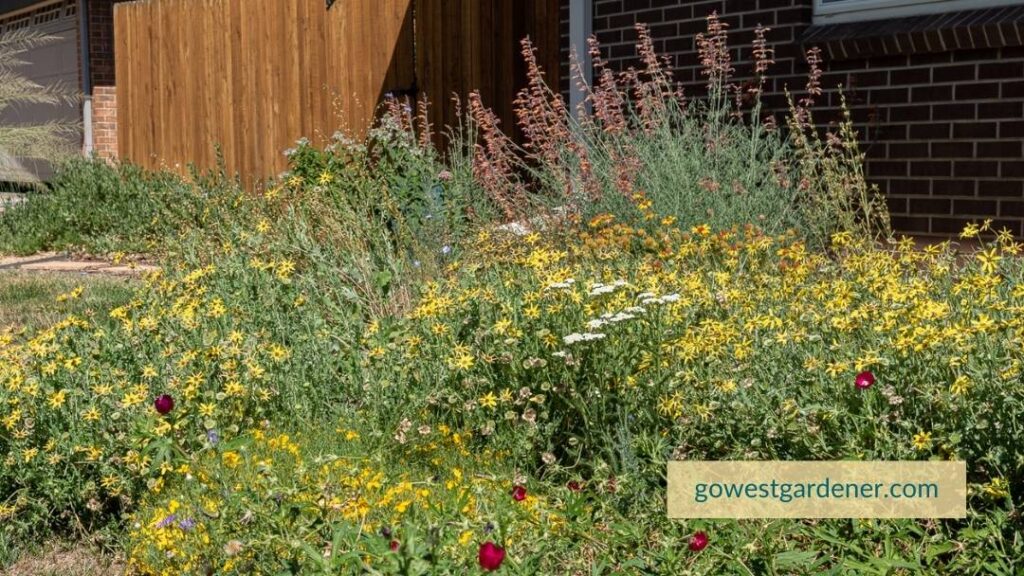
Photo caption: Several of the plants in Ann’s native pollinator garden in Colorado
GWG: What if people don’t have a lot of time to do research on native plants?
Ann W: I got a Garden in a Box from Resource Central for one of my other gardens, and it was a great solution. It’s a pre-planned garden for Colorado, and it comes with a design for your plants. Many of their pre-planned gardens include native plants.
GWG: Did you do anything special to get your garden ready for your plants?
Ann W: The native plants that I planted on the south side of my house like drier conditions. So, the only thing I did was mix about one-third expanded shale into some of the plant holes I was digging. I found the expanded shale at Harlequin’s Gardens in Boulder.
Expanded shale is like a lightweight, porous gravel that can get mixed into the soil [dirt] to help with water drainage and soil oxygen.
I have heavy clay soil. My prairie plants seem to love the clay—I think that may be why my prairie zinnia is doing so well.
But for some of my other plants, they need better drainage and more air around their roots. That’s where the expanded shale helps.
GWG: How did you go about designing your native pollinator garden? Did you hire a landscape designer?
Ann W: No, I didn’t hire a designer. I went online for designs.
I was looking for something similar to what I wanted to do in my garden, which was to extend the bed into a large semi-circle. I looked for similar designs and got some plant ideas from there. I also looked at how they placed plants.
The Colorado Native Plant Society has some simple designs for various regions across Colorado. They have ones for the plains, the foothills, the montane region and more. I looked at their designs for the plains and foothills and worked with those.
The City of Fort Collins had designs online. And Plant Select has garden designs online too.
And I recently saw that Wild Ones Front Range has a native garden design on their website too.
GWG: Knowing what you know now, what would you do differently if you could go back in time?
Ann W: If I could go back, I would take more time with upfront planning.
I’d tell myself to take the time to really get to know my site and what kind of sunlight it gets. Go outside several times per day and at different points in the spring and summer to see how the sunlight is. Be aware of how things may shade the garden, like overhangs from your house or trees that may be 10 feet away.
I thought I knew my sunlight, but I think being more thorough would have been helpful. I have some plants reaching for the sun and others that didn’t make it because they didn’t get enough sun.
GWG: That’s a great tip. What else?
Ann W: I’d also tell myself to buy fewer plants and see how things go.
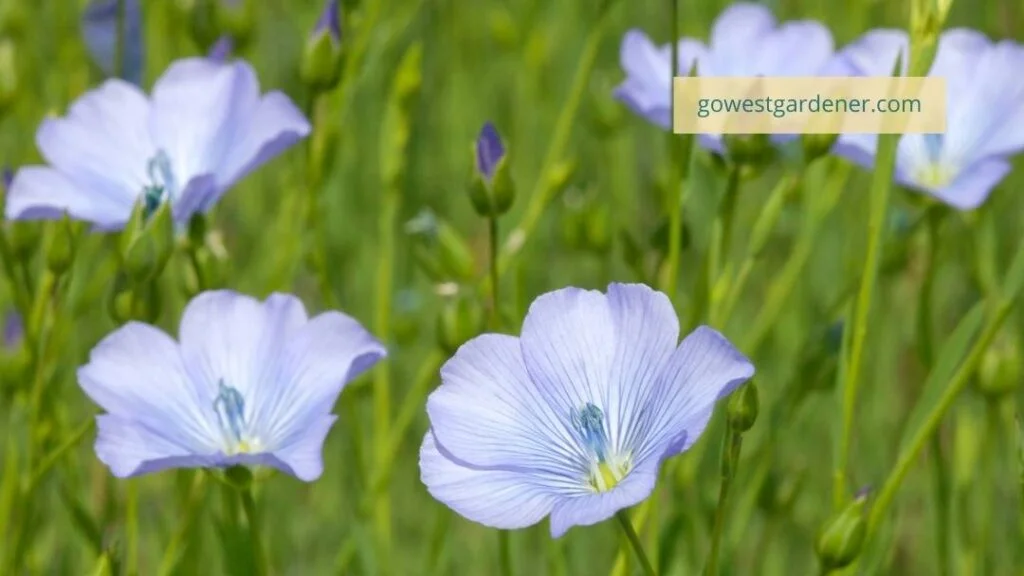
I think I overbought, and having invested the money, I felt like I needed to get all the plants in the ground. I ended up planting things too close together. The blue flax [flowers] are not as pretty as they could be because the plants are so close together. They’re one large mass. Their lovely shape and ferny look can’t be appreciated.
And I’d pay more attention to how irrigation affects the garden, even if we aren’t directly spraying it with water. Many native plants prefer low water, so you have to be careful with how the irrigation system for your lawn butts up to your garden.
And how does your neighbor’s watering affect your plants? Does their water drift over? We have a few plants that are probably getting more water than they prefer and may not live as long.
GWG: I’ve never thought about how my neighbor’s sprinklers can affect my plants, but I can see how that’s important to consider. On the topic of water, how often do you water?
Ann W: I haven’t watered the entire garden once this season [as of late June 2022], even with the heat and dry periods we’ve had this summer in Colorado.
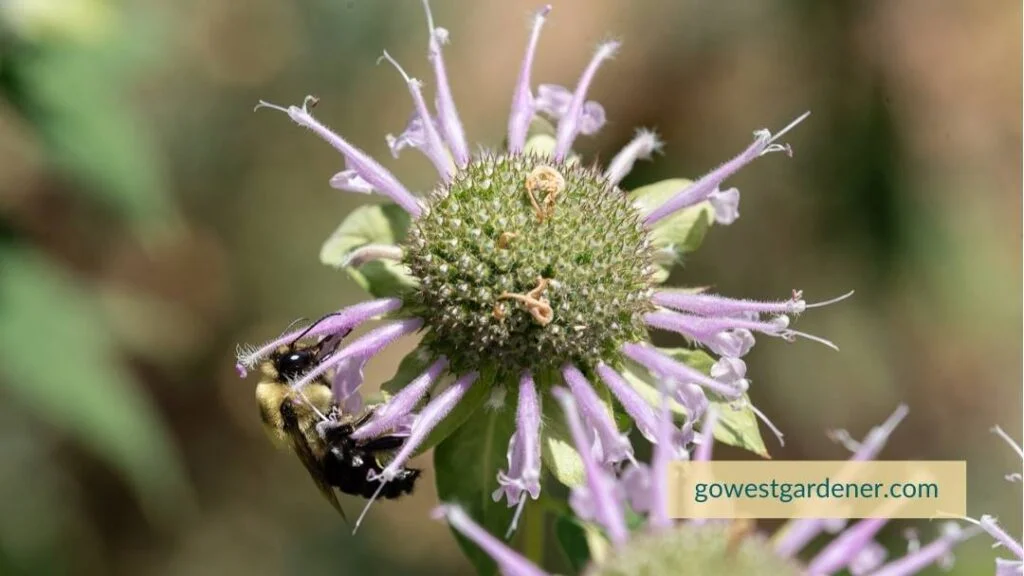
But I have watered some individual plants—like anything that’s newly planted, the hyssop [Agastache rupestris] so it has plenty of blooms for the hummingbirds, and a native bee balm [Monarda fistulosa] that just showed up.
But even with those plants, I’ve only watered them maybe once a week if we haven’t had a soaking rain.
GWG: Wow, that’s awesome! What about when you first planted your garden?
Ann W: That first summer, I watered the plants by hand just about every day from June to mid-July to help them get established.
After that, I cut back the watering to about twice a week.
GWG: What’s your favorite plant in your native pollinator garden and why?
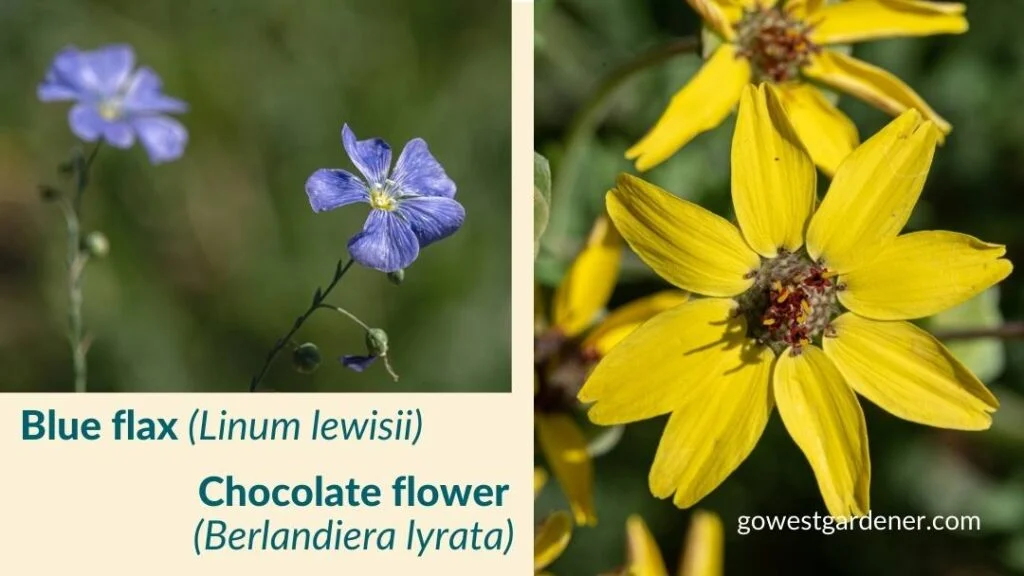
Ann W: I’d have to say chocolate flower [Berlandiera lyrata]. It’s a profuse bloomer. The pollinators love it. It smells good…
GWG: Like chocolate!
Ann W: Yes!
It’s very hardy, and it spreads.
I also really love the blue flax [Linum lewisii]. You don’t find a lot of flowers that are blue. I like the airiness, and the small bees seem to really like it.
GWG: What are some of the other plants that are thriving in your garden?
Ann W: The prairie zinnia [Zinnia grandiflora] is thriving.
The blue grama grass [Bouteloua gracilis]—it’s given us numerous volunteers.
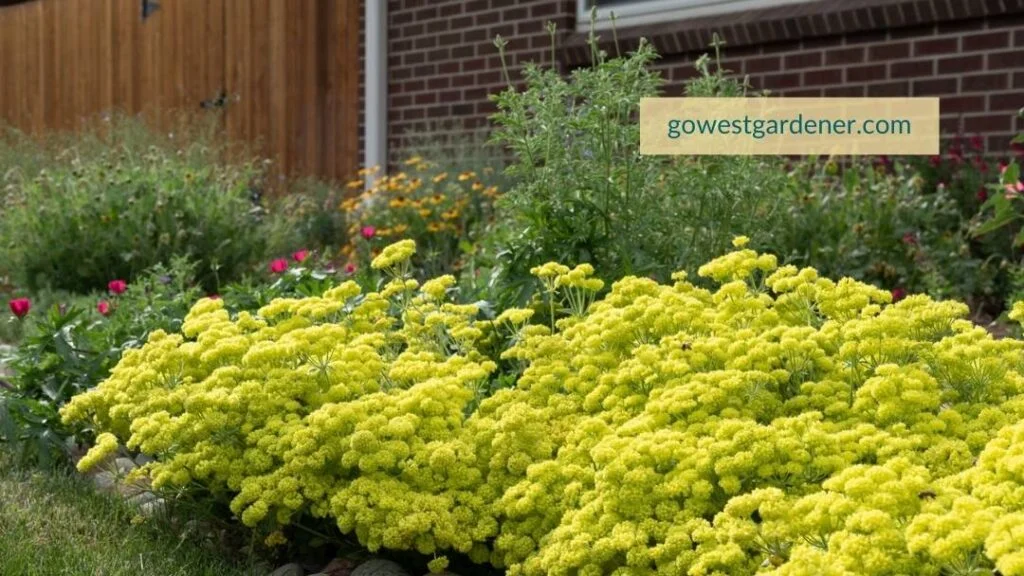
The Kannah Creek buckwheat [Eriogonum umbellatum var. aureum]. It has a beautiful, mounding shape. It has yellow flowers in the spring, and then the foliage turns burgundy in the fall through winter.
The Sunset hyssop [Agastache rupestris]. I’ve seen hummingbirds visiting it.
The hummingbirds also like the Furman’s Red sage [Salvia greggii] and the red yucca [Hesperaloe parviflora].
And the blanket flower [Gaillardia aristata]. It’s a prolific bloomer, and the bees like it. I’ve seen Spotted Towhees [western birds] scratching around it, looking for insects.
GWG: What do you like most about having a native pollinator garden in Colorado?
Ann W: It’s the pollinators. Because it’s alive, it fills my heart with joy. I feel like I’m helping in some tiny way.
We see a lot of variety in the bees visiting the garden. Big bees. A lot of small, native bees. You can see hundreds of insects buzzing around in the late-day sunlight.
And we get those Spotted Towhees [western birds]. That’s been a bonus we didn’t expect.
GWG: What advice do you have for people who’d like to create a native pollinator garden?
Ann W: I’d say do your research.
Talk to people who are knowledgeable about native plants. I think it would have been helpful if someone had said, ‘You have too many plants in here and it’s going to get really crowded. You need to take some plants out.’
You just want to pop all the plants in the ground and say, “Go do your thing!” but it does take some thinking and planning.
GWG: I can relate to that. It’s tempting to want to jump into buying plants, but planning makes things easier later. What other tips do you have?
Ann W: I’d say write down what your plants are and keep track of what you’re learning. You will make mistakes. That’s been hard for me to acknowledge. I’m a perfectionist—I want to get it right from the start.
The magical thing about it is you see what nature does on its own. You find yourself saying, “Wow, I did nothing to that and look what happened.” That’s another reason it may be a good idea to not buy too many plants in the beginning.
GWG: And you mentioned irrigation earlier…
Ann W: Yes, think about your irrigation.
If you want to remove your grass but you have trees, you need to have a drip irrigation system for your trees, so they can still get water. Group your plants together by their water needs.
And talk to your neighbors upfront and tell them what you’re doing.
Initially, the neighbors next door weren’t very excited about what we were doing. You have to turn your sprinkler system off while you’re creating the garden, and our lawn suffered for a little while. But we talked to them and explained what we were doing, and they were okay.
By mid-summer, the lawn was fine.
GWG: What kind of reaction do you get from neighbors now?
Ann W: People stop by and say, “That’s really pretty!”
GWG: I agree with your neighbors, Ann, and it’s cool to see so many types of bees. Thank you for sharing your great tips for creating a native pollinator garden in Colorado.
Ann W: It’s been a pleasure to talk with you about this!
If you love having a garden…
… that’s buzzing with activity (hummingbirds, butterflies, bees or other pollinators) or you want to create a garden with pollinators in mind (many of whom are losing their natural habitat), put native plants on your radar.
You can start from scratch like Ann did.
Or, you can simply work native plants into your garden as you can, especially if you have an existing garden. These plants are surprisingly adaptable to different garden styles.
And if you’d like to learn more about Ann’s yard transformation…
… she wrote a series of articles about her experiences below:
Related topics that may interest you:

by Ann at Go West Gardener | Updated: May 20, 2026 | Flower Garden Basics
When I was first learning how to garden…
I used to think that 32 degrees was the temperature I needed to keep an eye on for my flower plants.
32 degrees is when water freezes, so that must be the point when my flowers will freeze too, right?
But over time, I’ve learned:
There are levels of frost and freezing that affect plants in different ways.
32 degrees isn’t the magic number for all plants.
(Because Mama Nature makes her own rules, y’all!)
So, in this article, I want to share tips I wish I had understood sooner, so you’re a step ahead as a gardener. As our temperatures dip in states like Colorado and Utah, I hope this article helps you understand:
- What’s going on with the annuals and perennials in your garden
- Which flowers you may want to cover and protect (if you want them to last longer)
- Why the heck some of your plants still look good — while others may be a mushy mess!
In gardeners’ terms, annuals are flowers that live for a single year, but don’t return. Perennials are flowers that come back for multiple years.
Here’s a quick summary:
Between 36 and 29 degrees, your most vulnerable flowers are your “tender annuals.”
Tender annuals are your one-season flowers that like warm air and warm soil to grow. They like having “warm feet,” meaning they want their roots to be comfortably warm. These are the guys you definitely want to cover if you want them to last longer. (You can see examples further down this post.)
When you reach 28 degrees or below, more of your flowers will be affected.

Keep in mind, there are always exceptions with Mother Nature. I’ve shared some of them down at the end of this post. Nonetheless, this will give you a good overview.
Let’s start with frost because it often shows up first.
Frost
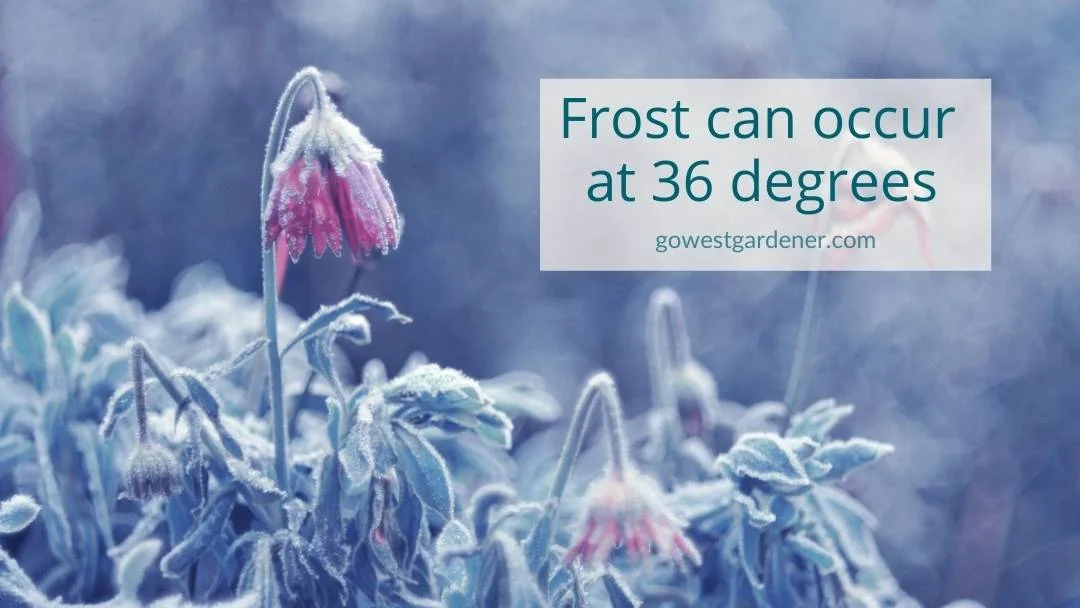
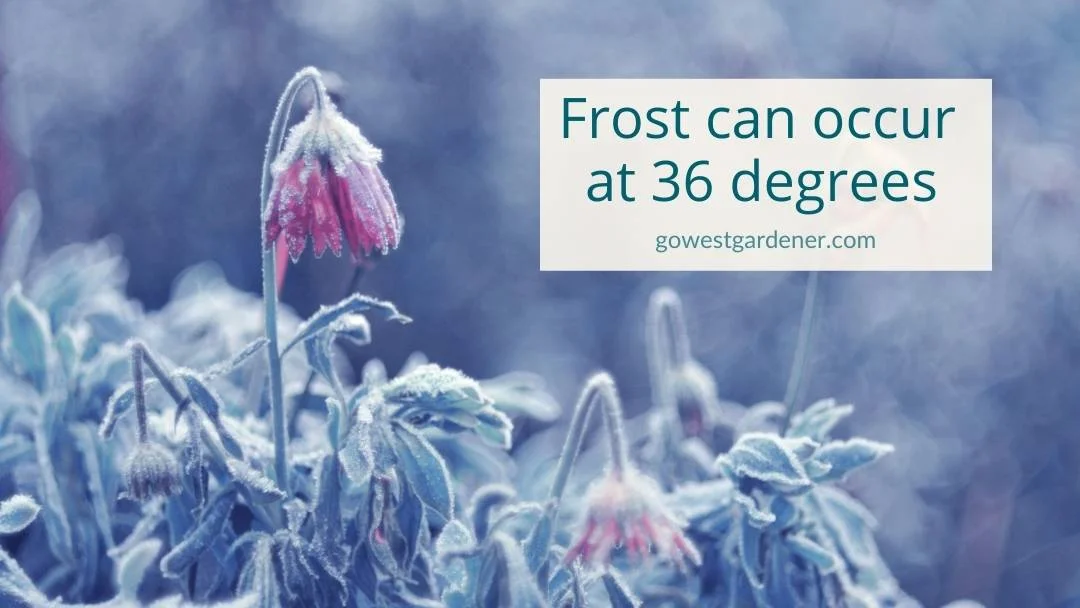
When temperatures reach 36 degrees (or below) AND the moisture conditions are right
Frost is a thin layer of water vapor that turns into ice on the surface of your plants. When ice forms on the surface of your plants, the water inside your plants can freeze too, causing the cells to rupture and lose all their water.
And this can damage or kill your plants.
If the moisture conditions are right for frost, you can get it when temperatures reach 36 degrees or below.
As I mentioned earlier, between 36 and 29 degrees, frost often has the biggest effect on your tender annuals.
Have you ever had a friend visit from a city like San Diego? When our temperatures are 50 degrees, you’re thinking about wearing shorts… but your friend wants to put on a parka. Your friend from San Diego is like your tender flowers. These plants do not adjust well to the cold.
These flowers are happiest when temperatures are warmer. They’re VERY sensitive to frosts and cold temperatures.
Light freeze
Between 32 and 29 degrees
You know the tender annuals we’ve been talking about? The temperatures in a light freeze will likely kill them. A light freeze takes place between 32 and 29 degrees. If you’re catching your local weather report, you’ll hear your weather forecasters call this a “freeze warning.”
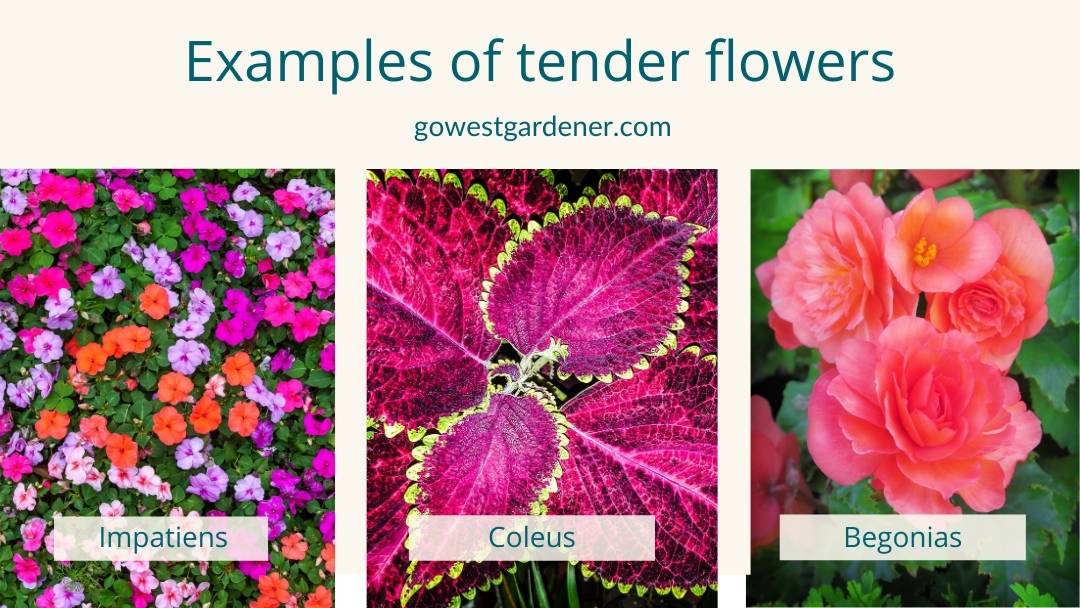
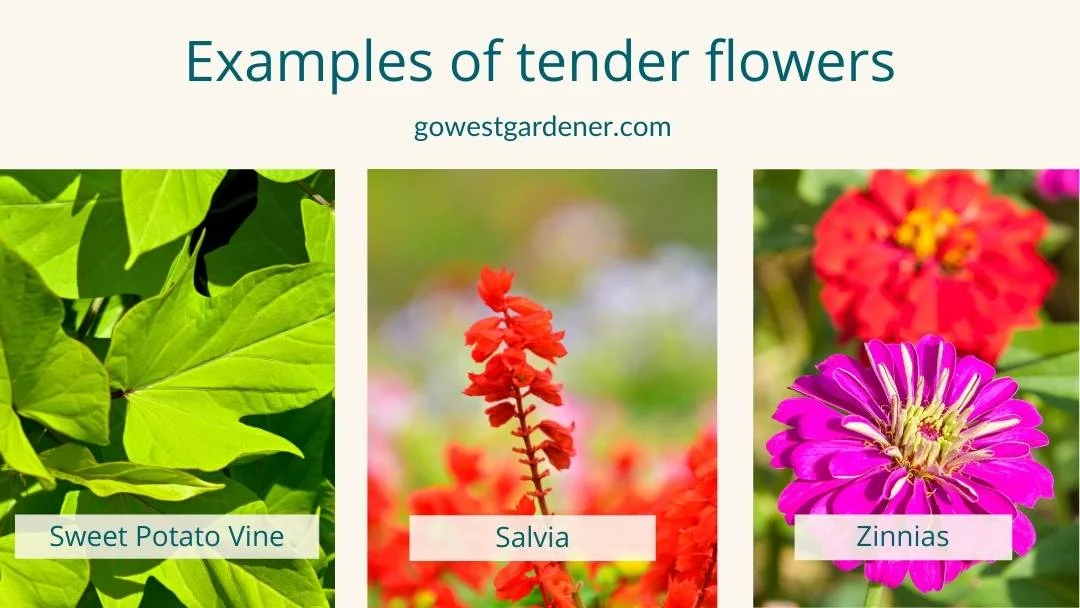
What are examples of tender flowers? You may recognize some of the annuals below.
In my garden, sweet potato vine (pictured above) is ALWAYS the first plant to get nipped.
A light freeze also can damage how your hardier flowers look. Usually, though, it’s just cosmetic damage.
Hard freeze (National Weather Service language)
Between 28 and 25 degrees
A hard freeze should severely damage or kill most of your annual flowers — even your hardier flowers that are happier in chillier temps.
Master gardeners sometimes call this a “moderate freeze.” However, I’ve used the hard freeze language from the National Weather Service here because it’s what you’ll see on a weather app or hear on a forecast. When the weather forecasters say, “There’s a hard freeze warning tonight,” they’re talking about the threshold of 28 degrees or below.
It’s going to be destructive to your annuals if you don’t protect them.
This is the temperature zone where you may start noticing damage to some of your perennials too. For example, you may notice their leaves turning a dark color or becoming a little gooey.
Hard, severe or killing freeze
24 degrees (or colder)
This freeze will likely cause widespread damage to the exposed flowers, leaves and stems on many perennials. (It can depend on how protected your flowers are in your yard, and it also depends on the type of plant.)
This is also the freeze that kills most remaining annuals.
There are exceptions. Pansies and violets, for example, are tenacious little flowers that can survive these freezing temperatures. At lower (warmer) elevations in Colorado, you may see them planted in the fall for spring blooming.
Some exceptions to these guidelines!
Remember, Mama Nature makes her own rules.
Here are exceptions that are relevant if you’re gardening in Colorado, Utah or similar western states:
- If you have young or newly planted flowers, they’re more vulnerable to freezing (and dying) than your plants that have well-established roots.
- If we experience a really big temperature swing, your plants are more vulnerable to damage or death from freezes. In the Front Range of Colorado, we can get 50- to 60-degree temperature swings in the fall and spring. In the fall, this is confusing for our plants (especially our trees). They don’t have time to naturally prepare for hibernation mode, known as “dormancy.” And in the spring, they’ve often started to wake up from dormancy when we get these cold temperature swings.
- If you have flower buds that are opening in the spring, I’ve found they’re more vulnerable to getting dinged by freezes than leaves. The freezes likely won’t kill your plants. You just may not get flowers that year.
- If you’re growing flowers in a protected area of your yard (like along a south-facing fence that’s shielded from the wind), your plants may stay warmer when temperatures drop. I often have flowers that freeze in my front yard, while those same flowers are wide awake and happy in the backyard, which is more protected.
- There are some perennials (plants that come back) that are evergreen. They keep the color in their leaves all winter. You may not notice freeze damage on those plants.
The dates for the first fall frost
We have such varied elevations and conditions in Colorado and Utah, it depends on where you live.
The Front Range of Colorado usually gets its first frost in early- to mid-October. But hey, it’s Colorado. We also can get it in early September. (I’m looking at you, 2020.)
And if you live at a higher elevation, your garden may be at risk for frost year-round.
How to find the spring and fall frost dates in your area
In the fall, if you’d like to find the “average first frost date” for your area, I suggest googling:
- Average first fall frost in {your city}
In the spring, you may want to search for the “average last frost date”:
- Average last spring frost in {your city}
Just a final bit of garden lingo… The “average last frost date” means you’ve reached the point when it’s now less than 50 percent likely you’ll get a frost after this date.
Related topics that may interest you:
by Ann at Go West Gardener | Updated: May 20, 2026 | Flower Garden Basics, Gardening Tips and Tricks, Western Container Gardening With Flowers
You know you’ve entered the “joys of western gardening club” when…
It feels like summer one day… and the next day you’re bracing yourself for frosts, freezes and snow.
(I’m not crying. I have something in my eye.)
If you’d like your summer annuals — your one-season flowers — to stay alive, it’s helpful to find ways to protect them from Mother Nature’s cold snaps.
So, in this article, you’ll find 6 ways to help protect your tender flowers from frosts and freezes.
You’ll also find a tip to help protect your trees and shrubs, which can be vulnerable to sudden cold spells too.
Protecting your sensitive plants is about finding ways to keep them warm.
When you see your neighbors frantically covering their tender flowers, what they’re trying to do is keep their plants warm.
If you can keep your plants just 5 degrees warmer than the cold conditions around them, it often can make a big difference for your plants.
As you look for ways to protect your flowers, ask yourself:
“Is what I’m doing going to help generate or retain heat around my plants?”
If it’s not, skip it and look for another option.
Here are 6 ways to keep your flowers warm:
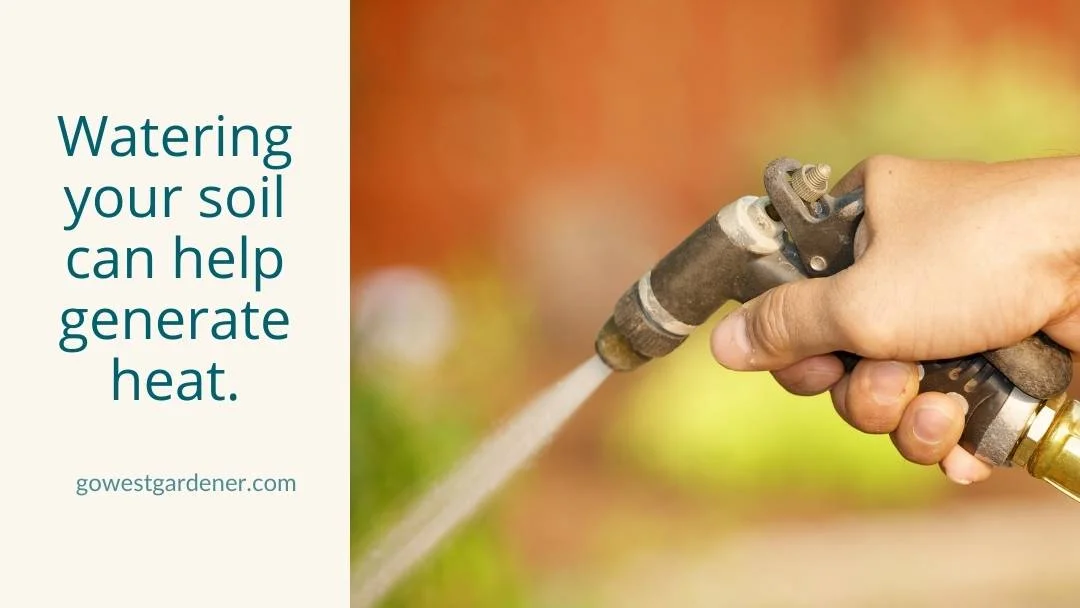
1) Thoroughly water the dirt (aka, “soil”) around your flowers.
If watering feels counter-intuitive when we’re talking about freezing temperatures, I’m with you.
But watering your soil before a freeze can actually help warm your plants. And remember, heat is the goal here.
Damp soil can keep the surface air around your flowers up to 5 degrees warmer than surrounding temperatures.
Why?
Because moist soil retains heat better than dry soil. It can warm up during the day and help offer heat at night.
Pro tip: It helps to water during the day. That way, the soil has time to warm up, and any water that splashes on your plants has time to dry before temperatures drop. (Wet leaves, flowers and stems freeze more quickly than dry ones.) When you’re done watering, be sure to unscrew your hose, so you avoid any issues with pipes freezing and breaking. Because we’re trying to remove headaches, not create them, am I right?
2) Move your pots of flowers to a warmer, protected area.
I know some flowerpots are too heavy to move, but move what you can.
A mudroom or an attached garage can work well as a temporary holding space when temperatures dip.
If you can’t bring your containers inside, even moving them to a dry, covered area on a porch or deck may help.
I would try to put your containers right next to your home out of the wind. Look for a spot where the walls may radiate some heat. Depending on how cold it’s going to get, you also may want to add on tip #3 below.
Keep in mind, warm air rises and cold air sinks, so avoid moving your pots to the low spots in your yard.
3) Build a “tent” around your flowers.
This one sounds a little complicated, but let’s keep it simple.
Here’s all you’re trying to do. You’re covering your flowers with a cloth fabric to keep the heat in, but you’re staking the fabric up (the best you can) so it doesn’t touch your plants.
The photo above may look like at an attempt at a spooky Halloween display, but it’s actually an impromptu tent for my cosmos flowers.
To create a tent, you can use:
- For your frame: Metal rods, tomato cages, lawn furniture, shepherd’s hooks for hanging flower pots, etc. Get creative!
- For your cover: Woven cloth fabrics like old bed sheets, pillow cases, towels, a lightweight picnic blanket… basically, the items you want to donate from your linen closet. You also can use “garden fabrics,” like a commercial-grade landscape fabric or heavier types of “floating row covers” (which are fabrics used in vegetable gardening). I would look for these garden fabrics at local, independent garden centers and online.
- For your clips: You can use safety pins, binder clips from your office, plastic clips, etc.
If you want to keep it really simple, I’ve given you a pre-made tent option at the end of this section.
So, why does using cloth fabric matter?
It all comes back to heat. Woven cloth fabrics offer better insulation than plastic materials. They don’t conduct the cold like plastic does.
Ideally, you want to extend the tent all the way to the ground.
I’d extend your tent all the way to the ground (even over a flowerpot), so you can capture the heat from the ground. Pin or clip the fabric together to keep cold air out and warm air in.
If you have gaps in your tent, you’re losing heat.
If possible, try not to let the fabric touch a plant:
- This helps keep the warm air circulating around your entire plant.
- And in some cases, if wet fabric touches your plant, you may accidentally cause the damage you’re trying to prevent.
If this sounds like too much work, there are pre-made frost protection tents for your plants.
You can see an example in the photo below.
Search online for phrases like:
- “Plant protection tents” or
- “Pop-up plant protectors”
These tents quickly pop up. They’re easy to use. And because they flatten up when you’re done, they’re easy to store.
4) Avoid using plastic sheets to cover your plants, unless you have no other option.
Why?
Because plastic doesn’t have the insulating properties of woven fabric. Plus, if plastic is touching your plants, it can conduct the cold and contribute to the damage you’re trying to prevent.
But if you don’t have other options, make it work, baby! It can be better than nothing. Just prop it up, so it doesn’t touch your plants.
5) Place empty containers over tender plants to trap warmth from the ground around your plants.
You can use boxes, buckets, recycling bins, garbage cans, empty flowerpots and other containers. These devices can work well if you’re going to get snow because they’re unlikely to collapse under the weight.
Just remove these covers during the day when it warms up.
6) Get creative with ways to generate heat around your flowers.
You may see your neighbors filling milk jugs with hot water or placing warm bricks near their plants. Both options can create warmth in the shelters you’re placing around your plants. It’s like a little campfire for your plants.
All these methods should work well for BRIEF temperature dips.
But if you’re going to get an arctic blast (especially one that lasts a few days), you may need a stronger heat source.
Or, you may want to try doubling up on the methods above.
Do you have to do anything when a frost or freeze is in the forecast?
If you’re reading this article in the fall, nope, you don’t have to do anything.
You can sit back and see what Mother Nature throws at you, especially if you’re ready for your flower season to be over. But if you’d like your flowers to last a little longer, it helps to protect your plants.
In the spring, it’s a good idea protect your newly-purchased flowers, especially your summer annuals. These are your tender flowers that grow for one season only and don’t like frost.
That way, you don’t have to buy replacement flowers!
Let’s chat for a sec about your trees and shrubs.
At our lower elevations in states like Colorado, we can get big temperature swings that are really hard on our trees and shrubs.
When temperatures plummet in the fall, your trees and shrubs don’t get the chance to ease into dormancy.
These plants haven’t had a chance to gradually turn the water in their veins into “antifreeze” yet.
Even when we aren’t facing big temperature swings, our trees are often drought-stressed.
And “stressed” is not the way you want them entering winter!
It can help to give your trees and shrubs a deep, soaking water before a freeze too.
If you have a newly-planted tree or shrub, water the root ball area.
Otherwise, soak the ground around the outer circumference zone of your tree (out where the branches of leaves end), rather than soaking the trunk area.
This outer area is known as your tree’s “drip line,” and it’s where your tree’s roots are actively absorbing water.
Going from a beautiful garden to a freezing mess stinks, but it’s part of gardening life in western states like Colorado, Wyoming and Utah.
If you think it’s tough to be a gardener here, remember it’s even tougher to be a plant!
But you’ve got this!
If you want to protect your tender flowers and keep them alive, I hope these tips help you feel more confident in what you’re trying to do.
Related topics that may interest you:
by Ann at Go West Gardener | Updated: Sep 12, 2025 | Garden design Ideas, Gardening Tips and Tricks
You want your spring flowers to look pretty, but what’s the best way to design them?
How do you make the biggest impact?
Great questions!
In this week’s post, you’ll find 4 simple tips for spring bulb garden design. Use these tips when you plant your bulbs in the fall, so you can get a pretty look in the spring.
Plus, I’ve included a bonus tip on bulb planting… because gardening in the high-elevation West is an adventure, y’all!
For this article, let’s say you want to plant spring flowers in selective places in your yard.
For example, you want to plant them along a walkway or add pops of color through your garden.
We’ll assume you DON’T want to fill an entire garden bed with a mass planting of bulbs. (Your design approach will likely be different for a mass planting.)
I like to share upfront: Gardening is personal.
It’s your own form of artistic expression.
So, if you prefer to do something different than what I’m suggesting, do what makes you happy!
Okay, let’s jump into these tips on spring bulb garden design.
Design tip #1: You can create visual interest when you plant bulbs in small groups.
Translation: It looks really pretty!
For most plants, you dig a hole, and you place 1 plant in the hole.
But spring flowers can look lonely or out of place when you see a single flower only.
Instead, you can make a bigger impact with your spring flowers when you plant them in small clusters or groups.
And hey, we want some “wow” factor!
This means you’ll place a number of bulbs in a hole — rather than just 1 individual bulb per hole.
Design tip #2: Flowers look really good when they’re planted in odd numbers.
They look really good in sets of 3, 5, 7 or 9 plants.
This is known as the “rule of odds.”
Think of it as a helpful guideline, rather than a “you must do this” rule.
But it’s the same principle that’s used in many forms of art and design — from photography, to interior design.
Odd numbers create visual interest. They look good to our eye.
Why? Because:
- Odd numbers look natural.
- They feel more dynamic. (They aren’t too matchy-matchy to lose our interest.)
- They don’t compete for our attention, which can happen with even numbers.
- They give us repetition, but with variety.
So, what does this mean for your garden?
Spring flowers look great when you plant them:
- In an odd number of groupings
- With an odd number of flowers in each group
When you plant your bulbs, dig a wider hole. Place more than 1 bulb in the hole.
Here are common questions that come up about this:
- “What if I have an even number of bulbs?” If you’re buying a package of bulbs, you’ll often end up with an even number, like 12, 20 or 50 total bulbs. Do your best to achieve odd numbers where you can, but it’s 100% okay to plant an even number of bulbs in 1 or 2 holes.
- “What if I don’t have that many bulbs?” Try small groupings of 3 to 5 bulbs. They should still look good.
- “How far apart do you place the bulbs in the hole?” It varies by plant. Generally, you want to give the bulbs some space, rather than having them touching each other. With tulips, for example, you may want to space your bulbs 2″ to 5″ apart in the hole.
Design tip #3: Plant the same colors together for big pops of color.
Let’s say you’ve purchased several colors of spring flowers.
You can create vibrant pops of color when you group the same colors together.
This means you may want to plant 1 color per grouping.
For example, let’s pretend you bought bulbs for pink tulips and for white tulips:
- Group the pink tulips together.
- Put the white tulips in different clusters.
You can still plant the different clusters near each other for pretty variety!
And yes, there are times when mixing the bulbs together may make sense for you. For example:
- If you bought a bag of pre-mixed bulbs, those bulbs are likely designed to look great together. Mix away!
- If you’re doing a mass planting and filling an entire garden bed with bulbs, you may want to mix all the colors together. It depends on the look you’re going for.
Design tip #4: Consider planting your spring bulbs behind or among perennials.
Some spring flowers — like tulips — go through a not-so-pretty phase when they finish blooming. Their leaves get floppy and turn yellow.
It’s important to resist the urge to cut off those floppy, yellow leaves.
And this is where spring bulb design comes in handy!
Plant your bulbs behind or next to perennials. Perennials are the flower plants that return year after year.
When your perennials begin to grow in the spring, their foliage can help mask the fading leaves on your spring bulbs.
BONUS tip: Be careful planting bulbs in hot spots in your garden.
We’re gardening at elevation in Colorado, Utah and the intermountain west. This means that the sun is very intense on our flower plants — especially in certain parts of our yards.
Let’s say you want to plant your spring flowers along a sunny, south-facing or west-facing structure (like a wall, fence or building).
The temperatures can get hotter here than other parts of your yard.
In garden lingo, this is known as a “heat sink.”
Think of it like a little micro-climate in your yard.
Sometimes, this can create tough conditions for your flowers.
So, what does this have to do with your bulbs?
When you plant your bulbs in these hot spots, your bulbs may think it’s time to get the party started earlier in the spring.
The ground may warm up faster.
Your flowers may want to emerge too early.
They become vulnerable to freeze damage.
If your flowers are getting ready to bloom and the temperatures plummet for a few days, it can nip your flowers’ buds for that year.
Some years, you may not have an issue.
But other years?
You may need to babysit your plants.
I had purple allium planted along a sunny, south-facing fence.
We had a bad year of freeze damage. The allium had brown leaves and shriveled up buds. I realized I should have taken extra steps to protect them.
You’ll have less work if you avoid planting bulbs in these hot spots.
Related tips that may interest you:
by Ann at Go West Gardener | Updated: Sep 10, 2026 | Gardening for Pollinators, Gardening Tips and Tricks, In-ground garden
It’s tempting to want to get out early in the fall and tidy up your western garden for winter, especially if you’re having a mild fall. But is it too early? When’s the best time to cut back perennials in Colorado and similar states?
In this article, you’ll get the scoop on:
- Why it helps to wait to trim down plants
- Whether it’s better to cut back perennials in the fall or spring in Colorado (hint: it depends!)
Let’s start with your garden in the fall…
No need to rush it. Put your feet up. Enjoy the fall color!
Your plants will thank you for it.
On autumn days, it may look like your perennials aren’t doing much. But they’re doing A LOT… under ground.
In the fall, soil temperatures are still warm, and air temperatures are cooling off. For most plants, these are ideal conditions for growing roots. And healthy roots are the secret to bigger, stronger plants next season, which is so important in our gotta-have-some-moxie West.
So, don’t cut back your perennials too early, especially if they’re still green.
Instead, let them gather as much energy as they can for their roots, so they can come back strong and showy in the spring. Wait until you’ve gone through several hard freezes before you get out your pruners. (A hard freeze is when temperatures drop to 28 degrees or below.)
When temps start dipping and dancing their way into the mid-20s, you’ll likely see the leaves on your perennials wither, brown, curl or drop. That’s your cue to prune IF you want to cut back your perennials in the fall.
Of course, then the question becomes…
Is it better to cut back perennials in the fall or spring in Colorado and similar western states?
The short answer is: It depends.
Mama Nature likes to keep us on our toes!
Let’s assume you don’t live in an area that’s at risk for wildfires. If so, there are LOTS of good reasons to wait until early spring or even later to clean up leaf litter and cut back most perennials. For example, you’ll:
But there are a few instances when it helps to clean up some plants in the late fall. For example, it’s a good idea to cut back:
- Diseased plants or plants with pesky insects, so the problem doesn’t carry over to next season.
- Plants that spread seeds like a fairy godmother tossing pixie dust, assuming you don’t want more plants next year.
- Dried out leaves and stems if you live in a wildland-urban interface and your home has some wildfire risk. (The Colorado State Forest Service has a helpful PDF on how to clean up your plants to reduce wildfire risk.)
There is no one-size-fits all approach to western garden clean-up.
What I do in my Colorado perennial garden
When I first moved to Denver, I used to cut back my perennials in the fall. I left my flowerpot clean-up until the spring.
Now I do the opposite.
I tackle my flowerpots in the fall. (Here’s why.) And I wait until April to cut back the majority of my perennials. I wait until I see new spring growth appearing from the ground. I try to wait until late April to clean out the leaf debris in my garden.
Because native bees often nest in the pithy plant stems (like rose canes), I set aside those types of plant stalks once I trim the plants down. Some bees don’t emerge until later in the spring.
Why not clean up the garden earlier, like in the late fall or in February?
Two reasons:
- Unpredictable Colorado weather. I’ve learned the hard way that we tend to bounce back and forth between winter and summer. Big temperature swings in February, March and April can be tough on our plants. I leave last year’s growth on the plants as long as possible to give them as much protection as possible.
- Pollinators. Many bees that are nesting in plant stems and under leaf debris aren’t ready to emerge that early. Plus, our big temperature swings are hard on overwintering insects. The leaf litter helps insulate them.
Related topics that may interest you:
by Ann at Go West Gardener | Updated: May 20, 2026 | Best Flowers for Colorado, Utah & Similar States, Garden design Ideas, Gardening for Pollinators, Gardening Tips and Tricks, Waterwise Gardening in the Intermountain West
Reader note: I first published this article in January 2022, but the content is still relevant and timely!
I feel strange saying, “garden trends,” because it implies a fad.
Here today, gone tomorrow—like paint colors in a home or trendy flower colors.
I’m not here to tell you that violet is the new purple in your garden.
Instead, think of these 5 western garden trends as where landscaping is going in Colorado, Utah and the intermountain west.
These are movements that will shape our gardens today—and well into the future. Use these garden trends to inspire you as you think about your western landscape and the plants you choose.
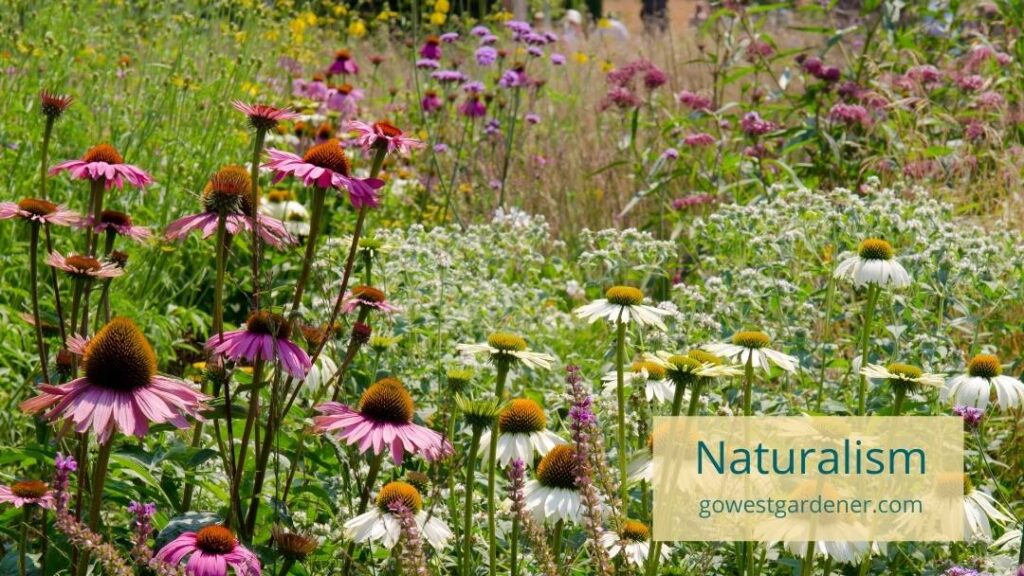
#1: Naturalism is in.
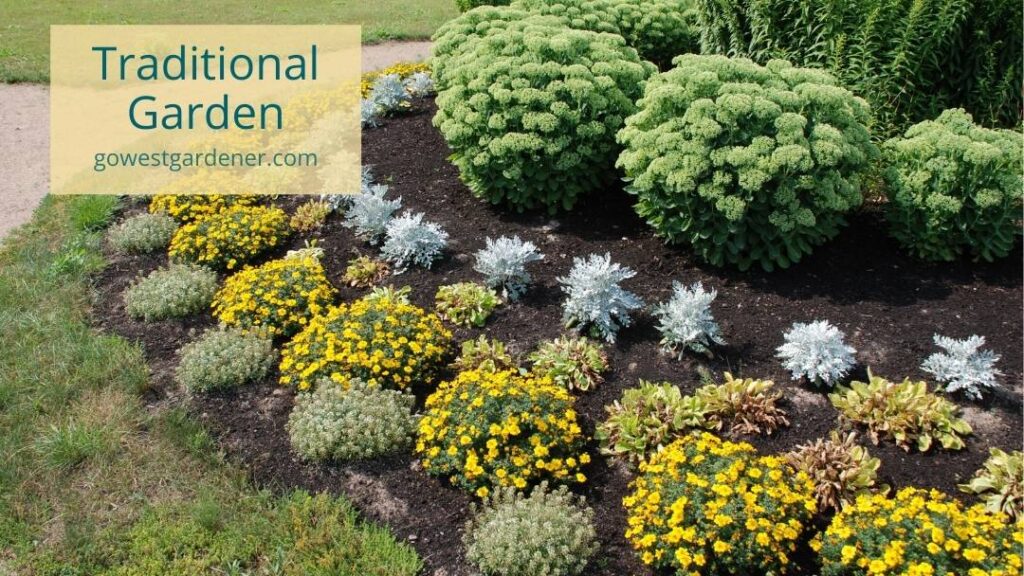
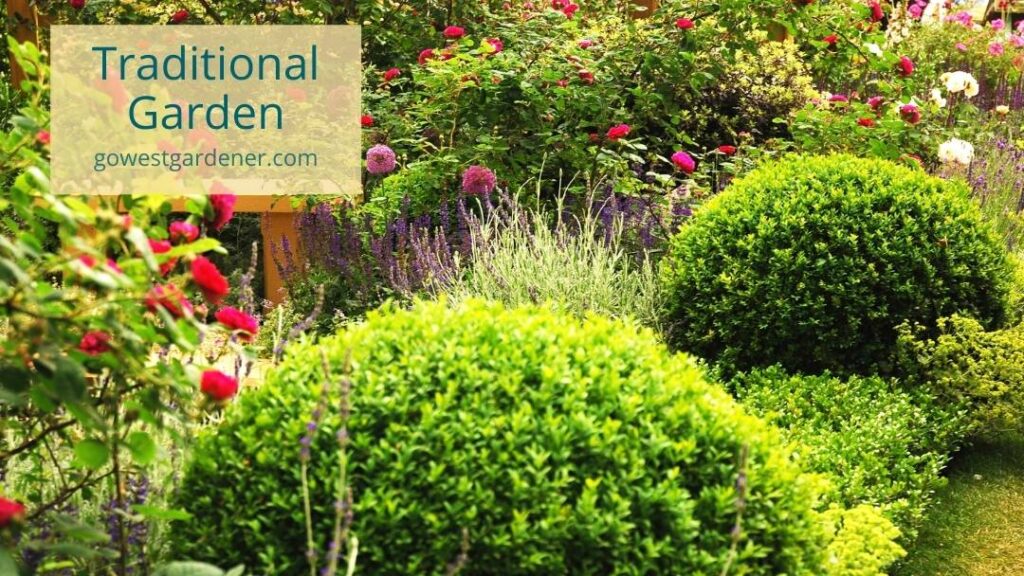
When you think of a traditional garden, what comes to mind? Many people think of formal gardens like they have on the East Coast and Midwest.
Tidy rows of plants. Shaped hedges. Lots of symmetry. (You know, like the photos in magazines.)
But there’s a trend to create gardens that reflect more of our natural environment.
With “naturalism,” there’s a relaxed ebb and flow to the plants.
These gardens are reminiscent of what you may see in nature, like in a high plains prairie or in a mountain meadow.
If you’d like to embrace a more natural look in your garden in Colorado, Utah or a similar state, here are a few ways to start:
- Let go of symmetry.
- Plant your flowers in drifts or clumps. (This is good for pollinators too!)
- Intermingle low-growing plants (like groundcovers) among larger, structural plants.
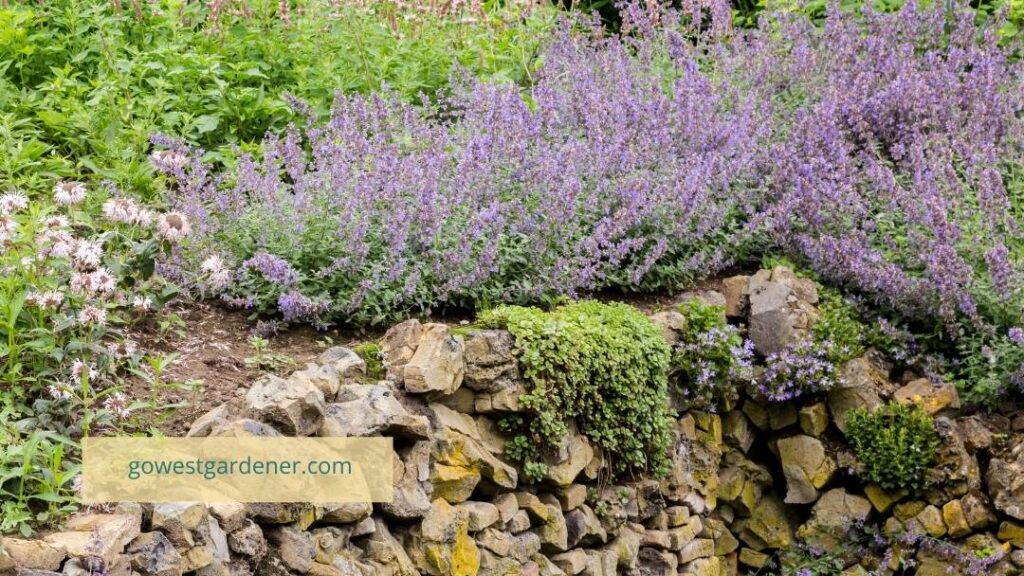
- Integrate parts of the natural landscape into your garden design, such as boulders, rocks or tree trunks.
- Choose plants that thrive in our tricky western conditions. (More on this below!)
#2: Pollinator gardens are growing in popularity.
Bring on the bees, butterflies, birds and more! People are taking an interest in pollinator gardens—which is helpful with many types of pollinators at risk.
I used to think, “But I already have bees in my garden.”
I didn’t really get it.
What I’ve learned in recent years it that not all bees were created equal.
Commonplace bees are becoming more common, while rare bees are becoming more rare.
Some bees are generalists. They’ll seek nectar and pollen from a variety of plants. They aren’t picky.
But we also have specialist bees, and some are rare. They tend to prefer a very narrow palette of plants.
The same principle is true of other pollinators.
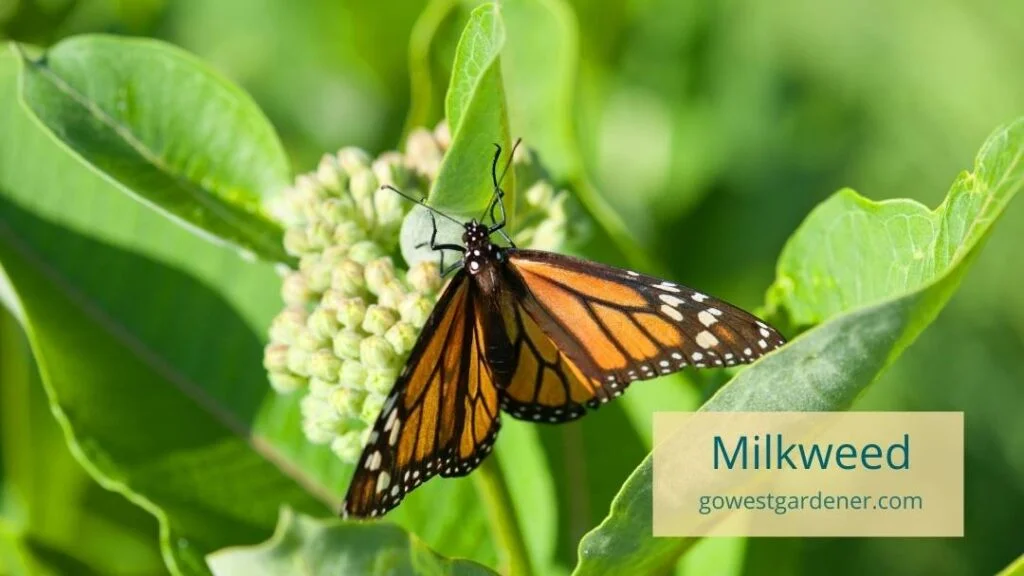
For example, Monarch butterflies use a specific plant (Milkweed — aka, Asclepias) to host and feed their young. That’s it! Just one type of plant.
The idea behind a pollinator garden is that you create an environment that attracts and nurtures a variety of species, including the rare ones.
Biodiversity, baby!
Want to create a pollinator-friendly garden? Check out: “How do I attract bees and butterflies to my garden?”
#3: Gardening with native plants is getting lots of buzz.
For many decades, if you’d walk into a western garden center, you’d find perennials (the flowers that come back each year) that were ideal for high-moisture regions of the U.S., like the Midwest and East Coast.
Not so great for our semi-arid gardens in Colorado, Utah and the intermountain West!
Today, there’s a big push to include “native plants” in western landscapes. Native plants have been around for a looooong time—usually before European settlement.
Native plants are “ecologically adapted” to where you live. They can tolerate your soil (dirt) and local climate. They tend to be resistant to disease and troublesome insects. They create a sense of place. They feel like the West and reflect where we live.
And most importantly, native plants are excellent plants for native bees and other pollinators—especially pollinators that are in decline. They’ve evolved together.
TIP: If you’d like to learn about plants that are native to where you live, visit your state’s Native Plant Society website. To find it, search for: [your state] native plant society.
#4: “Waterwise” gardens are smart gardens.
This isn’t a new gardening trend, but it’s an important one here in the semi-arid West—especially as more of us go through sustained periods of drought.
The idea behind waterwise gardens is that you:
- Choose plants that don’t need a lot of moisture to survive.
- Group plants with similar watering needs together, so you can be efficient in your irrigation. (Good for your water bill — and Mama Nature too!) In other words, you avoid placing plants that prefer lots of water next to ones that need very little water.
This doesn’t mean your yard has to look like a desert. You can still have a gorgeous flower garden!
But it does mean you may need to think differently about your plant choices. For example, a big part of waterwise gardens is embracing native plants that can tolerate drought.
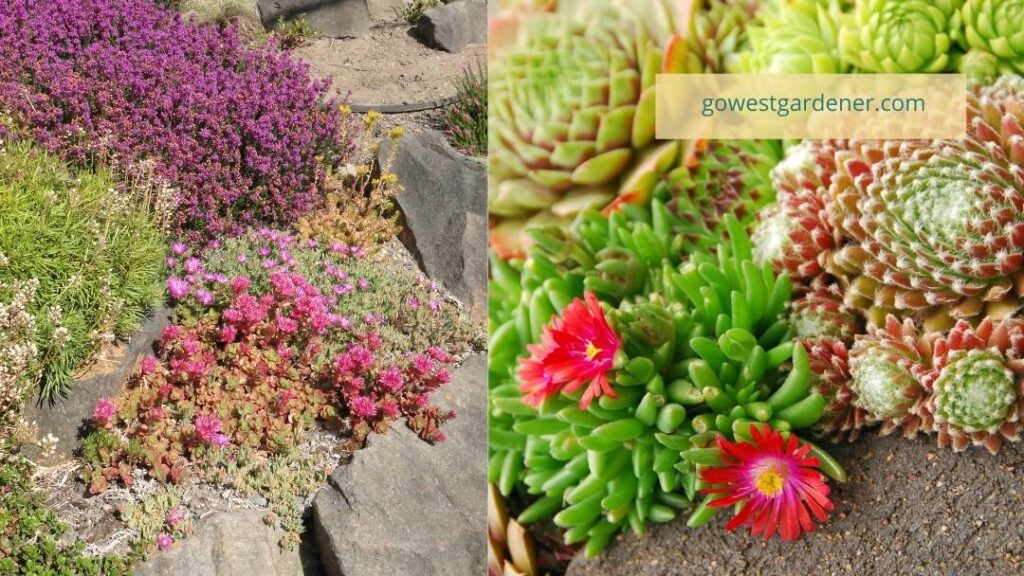
You also may want to learn about waterwise plants that thrive in our sister climates. These are plants from “high steppe” regions of the world that share our growing conditions.
For example, did you know that plants that are native to Patagonia, Central Asia and the steppe region of South Africa often grow well in states like Colorado and Utah?
Yep, our gardens have more in common with Patagonia than Pittsburgh.
(Explains a few things, right?)
Does this mean you can’t plant flowers you love from other parts of the country?
Nope!
But it does help to understand that not every plant is a good fit for semi-arid gardens.
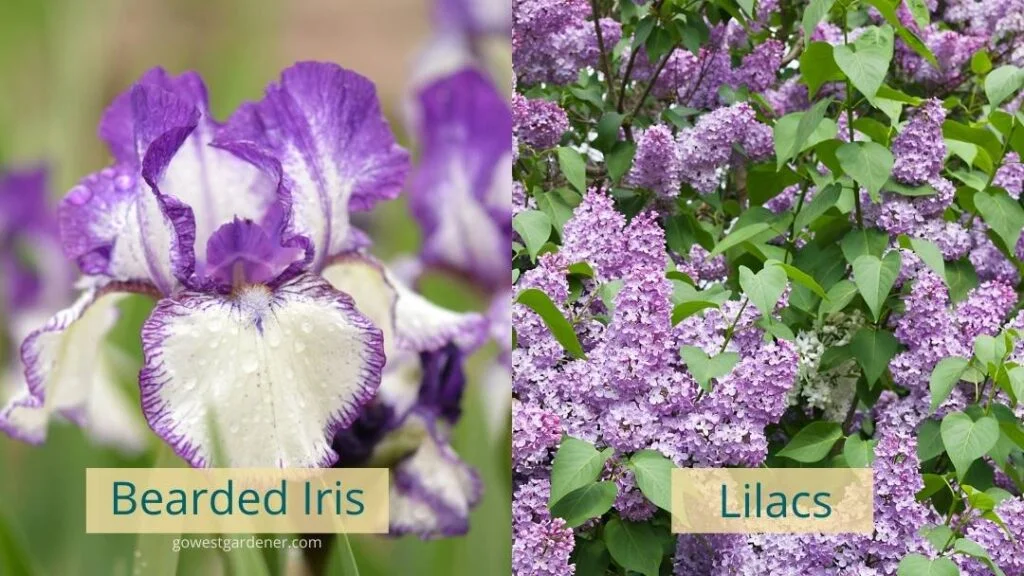
The good news is there are some plants that many people know from other places that grow well in states like Colorado. For example, bearded irises and lilacs tend to be drought tolerant and can thrive in our tough, western growing conditions.
Looking for inspiration for drought-tolerant plants? The western plant introduction program—Plant Select—has a variety of western native plants and plants from sister regions of the world.
#5: Lawn/turf conversions are becoming more common.
I recently crossed paths with a homeowner from Park City, Utah. She was telling me that Park City residents are allotted a finite amount of water per household each year. If you exceed that amount, you have to pay a BIG financial penalty.
Yikes!
She said they pay close attention to their monthly water bill. They’ve also rethought their lawn. They still have some areas of lawn, but only where it makes sense.
As more people are looking for ways to get smart with their water use (whether it’s to save money or do good for Mama Nature), there’s a growing interest in replacing portions of traditional lawns with turf alternatives, like:
- Drought-tolerant perennials (the flowers that return year after year) and native plants
- Waterwise groundcovers
- Turf grasses that thrive in hot temperatures
These new alternatives to traditional lawns “allow homeowners to cut back on pesticides, fertilizers, mowing and watering,” says the National Wildlife Federation.
Yes, please!
Many of us have lawn grasses that thrive in cooler, damper parts of the country.
Kentucky Bluegrass, for example, is a common lawn grass in the Front Range of Colorado. It’s a “cool season” grass. It thrives in cool temperatures ranging from 40 to 70 degrees—typically going dormant in our summer heat.
Kentucky Bluegrass can be a good lawn grass for yards that get a lot of activity (like if you have young kids).
But many of us have parts of our landscape that just aren’t used that much.
In this case, it may make sense to rethink what’s planted there.
There are some types of “heat tolerant” turf grasses that do much better in hot and dry locations, like blue grama grass, buffalo grass, and special types of Bermuda grass, like Dog Tuff™ grass and Tahoma31.
These grasses thrive in hot temperatures. They are known as “warm season” grasses. This means they grow and green up when temperatures warm up. They use significantly less water than Kentucky bluegrass, and they rarely need to be mowed. (Less work for you!)
These types of lawns may be good solutions for parts of your yard that:
- Get lots of sunlight. (Heat tolerant grasses often don’t grow well in shade.)
- Don’t get heavy foot traffic.
- Don’t have mature trees nearby that may need more water.
Dog Tuff™ Grass is an example of a heat tolerant grass. Photo credit: Kelly Grummons. Photo courtesy of Plant Select.
I’ve transformed unused parts of my traditional lawn into waterwise gardens with a lot of native plants. Maybe you’ll be doing the same!
If you’d like to learn more about why turf conversions are beneficial, the National Wildlife Federation has an insightful article called: A Farewell to Lawns—Native turf-grass alternatives can reduce your environmental footprint while supporting birds, butterflies and other living creatures.
Related topics that may interest you:
by Ann at Go West Gardener | Updated: Sep 12, 2025 | Gardening Tips and Tricks, In-ground garden
What NOT to Plant in Fall Gardens
Early fall can be a good time to plant perennials in many places in the intermountain West. (Perennials are your flowers that return year after year.)
But as I’ve learned the hard way in my Colorado garden…
There are some flowers you may not want to plant in the fall in Colorado, Wyoming and similar western states.
Some plants need a little more time for their roots to get established before winter.
Here are a few examples.
Avoid planting “marginally hardy perennials” in the fall.
What’s a marginally hardy perennial?
It’s a plant that won’t come back if it gets too cold or if it can’t handle winter conditions where you live.
Usually, these plants are better off when they’re planted in the late spring or early summer. That way, their roots have ALL summer to get established in the ground.
This gives them a better chance of surviving their first winter.
Here’s a simple trick to tell if a perennial is marginally cold hardy >>
The pink flower pictured above is known as Gaura or Wandflower (Gaura lindheimeri). I LOVE this flower plant, but it’s marginally hardy in my garden along the Front Range of Colorado.
Some years it comes back. Some years it doesn’t, and I have to replace it.
Because I know it’s marginally hardy in my garden, I wait until spring to plant it. I don’t plant it in the fall. That way, it has as much time as possible to get established before winter.
Native western salvias often do better with spring planting.
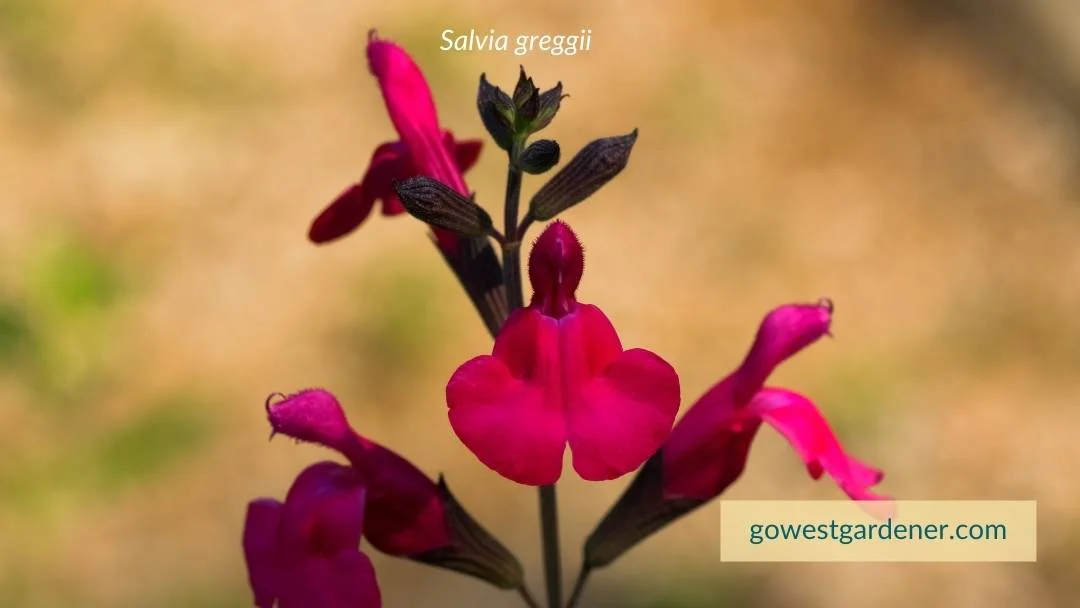
Native western salvias occur naturally in Texas, New Mexico and the Southwest. They go by botanical names like Salvia greggii and Salvia darcyi.
You may see popular ones at the garden center called Furman’s Red Sage and Wild Thing Sage.
Native western salvias thrive in hot and dry climates, so they grow well in our summers at our lower elevations.
These showy flowers are drought tolerant, long blooming and a favorite among hummingbirds.
So many reasons to love them!
But native salvias can be fickle in our winters.
It’s best to plant them in the spring or early summer (like May or June), rather than in the fall.
That way, their roots can get a running head start into autumn and winter.
In general, don’t plant evergreen trees in the fall. Spring is a better time.
While we’re on the subject of “what not to plant in the fall” in states like Colorado and Wyoming, add evergreen trees to your list too.
Evergreens (aka, “conifers”) are your trees that have needles. They don’t go dormant in the winter. This means they don’t go into hibernation mode like your trees that lose their leaves. They are awake and “ever green” through the winter.
Evergreen trees need to be well watered over the winter.
They’re also vulnerable to our tough winter conditions — like our drying winter winds and our big temperature swings — because they aren’t dormant.
It’s best to plant your evergreen trees in the spring, so their roots have more time to get established before winter.
Keep in mind, these are guidelines, rather than rules.
We may get a mild winter, and your plant babies may be fine.
But if you’d rather not risk it, then just wait until late spring to plant the flowers and trees in this article.
Related tips that may interest you: