by Ann at Go West Gardener | Updated: Sep 10, 2026 | Best Flowers for Colorado, Utah & Similar States, Gardening for Pollinators, Waterwise Gardening in the Intermountain West
Most of these spring flowers are low maintenance too!
Let’s say you want to add a splash of color to your spring garden, but you live someplace dry, like Colorado or Utah. It would be nice to find spring flowers that don’t need a lot of watering, right? (Less work for you—and good for Mama Nature too!)
The question is: Are there drought-tolerant spring flowers? Yes!
Here are 5 drought-tolerant spring flowers that can grow well in sunny, dry gardens in Colorado, Utah and similar states. They’ll keep your watering and work to a minimum.
Most of these flowers get planted in the fall.
Crocus

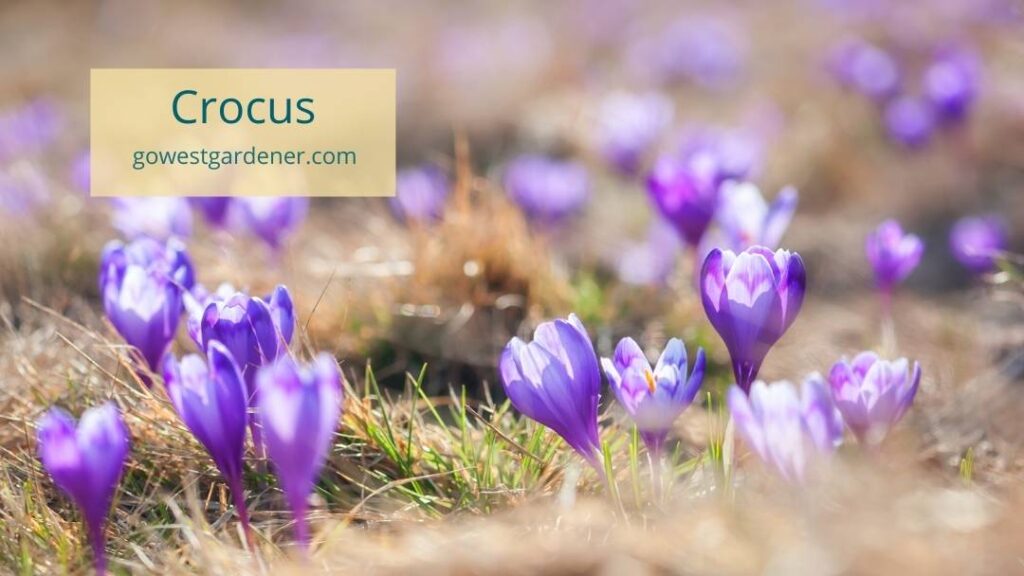
Crocuses are drought-tolerant spring flowers that come in a variety of colors, like purple, white, gold, yellow and lavender.
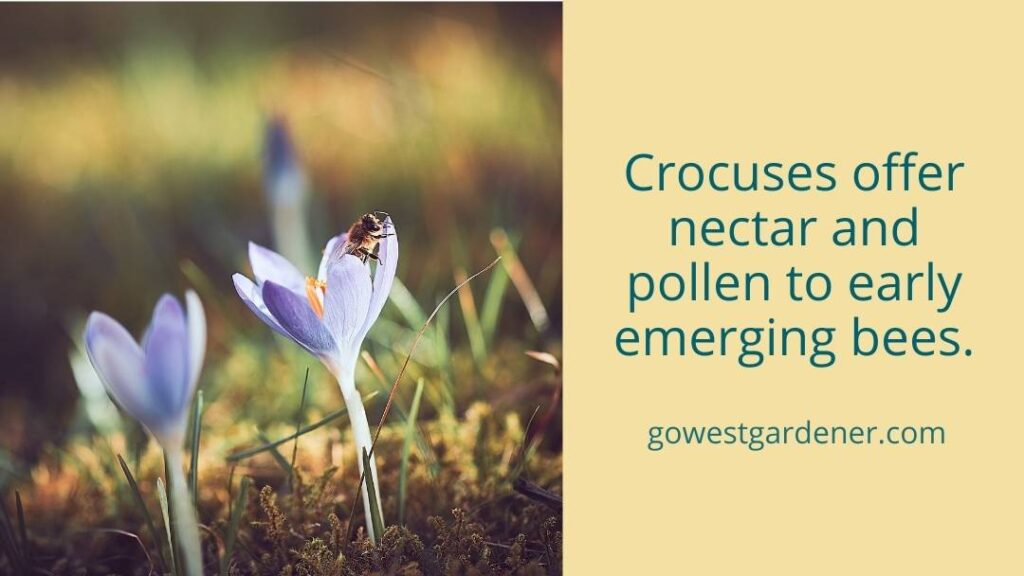
You plant crocus bulbs (known as “corms”) in the fall, and they bloom early in the spring. Their early spring blooms are important because they can offer nectar and pollen for early emerging bees. Plus, it’s nice to see pretty color in your garden after a long winter.
These small flowers tend to look the showiest when you plant a mass of them together (“en masse” or “in drifts”). Crocuses also can look pretty when you plant them in small clumps of flowers. Just avoid planting them individually because you won’t get that showy splash of color.
Garden lingo bingo: Crocuses “naturalize” easily. This means they should increase in number and come back each year. Yesss!
Wildflower tulip
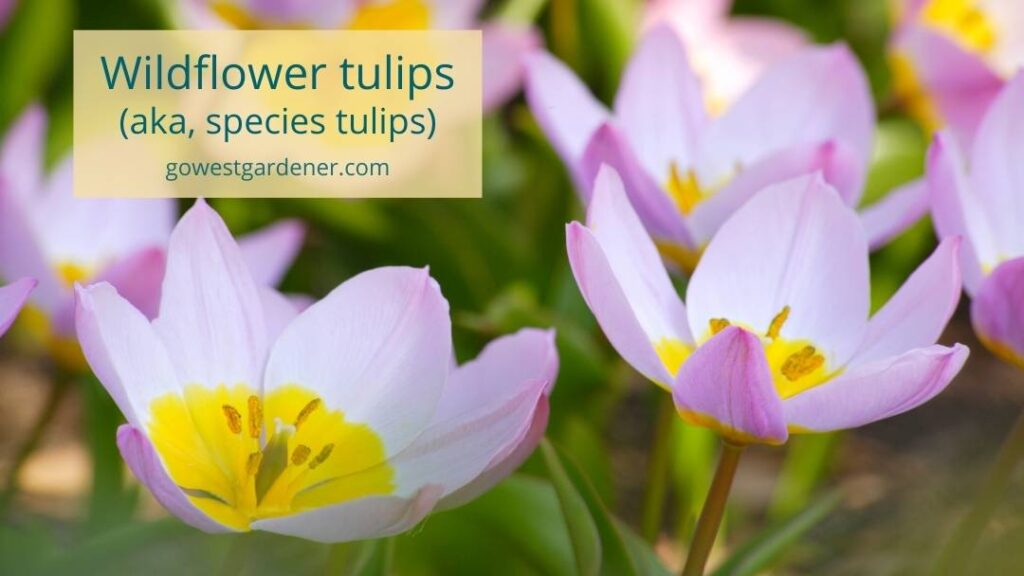
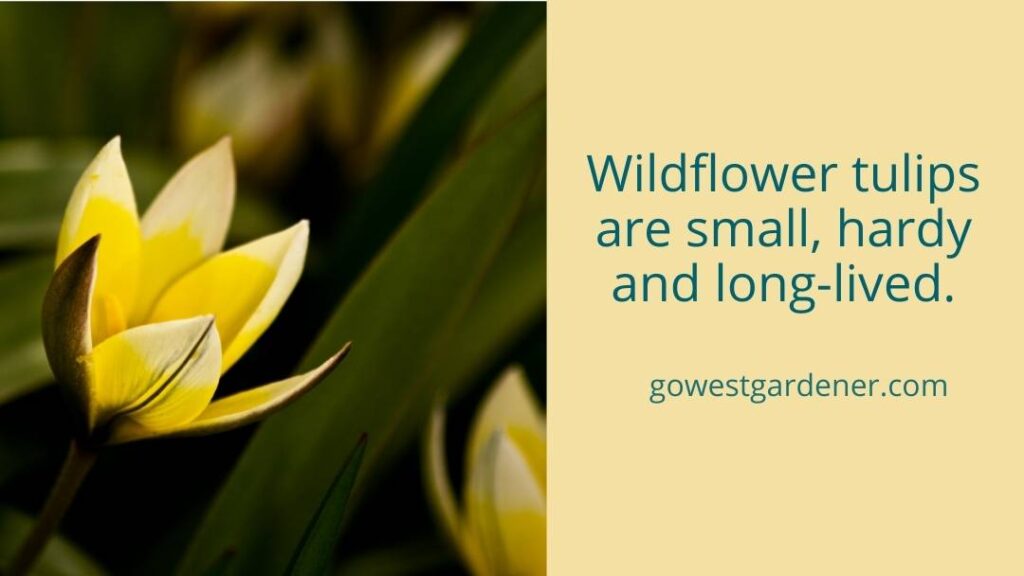
Wildflower tulips are another drought-tolerant spring flower for sunny, dry gardens.
They’re the smaller cousins of the showy tulips you’ll see in the spring. Wildflower tulips aren’t as flashy as their cousins, but they tend to be hardier, more reliable and last many more years.
These tulips are sometimes called “species tulips.” These lil’ guys are from the wild species of tulips.
Wildflower tulips have more of a natural, western vibe than their cousins. They’re a pretty addition to sunny rock gardens, front borders of gardens and natural-looking landscapes.
You can even plant them in “warm season” lawns—grass that doesn’t green up until it gets hot—like buffalo grass. Warm season lawns are usually drought tolerant and don’t need a lot of water, so wildflower tulips are a good match.
Wildflower tulips are a spring flowering bulb. You plant them in the fall, and they bloom in early- to mid-spring. They’re another spring flower that can “naturalize” in gardens. They should multiple and come back each year.
Pollinator tip! Wildflower tulips offer a good source of nectar and pollen for many hungry bees that are emerging after winter.
Muscari / grape hyacinth
First, a lil’ more garden lingo bingo…
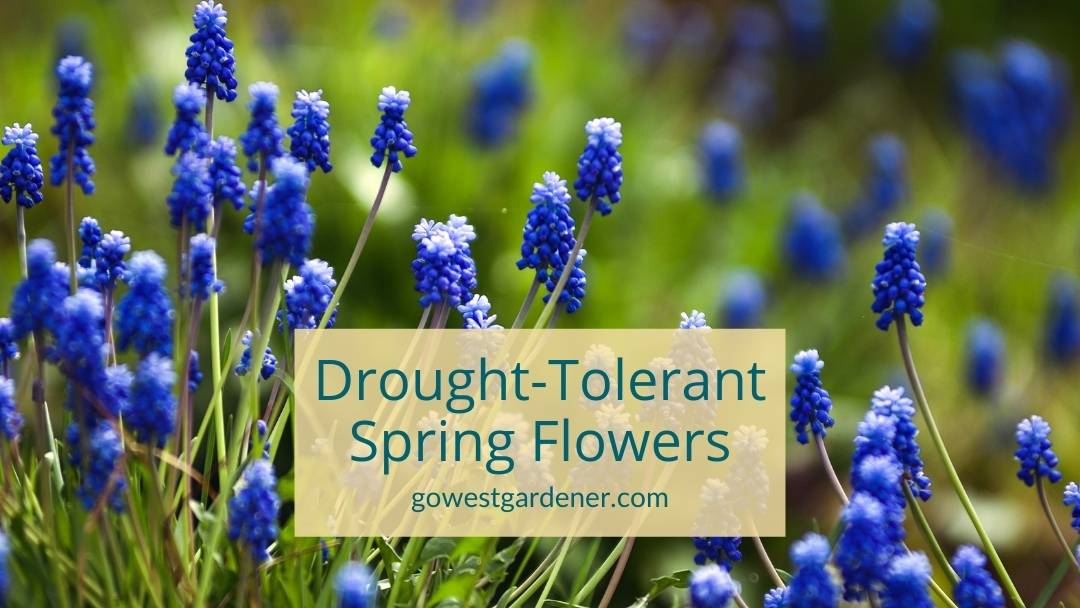
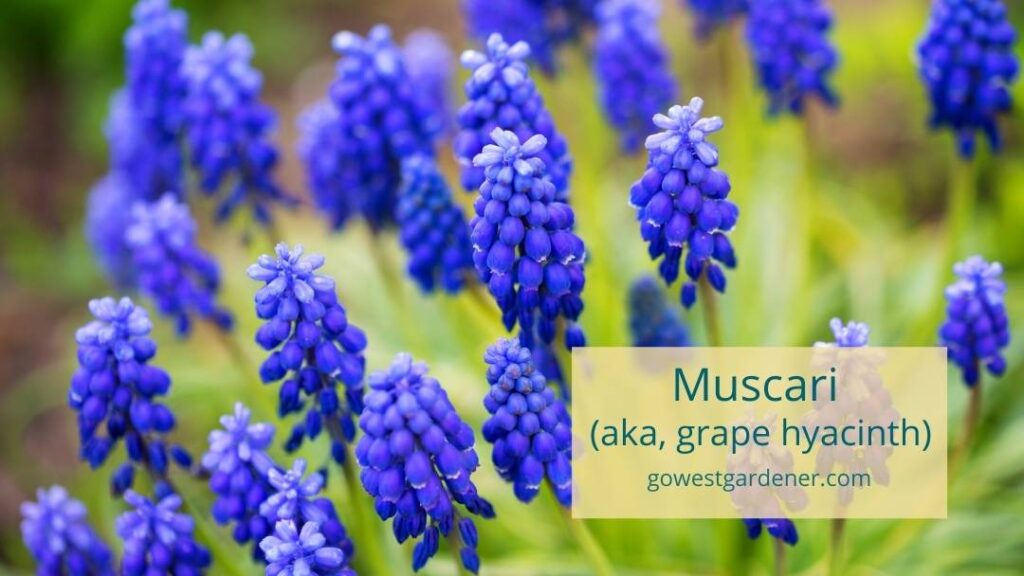
In casual conversation, you’ll hear these flowers called both muscari and grape hyacinth. (Can you see their resemblance to small clusters of grapes in the photo above?) I suggest using the name: “muscari.” Why? Because there’s another spring flower known as a hyacinth too, but it isn’t related. It can get confusing.
Muscari are small flowers that bloom in mid-spring.
One of the most popular muscari (Muscari armeniacum) comes in a beautiful, deep blue color. Yes, blue! But you can find other colors too, including white, purple and yellow.
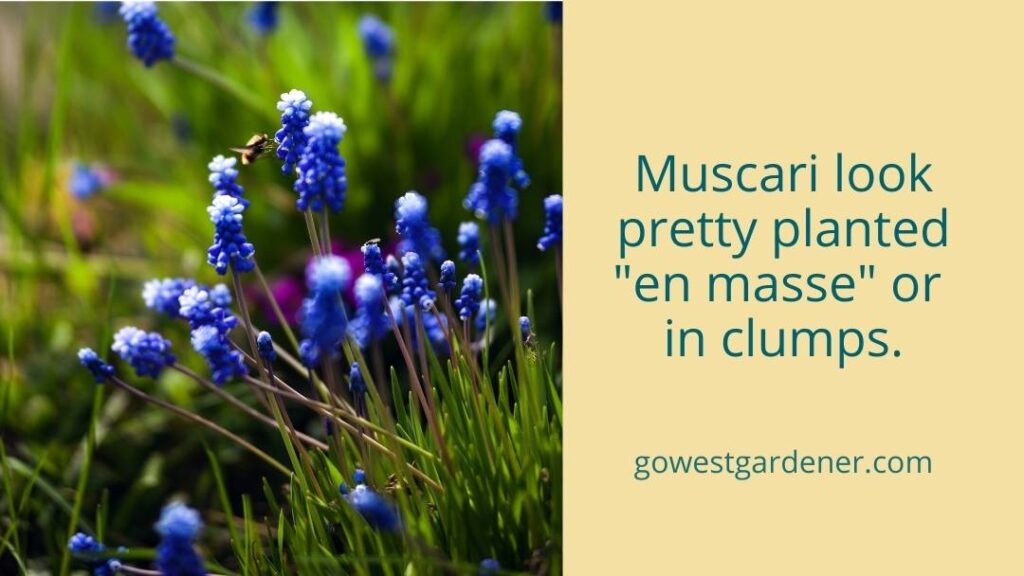
This is another flower that tends to look showiest when you plant quite a few of them together. I think they look pretty when they’re planted next to silver-leafed plants. I love the contrast.
Muscari are drought-tolerant spring flowering bulbs. You plant them in the fall, and they bloom in the spring. They can tolerate clay soil (the dirt that many of us have), as well as dry conditions. Very helpful for gardens in Colorado, Utah and the intermountain west!
This is another flower that will attract pollinators, like bees. They’ll naturalize too (coming back year after year).
Hybrid tulip
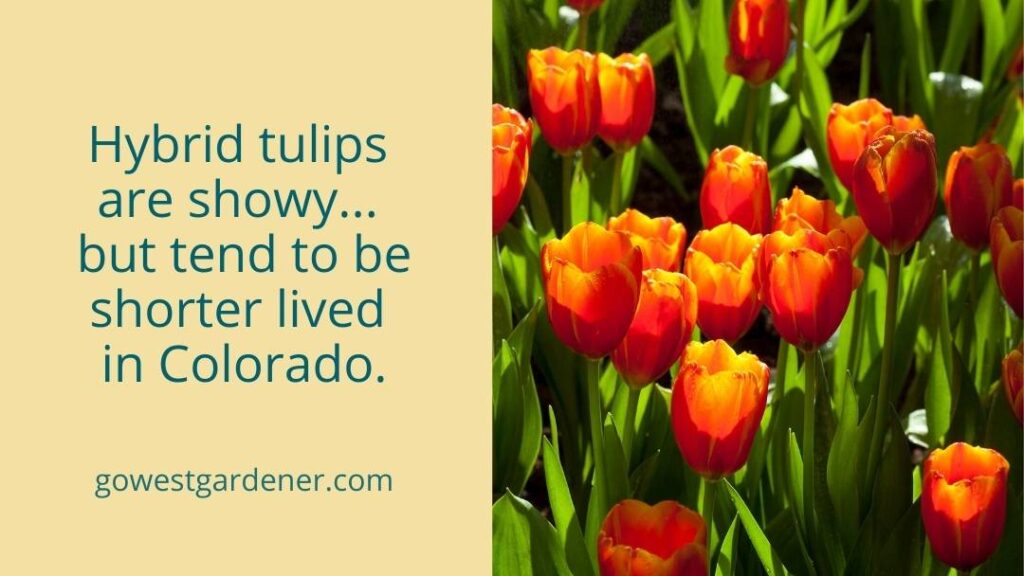
These are the classic tulips you’ll see in the spring. Typically, they don’t mind our dry conditions in states like Colorado and Utah.
Hybrid tulips can be short lived and a little unpredictable in the intermountain west. Some will only last a few years. But they sure are showy while you have them.
Worth noting… tulips are popular with more than just people. Critters love them too. If deer, rabbits, squirrels or other wildlife have been known to treat your garden as an all-you-can-eat buffet, you may want to skip tulips. Fending off critters may not be a low maintenance experience.
Hybrid tulips grow from bulbs that—yep, you guessed it—you plant in the fall.
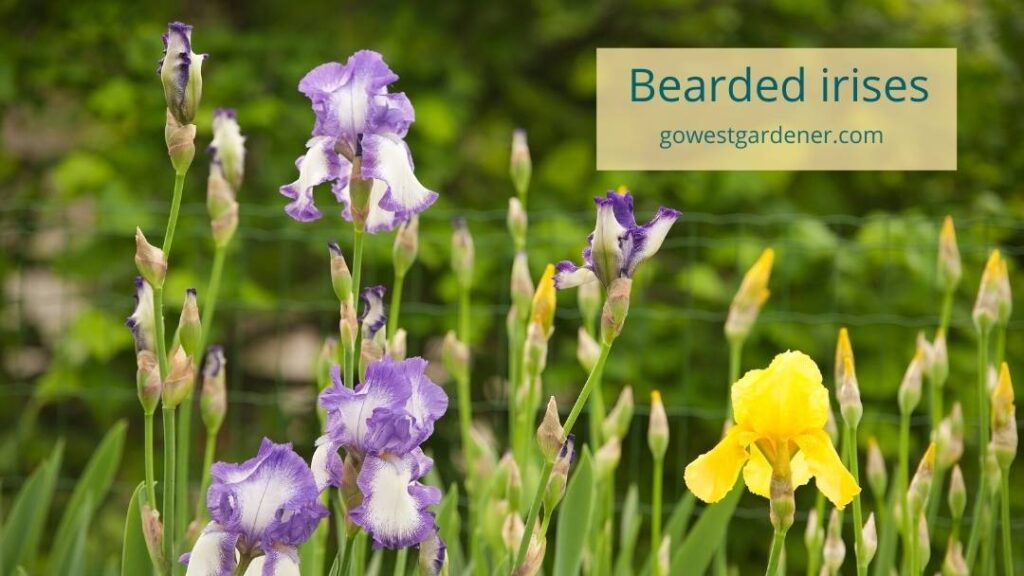
Bearded iris
Bearded irises come in a full spectrum of colors—just about every color you can imagine!
They remind me of where I grew up in Michigan. I was excited to learn these late spring flowers also thrive in sunny, dry gardens in the West. I’ve seen bearded irises growing as far south as the Tucson Botanical Gardens in southern Arizona.
There are many things to like about bearded irises in semi-arid states like Colorado and Utah.
Bearded irises are drought tolerant, so they look good even with our low precipitation. You can grow them in our alkaline soils (our tricky western dirt). They’re rabbit resistant AND deer resistant, which means rabbits and deer prefer to eat other plants first. And overall, irises don’t like a lot of fuss.
Yay for low maintenance spring flowers!
Bearded irises don’t grow from a bulb. Instead, they grow from “rhizomes” you plant in July, August or September. Rhizomes look like narrow, little potatoes. A rhizome is actually a modified stem of the plant. (Isn’t nature cool?)
When you plant your irises from July to September, you’ll give them time to establish their roots before it gets too cold.
Related topics that may interest you:

by Ann at Go West Gardener | Updated: Jan 28, 2026 | Gardening Tips and Tricks, In-ground garden
Let’s say you’d like to grow pretty spring flowers in your western garden, like tulips or daffodils.
Awesome! These spring flowers grow from bulbs that you plant in the fall in Colorado, Utah and the West.
Here are a few examples of spring flowering bulbs:

In this week’s tip, you’ll get 5 helpful tips for buying spring flowering bulbs.
Tip 1: The best time to plant spring bulbs is when your weather starts to cool.
Generally, it’s a good idea to plant your bulbs when temperatures start to cool off — but there’s still time before the ground freezes. That way, your bulbs have time to establish their roots.
(Yep, bulbs have roots!)
Look for days when temperatures are in the 60s. For example:
- The best time to plant bulbs in Colorado’s Front Range is usually October.
- In western Colorado and northern Utah, the timing is often October into early November.
The timing can vary slightly from year to year. If you’re getting blazing-hot temps and it still feels like summer, it’s likely too early to plant your spring flowering bulbs.
So, what does this tip have to do with buying spring flowering bulbs?
It’s common to buy bulbs earlier than they should be planted. Simply put them in a cool, dry place until you’re ready to plant, so they don’t dry out.
Tip 2: Spring flowering bulbs often start appearing in stores in August and September.
Typically, you can buy spring flowering bulbs from:
- Independent garden centers
- Online retailers like High Country Gardens (they often have unusual bulbs)
- Costco and similar retailers
- Home improvement stores
- Bulb sales at local botanic gardens (For example, the Denver Botanic Gardens typically has a spring bulb sale in late September. The Durango Botanic Gardens often has a spring bulb sale in August with bulb delivery in October.)
If you live in Idaho, Oregon or Washington, you may have restrictions on where you can buy some types of bulbs (like allium). You can get the scoop in this publication from the University of Idaho Extension.
Tip 3: Spring flowering bulbs are sold in different types of packages.
You can buy bulbs as:
- Pre-assembled packages (sometimes with several types of flowers)
- Individual bulbs you can choose from open containers
Buying a pre-assembled package is easy. You just pick the bag of flowers you want and go!
The tradeoff is that you may not be able to tell whether you have healthy bulbs in your package.
If your package contains several types of flowers, the bulbs may be all mixed together or they may be bagged separately. In the photo below, you’ll see two types of daffodil bulbs that were included in the same package. (I like it when they’re bagged separately because you have a little more control over the design.)
Sometimes, you can pick individual bulbs at local garden centers. But this is becoming less common.
Why would you want to choose each bulb individually?
- You can be picky and look for healthy bulbs.
- You can choose as many bulbs as you like.
The downside is you have to trust that the right bulbs are in the right containers. If someone picked up a bulb and put it back in the wrong place, you may not be able to tell … until that flower comes up next spring.
(Hooray for surprises!)
Tip 4: Here’s how to choose healthy bulbs, so you aren’t wasting money on duds.
Think of a flower bulb as a battery. It stores energy for the plant. Ideally, you want the bulb to be fully charged (totally hydrated), as big as it can be, and in good condition.
With that in mind:
- Don’t mind the papery skin — it’s good for the bulb! Bulbs have a brown, papery skin on them, kind of like an onion. It’s called a tunic. The tunic is good for a bulb. It helps keep moisture in the bulb.
- Choose the heavier bulbs. You want the bulbs to feel heavy in your hand. Hold a few, so you can get a sense for which ones weigh more than others. If a bulb feels light, it’s probably dehydrated. Don’t choose that one. (Keep in mind, some types of flowers have small bulbs, so “heavy” is relative.)
- Look for the biggest bulbs of the bunch. Yep, size matters in most cases. There is a correlation between the size of the flower and the size of the bulb.
- Focus on the bulbs with minimal blemishes. If the papery tunic has fallen off (it happens), look at the condition of the bulb underneath. Ideally, the bulb should look smooth, creamy and firm. If the bulb has nicks and blemishes, is turning brown, is shriveled, or looks moldy, it’s a good idea to skip that one.
These tips are helpful when you’re picking individual bulbs.
But you can also use them to inspect bulbs that come in clear or semi-clear packages. You can pick out the best bag of the bunch.
Tip 5: Spring flowering bulbs bloom at different times.
You may want to choose bulbs that bloom at different times of the spring. That way, you’ll have longer-lasting color.
Usually, you can find the description of when the bulbs will bloom on the package. I’ve included a few examples below, so you can see what I mean.
By the way, this approach can help you with our wacky spring weather in Colorado and Utah too. Let’s say you get freezing temperatures in the spring that ruin some of your blooms. If you have flowers that bloom at different times, you may still get color from your other spring flowers.
It’s like you’re hedging your bets with Mama Nature.
Ah, the joys of living in the intermountain west! 🙂
Related tips that may interest you:

by Ann at Go West Gardener | Updated: Sep 10, 2026 | Gardening for Pollinators, Gardening Tips and Tricks
Black-eyed Susan (officially, Rudbeckia — Rude-bek-ee-uh) is an easy-to-grow flower that can add big color to your western garden, particularly in the late summer.
But often, gardeners plant Black-Eyed Susan… and it doesn’t come back
If this happens to you, you may find yourself thinking: “Well, that article was a load of crap.”
Or worse, you may think: “I guess I just don’t have a green thumb.”
I’m here to tell you this isn’t the case! But there are helpful things to know about Black-Eyed Susan that don’t always get mentioned at the garden center.
So, in this article, you’re going to learn…
How to tell the difference between short-lived vs long-lived Black-Eyed Susans (“biennials” vs “perennials”)
I’m going to use a little garden lingo later in the article (bring on the Latin!), but I promise I’ll explain what it means.
Some types of Black-Eyed Susan are much shorter-lived than others.
So, what are some ways to know what you’re buying?
- Take a good look at the plant
- Look at the botanical name on your plant tag (the Latin jibber-jobber I’ll explain in a sec)
The plants below are Black Eyed Susan.
What do you notice?

In the Plant A photos, do you notice the hairy leaves and stems? When you touch them, they feel fuzzy.
If your Black-Eyed Susan is fuzzy, you likely have a shorter-lived plant
Your fuzzy Black-Eyed Susan plants are likely Rubeckia hirta. They tend to be shorter-lived.
If you’re new to plant names: Rudbeckia describes a group of plants with similar traits. Hirta is like a descriptive adjective. It loosely translates to “hairy” or “rough” in Latin.
To keep things basic, plants with the botanical name, Rudbeckia hirta, include different types of hairy Black-Eyed Susan.
We’ll chat about why plants are hairy at another time. (Does this make your list of topics you never thought you’d talk about today? “Hey, why are plants hairy?”) But for now, don’t let the hair distract you. The hair itself is not why the plant is shorter-lived. It just happens to be a clue you can use to assume you have a shorter-lived plant.
It also helps to look for the botanical name, Rudbeckia hirta, on the plant tag. Unfortunately, growers use ALL kinds of names on plant tags, so this isn’t always a sure thing.
The next question you may be wondering is,
“Okay, so how long do hairy Black-Eyed Susan plants live?”
Generally, Rudbeckia hirta are “biennials” or “short-lived perennials.”
They go through a 2- and sometimes 3-year life cycle, and then they’re done.
Depending on your garden center, you may find young, leafy Rudbeckia hirta in the “perennials” section of the store — the section with plants that come back.
But, Rudbeckia hirta can be sold in the “annuals” section of the store too. Annuals are the flowers that give you colorful flowers for one season, but typically don’t return next year.
(Because it’s never simple, oye!)
When the plant is in the annuals section, the garden center is likely selling it in its second of growth. Your plant is flowering, and it’s near the end of its life cycle.
You can just enjoy varieties like these for the summer and fall, and pull them out at the end of the growing season.
But if you have them in your flowerpots and you WANT to see if they’ll come back, you also can move them to the ground in the early fall to see if they’ll return next year.
Depending on where you live, these plants may survive a winter or spread through their seeds.
Even though Rudbeckia hirta plants tend to be short lived, they CAN make new plants from their seeds, so Black Eyed Susan may keep reappearing in your garden year after year.
Bonus! More plants!
(But reseeding is a topic for another day.)
Okay, back to our comparison photos.
What do you notice about Plant B?
Plant B has smooth stems and leaves.
It’s a different species of Black-Eyed Susan. Specifically, it’s the longer-lived type of Black-Eyed Susan known as Rudbeckia fulgida. Fulgida loosely translates to “shiny” or “glimmering.”
Think of it as a shiny-leafed Black-Eyed Susan.
Below, you’ll find some examples you may find at your garden center.
‘Goldsturm’ a is popular variety. It was the 1999 Perennial Plant of the Year — an award given to plants that are standouts from other varieties. This plant should return for many years.
‘Goldsturm’ is happier with moderate watering, so you may not want to plant it in a dry, hot garden.
Which Black-Eyed Susan is native?
A native plant is one that has existed naturally in an area for hundreds of years. It wasn’t introduced through European settlers.
The answer to this question depends on where you live.
Rudbeckia hirta — hairy Black-Eyed Susan — is native to Colorado, Wyoming, New Mexico, the central United States and eastward. You can see its native range map here. It’s highly attractive to pollinators, and it’s a host plants for many butterflies (meaning they seek those plants out for their young).
So, for my fellow westerners, if you’re interested in native plants and/or you want a pollinator-friendly garden, you may prefer growing Rudbeckia hirta.
Rudbeckia fulgida is native to areas east of the Mississippi River and a few areas in the central U.S. You can see its native range map here.
Bring on the Black-Eyed Susan!
These aren’t the only species of Black-Eyed Susan, but they’re popular ones. And they’re a great place to start for your western garden.
The next time you’re at the garden center, look for Black-Eyed Susan plants. Touch the leaves and stems to see if they feel fuzzy.
If you feel hair, you’ll know what that clue is telling you: You likely have a shorter-lived plant.
Parting thoughts: This article is intended as an overview. It’s good to check the plant tag, or even better, read an online plant description from a grower for the specifics on the plant you’re buying, such as how long it should live, its plant hardiness zones, etc. There can be many nuances among individual plant varieties.
Related topics that may interest you:
by Ann at Go West Gardener | Updated: May 20, 2026 | Gardening Tips and Tricks, Western Container Gardening With Flowers
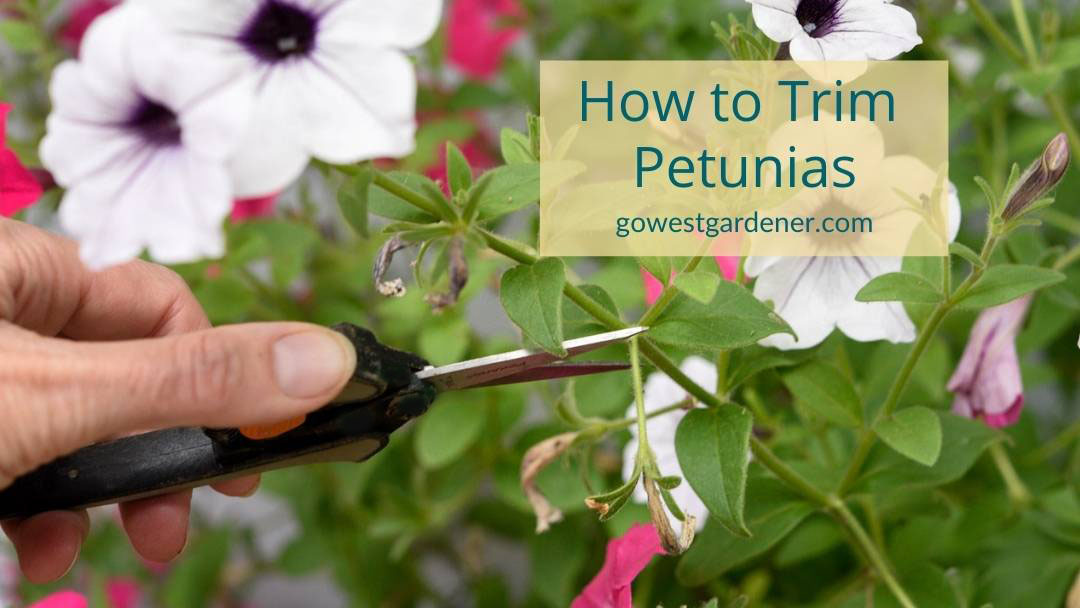
If you have petunias, you may be wondering how to keep your petunias looking good, especially when the blooms start dying.
In this week’s video, you’ll:
- See exactly where to trim your petunias, so your plants look pretty and you encourage them to keep giving you new blooms.
- Find out when you DON’T need to prune your petunia plants.
- Discover what to look for to make sure your petunias aren’t “going to seed.” When your petunias start making seeds, it takes a lot of their energy.
Click the video above to watch.
Prefer to read?
Simply scroll down for the transcript.
TRANSCRIPT:
How to Trim Petunias to Keep Them Looking Pretty
Are you wondering, “How do I maintain my petunias?”
“When the petals die, what am I supposed to do?”
That’s what we’re going to talk about in today’s tip.
Hi, I’m Ann with Go West Gardener.
[music]
Inspiring new western gardeners to find their green thumbs with flowers.
I love that you’re wondering how to maintain your petunias because taking a few small steps can make a big difference between colorful, showy flowers versus having stringy, kind-of-boring looking petunias.
Let’s dig in.
Petunias can go through a cycle of blooms.
They flower, that flower bloom dies, and then new flower blooms show up on your plant.
On many petunias, though, you need to manually remove the dead blooms in order to encourage new ones.
This is known as deadheading.
And yes, it’s more than just picking off the dead petals.
Here’s what I mean.Think of your petunia bloom as a torch holding a flame.
This little stem is the torch, and your petal is the flame.
So, when petal dies, people often do one of two things.
One, they remove the dead petal (the flame), but they leave the little stem (the torch).
Or two, they may just wait for the dead petal to fall off.
Here’s the problem.
You may create a little seed pod where the flower was.
It looks like a green kernel.
Do you see it here? It grows in the center of the torch.
This is known as “going to seed.”
And while going to seed sound like a great thing, it means your plant could stop giving you new flowers.
And we want colorful blooms.
So, here’s what you want to do instead.
You want to cut off the entire torch, trimming back to the nearest main stem.
Right here.
Now, some petunias have been bred, so that they can’t go to seed or they mostly deadhead themselves.
Like the “tidal wave” variety.
You’ll see this name on the plant tag when you buy it.
In theory, this means you don’t have to remove the dead blooms.
When you look at the little torch, you SHOULD see a brown center.
But if you see a green center, Mother Nature has found a way to go to seed, and you may want to trim off that torch down to the stem.
Please click subscribe below [on YouTube] … and share a little love while you’re at it.
See you next time!
[music]
Related topics that may interest you:
by Ann at Go West Gardener | Updated: Sep 10, 2026 | Gardening for Pollinators, Gardening Tips and Tricks
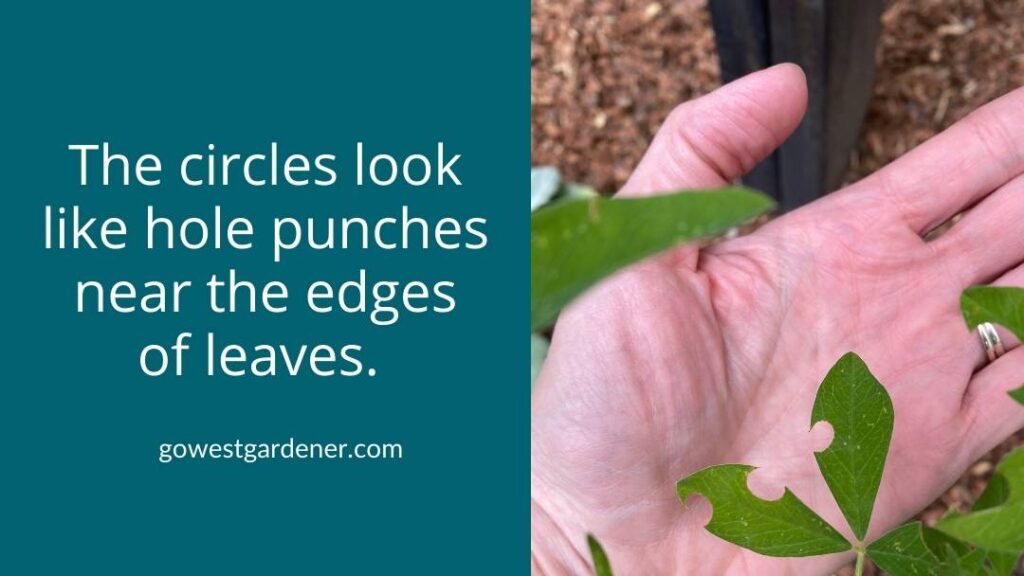
Let’s say you’ve noticed some strange, round holes in your plant leaves. These circular holes have fairly smooth edges. It almost looks like someone took an office hole punch and punched circles along the edges of your leaves.
What’s making these round holes in your plant leaves?
Is it Japanese beetles??
Nope, Japanese beetle damage looks different.
It’s more likely you have leafcutter bees—a native bee and beneficial insect in Colorado and many western states. They’re important pollinators for wildflowers and some fruits and veggies.
(Cool!)
Leafcutter bees aren’t eating your leaves. Rather, they’re cutting circular pieces to use in the nests they’re building for their babies. They’ll insert the leaf piece into a hollow tunnel, along with nectar and pollen. Then, the mama bee lays an egg and seals it off. Her bee nursery is ready to go.
What plants do leafcutter bees like?
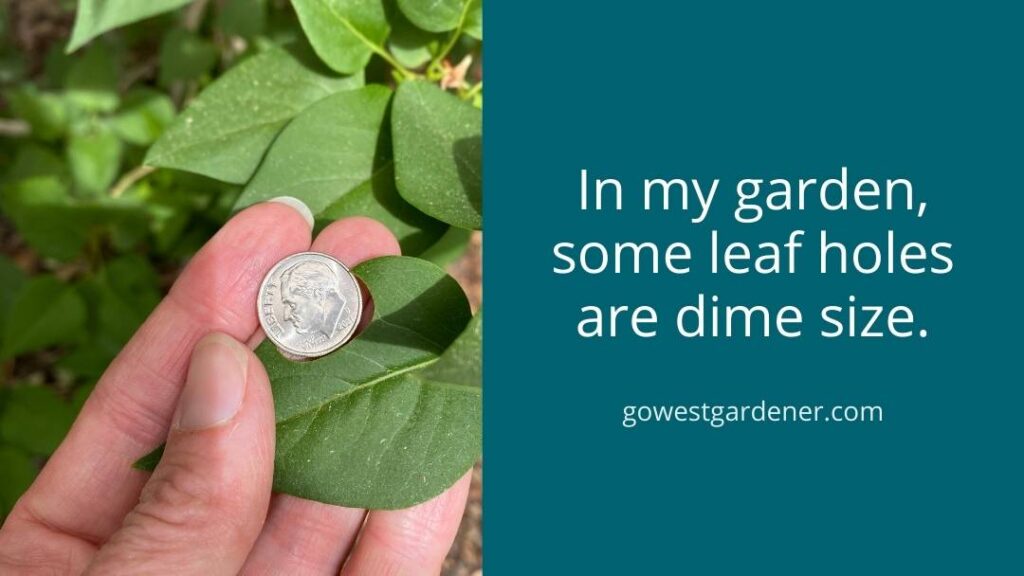
Almost any plant with broad, thin leaves is fair game. In my garden, the leafcutter bees love cutting round holes in the leaves of my lilac bushes and a flower plant called Golden Candles (Thermopsis lupinoides).
I’ve noticed circles and semi-circles that are dime size, but many of the holes are smaller.
So, should you be worried about the round holes in your leaves?
Typically, no. The damage from leafcutter bees is only aesthetic.
Insecticides will not prevent bees from cutting holes, according to the Colorado State University (CSU) Extension. So, save yourself money and a trip to the hardware store. Skip the insect sprays and powders.
(This will keep your garden ecosystem healthier too.)
In most cases, you don’t need to do anything…
Except maybe point out the leaves to your friends, so they can see that your garden is a favorite among pollinators.
If you have a plant that the leafcutter bees have become REALLY fond of, the CSU Extension suggests covering the plant with loose netting or cheese cloth if you want to deter the bees from making holes. Put up the netting when you first notice damage.
Just keep in mind the damage is only aesthetic. You’ve got busy pollinators at work in your landscape. 🙂
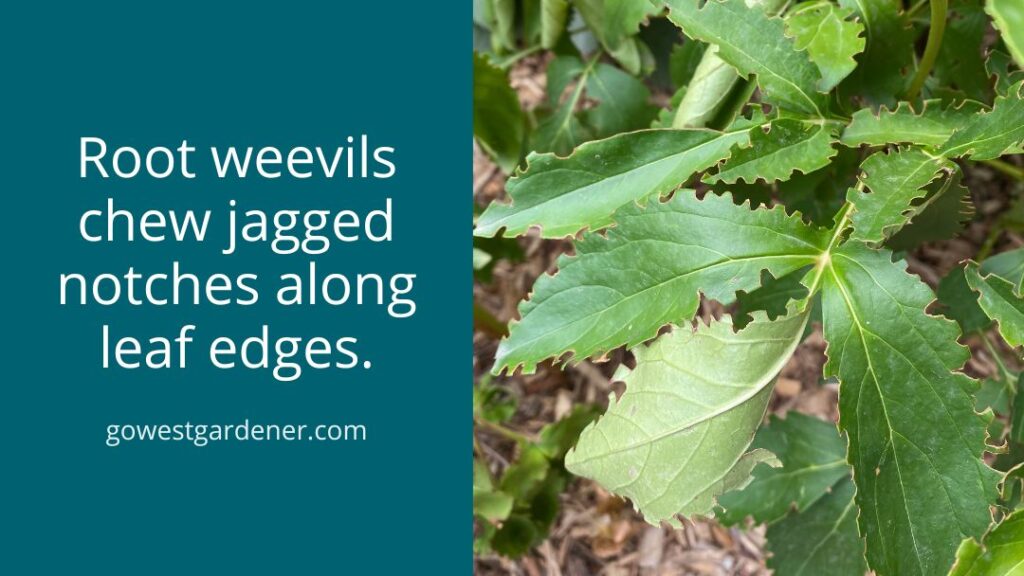
Now, if the holes on your leaf edges are jagged and look like notches…
Then, you likely have a different insect.
Root weevils are a type of beetle. At night, the adults chew jagged notches along the edges of plant leaves. You can find root weevil leaf damage on lilacs, peonies and privets, as well as other plants.
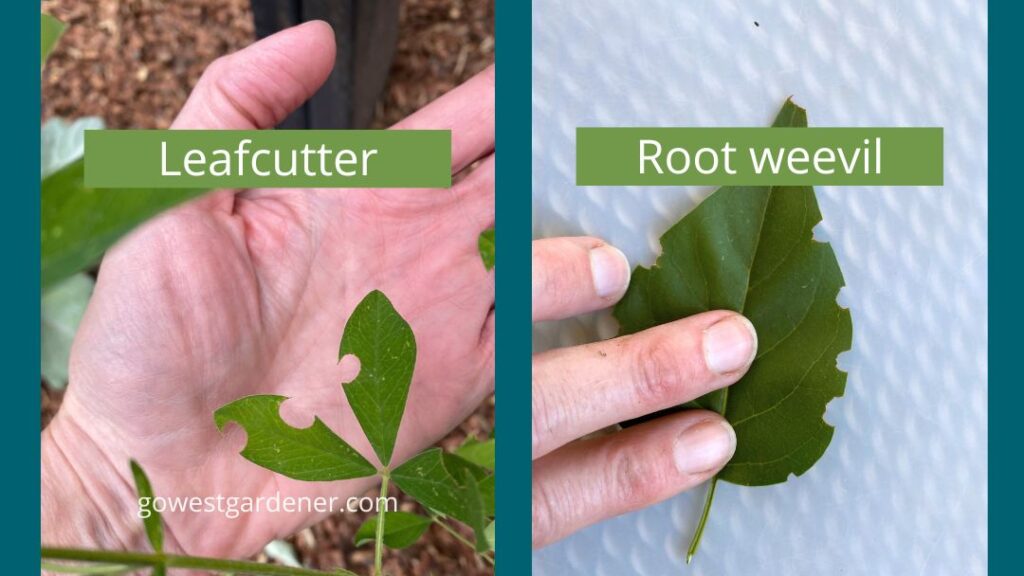
To me, the edge of a leaf with root weevil damage looks like the edge of a key. It’s more jagged than the symmetrical, round holes from a leafcutter bee. Can you see the difference below?
If you want to learn more about root weevils (and see more photos of their leaf damage), check out this root weevil summary from the CSU Extension.
Related topics that may interest you:
by Ann at Go West Gardener | Updated: May 20, 2026 | Flower Garden Basics
Colorado has 5 plant hardiness zones: 7, 6, 5, 4 and 3.
If you’re new to plant hardiness zones, they tell you whether your flower plants are likely to survive the coldest winter temperatures that are expected in your area and come back next year.
(For the full scoop on hardiness zones, check out: What is a plant hardiness zone? And why they matter.)
So, what plant hardiness zone is your Colorado garden? It depends on where you live, as you can see in the USDA Plant Hardiness Zone Map for Colorado below. Scroll down this page for specifics.
Areas with warmer winters have higher zone numbers. They’re in green. Areas with colder winters have lower zone numbers. They’re in purple and pink.

Let’s look at plant hardiness zones in Colorado in broad strokes:
- If you live in the hottest parts of Colorado — like the southwest corner and parts of the Grand Junction area — you’re likely in plant hardiness zone 7. Surrounding areas are in zone 6.
- Much of the Front Range is in zone 5.
- But if you live in an urban corridor — like parts of Denver, Aurora, Boulder and Fort Collins, as well as parts of Colorado Springs — you’re likely in zone 6a. Buildings and concrete can heat things up. Much of Pueblo is in zone 6 too.
- At higher elevations, like up in the mountains, your plants often need to be able to withstand colder winter temperatures. (For every 1000 feet you go up in elevation in Colorado, temperatures drop about 3 to 4 degrees.) Your garden will likely have a lower plant hardiness zone number. The majority of mountain towns are in zone 4. Some are in zone 5 and a few are in zone 3.

There are exceptions to the “it gets colder as you go higher” guideline.
For example, if you live on a valley floor in Colorado, your garden can be up to 10-degrees COLDER than your neighbors on nearby hillsides or mountainsides.
Cold air slides down the slopes and settles on valley floors at night.
Another exception…
If you live on a north-facing slope, your garden may be a lot cooler and damper than the dry, heat-gathering gardens on south- and western-facing slopes.
And one more exception…
It’s possible to create “microclimates” in your garden that are warmer than the surrounding area. For example, you could include large boulders in your garden. Boulders and large rocks can radiate heat to surrounding plants and help block winds. Often times, flowers planted along the south and western sides of buildings or rock walls can receive more heat too.
Also worth noting… the USDA released an updated zone map for 2024.
With the new release, some parts of Colorado grew “warmer” in plant hardiness zones.
For example, my garden in the Front Range went from a 5b zone to a 6a zone. This means the lowest coldest temperatures that are expected where I live went from -15 degrees below zero to -10 degrees below zero.
But here’s something to consider. While our summer temperatures are getting hotter, it’s still possible that we can get a really cold winter. (Brutally cold winters just may not be as frequent.) Where I live, we’ve had winter temperatures reaching -15 degrees below zero and -17 degrees below zero in two of the last six years. Technically, these are still zone 5 temperatures. So, even though the USDA map says I’m 6a, I’m going to continue to think of my garden as zone 5. That way, I’m buying plants that are more likely to survive.
What’s the takeaway? Your local surroundings play a role.
The zone you’ll get from the USDA may not accurately reflect what’s going on in your individual garden in Colorado. You may want to adjust down a zone (for colder conditions) or up a zone (for warmer conditions). Just keep this in mind as you get your Colorado hardiness zone below!
To get the Colorado plant hardiness zone for your garden:
Click to the USDA website here and enter your zip code >>
Related tips that may interest you:
by Ann at Go West Gardener | Updated: May 20, 2026 | Best Flowers for Colorado, Utah & Similar States, Waterwise Gardening in the Intermountain West
I received the following question from a gardener who moved to Colorado, and I thought, ooooh, that’s a good one!
“What plants struggle in Colorado?”
Here are some popular plants from other parts of the country that are best to skip in Colorado if:
- You don’t want extra work.
- You’d like to keep money in your wallet.
- You want to be smart with water.
- You’d like your Colorado landscape to consistently look good.
Let’s dig in!

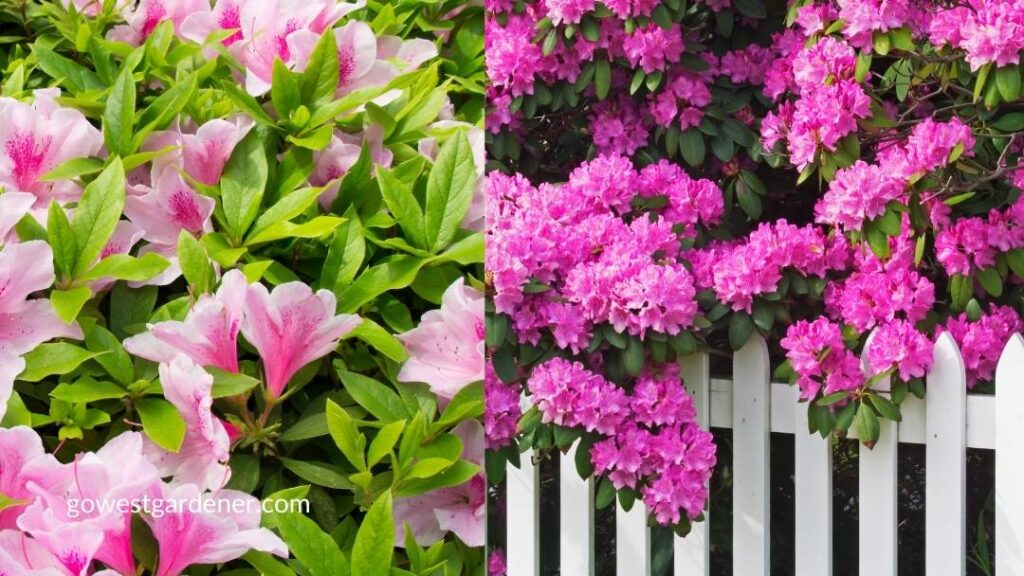
Azaleas and rhododendrons
Azaleas and rhododendrons are flowering shrubs that thrive in parts of the country that get more rainfall and have acidic soil (dirt).You’ll see azaleas growing in gardens along the East Coast and gracing photos in Southern Living magazine. Rhododendrons are popular in the Pacific Northwest.
But azaleas and rhododendrons struggle in Colorado.
Why? Because our soil is too alkaline for them. It’s tough for these acid-loving plants to get the nutrients they need from the ground, and they decline in health.
You may see azaleas and rhododendrons in the box stores and think, “But they look so pretty!”
Keep on walking.
Those stores don’t always have plants that are well suited for our unique growing conditions in the Rocky Mountain region. Azaleas and rhododendrons will have a tough time looking pretty in the ground.
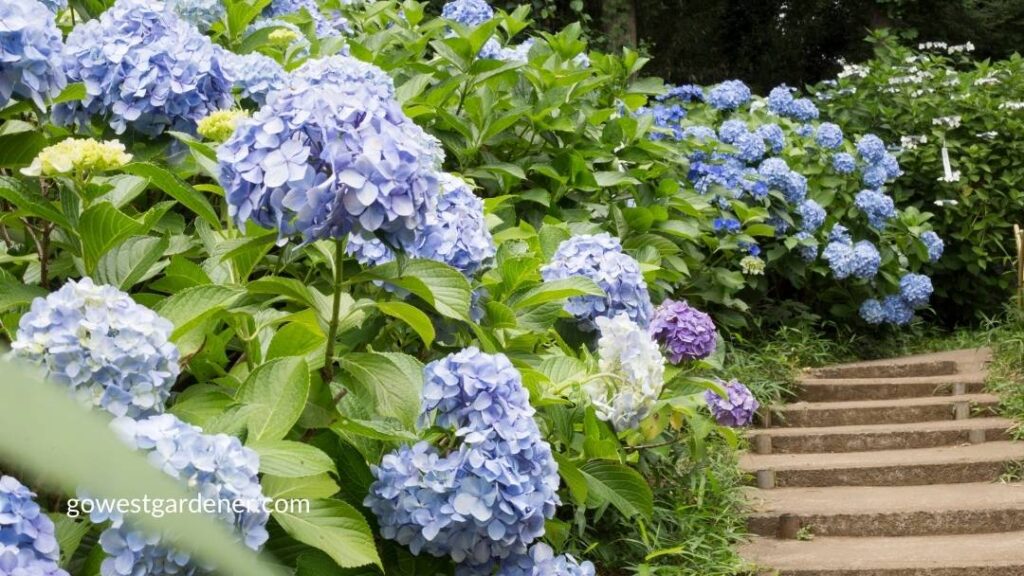
Hydrangeas
Hydrangeas are another type of flowering shrub. The majority don’t fare so well here… with a few exceptions.
But more importantly, hydrangeas need A LOT of water. Heck, they even have “hydra-” in their name!
Hydrangeas need up to 2 inches of water per week in hot and dry weather just to keep from wilting, according to the University of Massachusetts Amherst. Given how hot and dry our summers are, that’s about 20+ inches of moisture in July and August alone.
To put that in perspective, we get an average of 8-16 inches of moisture for the entire year at our lower elevations in Colorado. (The exact amount depends on where you live.) In contrast, Seattle and Chicago get close to 40 inches of moisture per year. Boston gets about 44 inches per year. And Atlanta and Orlando get around 50 inches per year.
Hydrangeas are beautiful… but typically, they are not a great fit for our semi-arid climate.
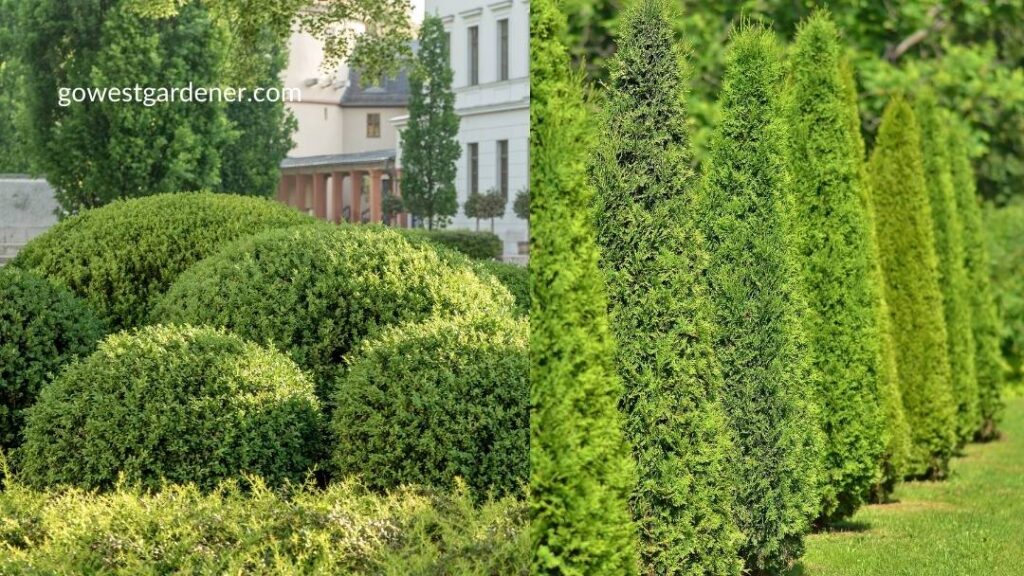
Boxwoods and arborvitaes
Boxwoods and arborvitaes are decorative landscape plants that are popular in other parts of the country. When they’re healthy, they (typically) keep their color all winter.
But here in Colorado, these evergreen shrubs and trees aren’t big fans of our winters, and they’ll let you know it!
I wrote a whole article on this topic: See why boxwoods and arborvitaes struggle in our Colorado winters >
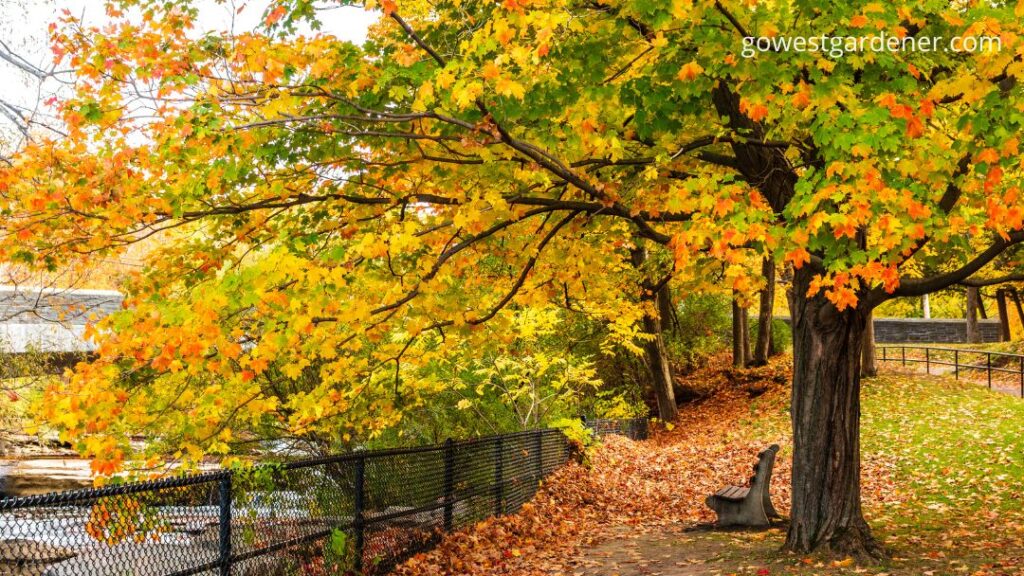
Many types of maple trees
I grew up in a Midwestern state with beautiful maple trees, so this was a hard one for me when I first moved here.
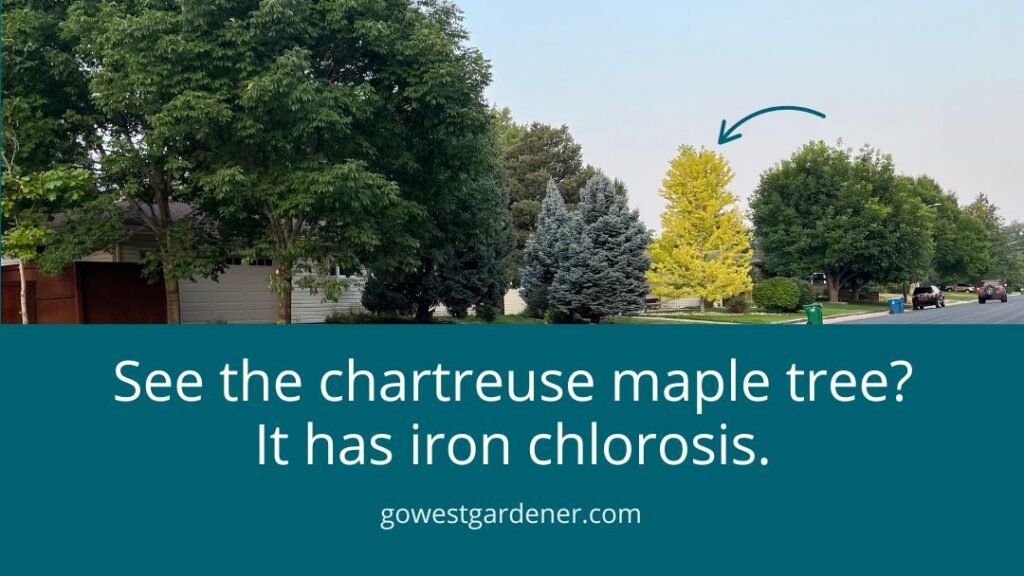
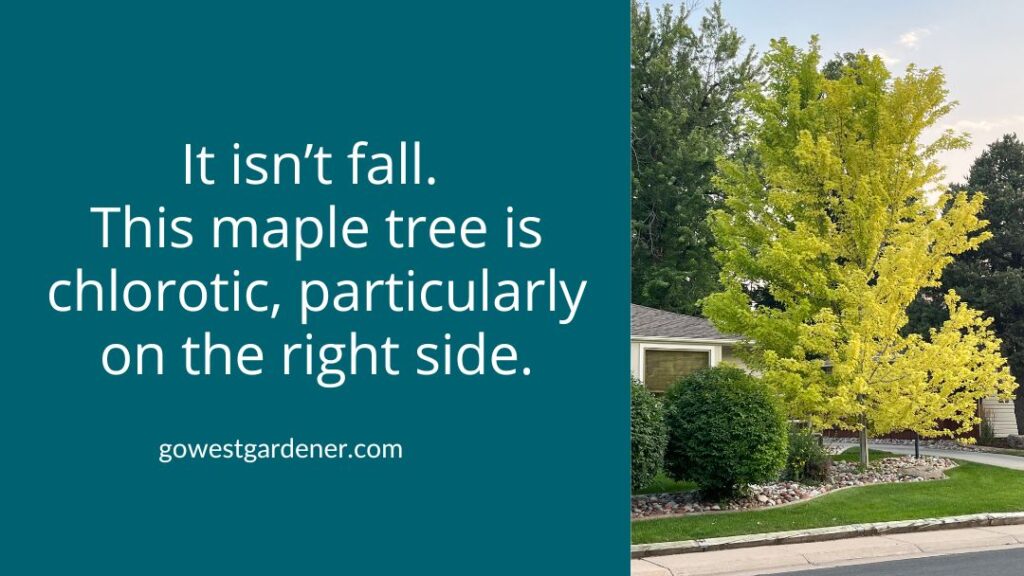
But many maple trees have a hard time absorbing iron from our soils. They are prone to “iron chlorosis” in Colorado. Their leaves can turn chartreuse green, and they often need to be treated with iron annually, which means you’re shelling out money to a tree company.
They also can struggle in our drought, our big temperature swings and our heavy spring snowstorms.
If you have your heart set on a maple, check out Bigtooth Maples (Acer grandidentatum), Tatarian Maples (Acer tataricum) and Rocky Mountain maples (Acer glabrum). They have a stronger track record than other maples in Colorado. Bigtooth Maples and Rocky Mountain Maples are native to western Colorado and Utah.
So, what does all this mean for your Colorado garden?
You have a choice!
You can absolutely plant any of these plants if you really want to. But if you want an easier time, why not focus on plants that thrive in our western growing conditions?
There are plenty of beautiful western plants to choose from!
Related topics that may interest you:
by Ann at Go West Gardener | Updated: Sep 12, 2025 | Gardening Tips and Tricks
Looking for a fun fall project that will make your front porch look GOOD?
Use a pumpkin as a planter. You’ll create a cute autumn flowerpot that has your neighbors saying, “Wow!”
I created pumpkin planters with a friend last fall. This project is quick and easy. (Yesss!) And I got great feedback from my neighbors.
Scroll on to get the scoop on how to use a pumpkin as a planter.
What you need to make a pumpkin planter…
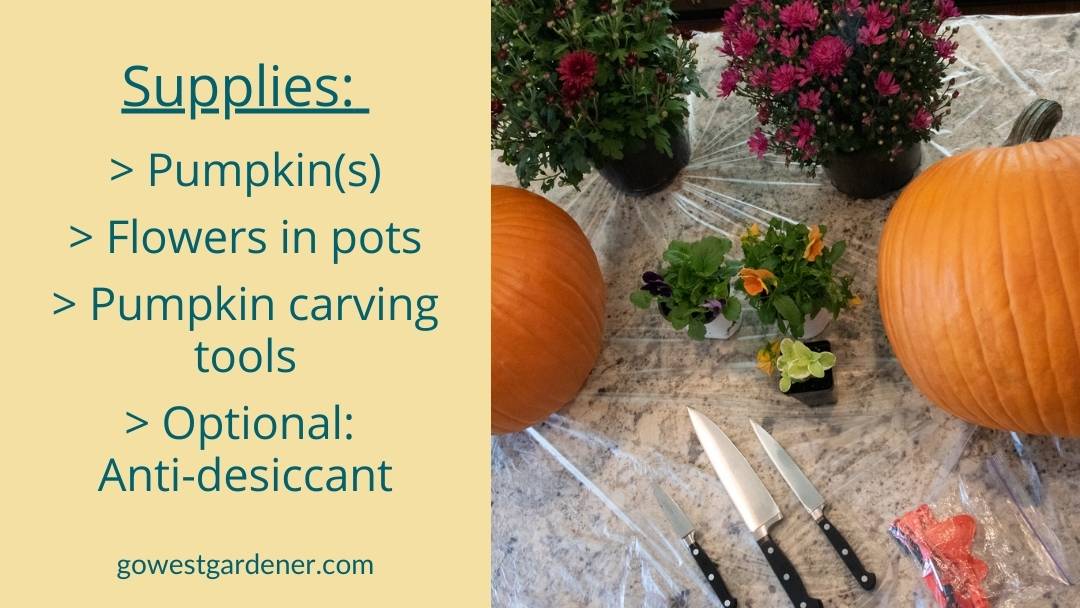
The basic things you need are:
- Large pumpkins
- Flowers in pots (you’ll keep your flowers in the nursery pots rather than planting them directly in the pumpkin)
- Pumpkin carving tools
- OPTIONAL: An anti-desiccant spray (this is supposed to help the pumpkin from drying out)
Alright, let’s jump into the steps!
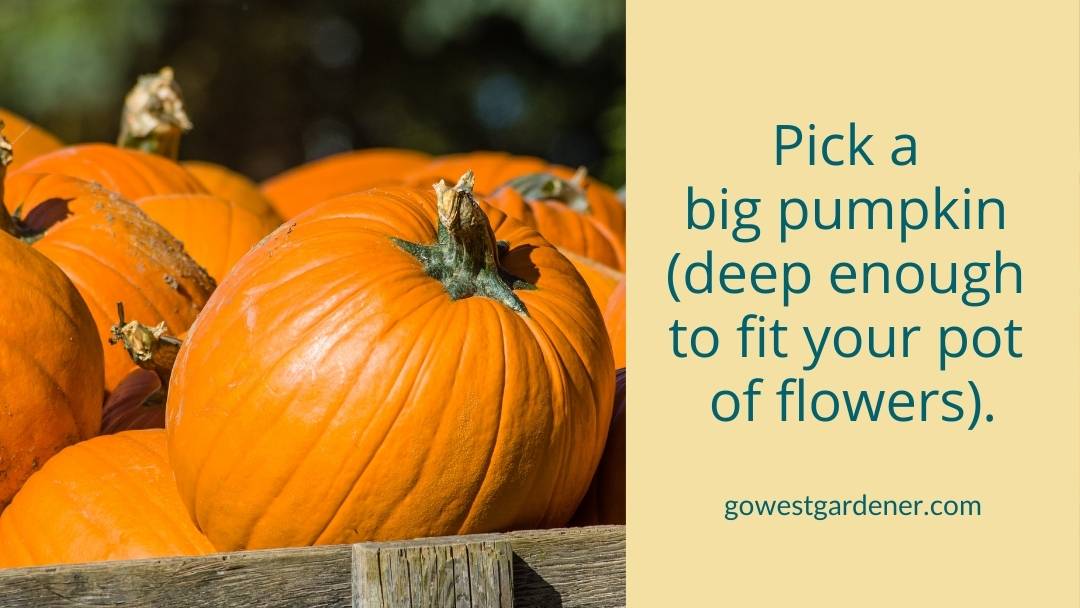
Pick a big pumpkin.
Size matters here. Look for a big pumpkin.
I took an empty flowerpot with me to the store, so I could get a sense for how big of a pumpkin I needed.
I’m not great at spatial planning, so this helped me a lot.
Wash your pumpkin.
Clean the outside of your pumpkin with soap and water.
This will help it look like a shiny, new penny and keep your hands clean.
Create the hole for the flowerpot.
Trace a hole on your pumpkin that’s slightly bigger than the size of your flowerpot.
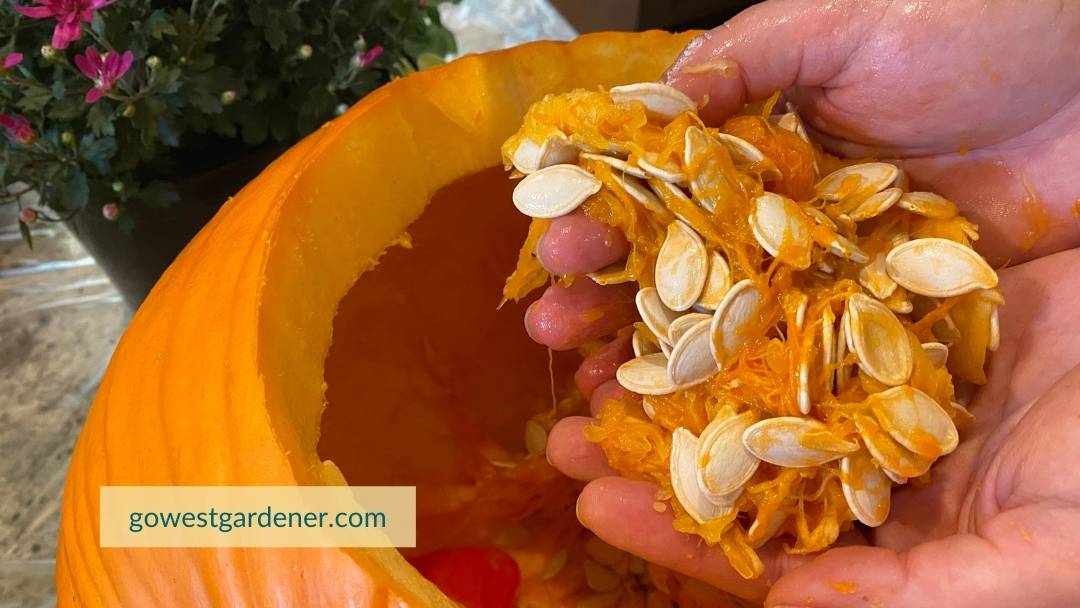
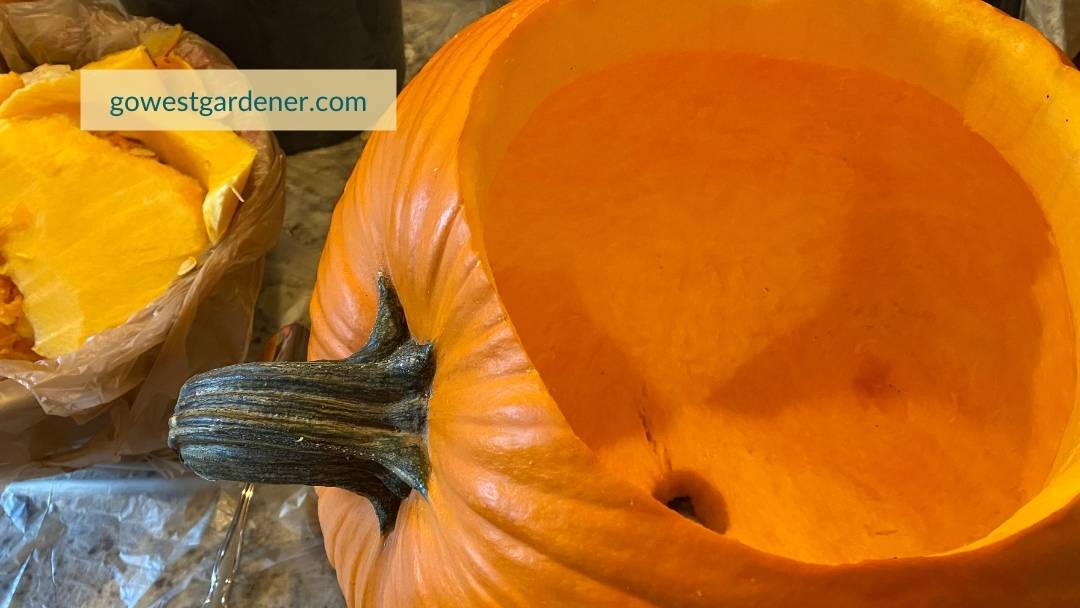
Clean out the inside of the pumpkin.
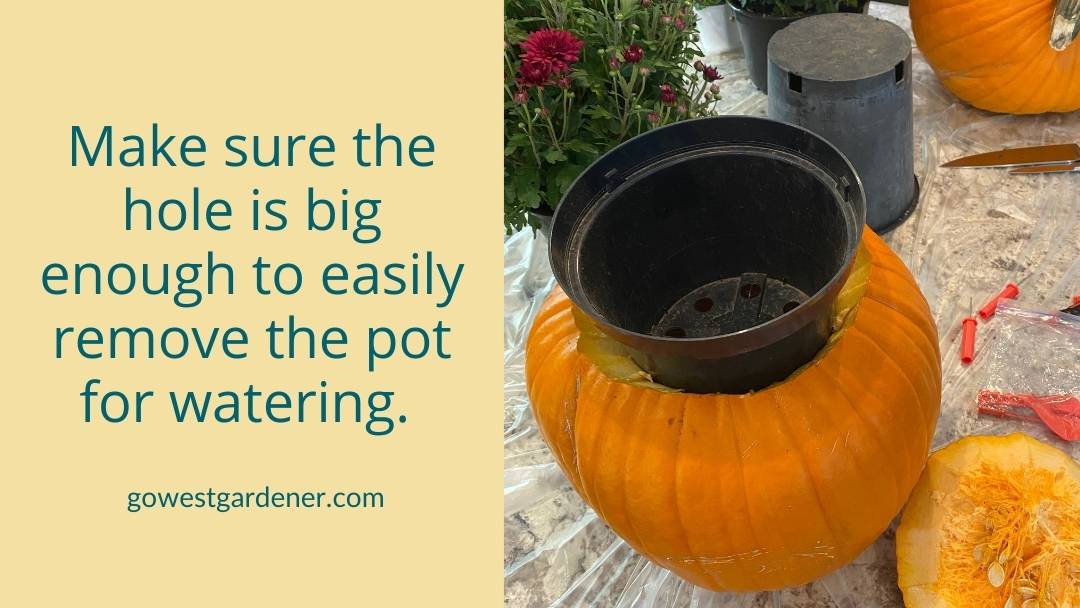
Make sure the hole is big enough to easily remove the flowerpot for watering. As you can see in the photo below, I needed to slightly expand the hole.
It’s important to be able to remove the flowerpot.
When you water your flowers, you’re going to pull the flowerpot out of the pumpkin. That way, you don’t have water seeping into the bottom of the pumpkin.
When you’re done watering and the water has stopped dripping, you’ll put the flowerpot back in the pumpkin.
If there’s any chance you’ll have water dripping at the bottom, you may want to carve a drainage hole in the bottom of the pumpkin too.
Get creative with where you carve the flowerpot hole.
You don’t have to cut the hole for the flowerpot where the stem of the pumpkin is.
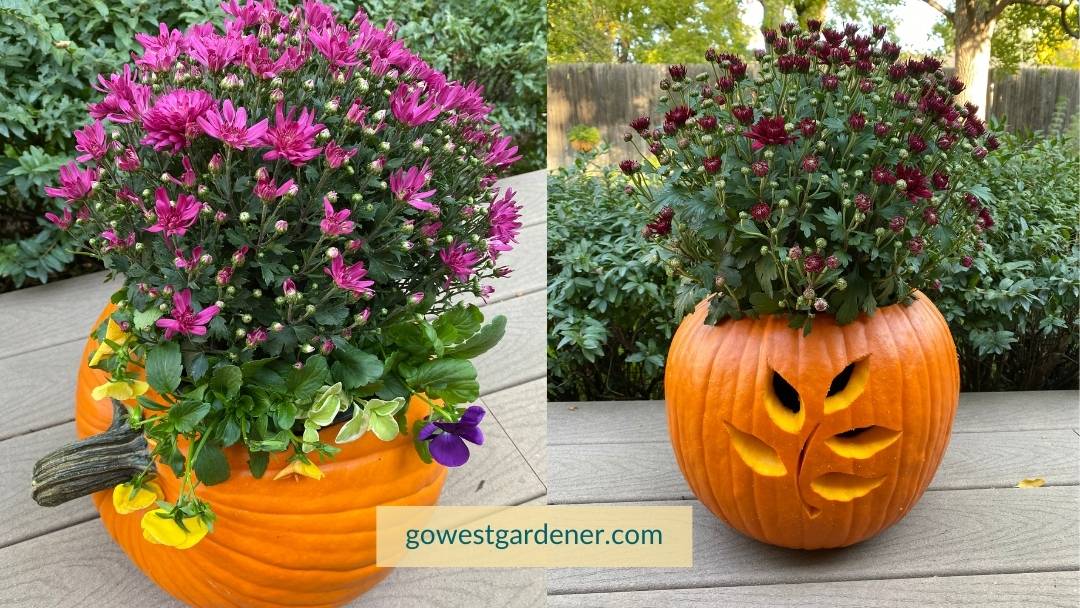
My friend found a cool pumpkin that looked better on its side, as you can see below.
Optional: Once the pumpkin is cleaned out, spray the interior with an anti-desiccant.
An anti-desiccant spray is supposed to help keep the pumpkin from drying out. I found the spray at a local garden center last fall. You also can order it on Amazon.
Follow the instructions on the bottle for how long to let it dry.
Full disclosure: I didn’t find that the anti-desiccant made much of a difference, so I’m not going to use it this year.
You could stop here, and you’d have a really cute pumpkin planter.
Or, you can go a few steps further…
Turn your pumpkin planter into a Jack O’Planter.
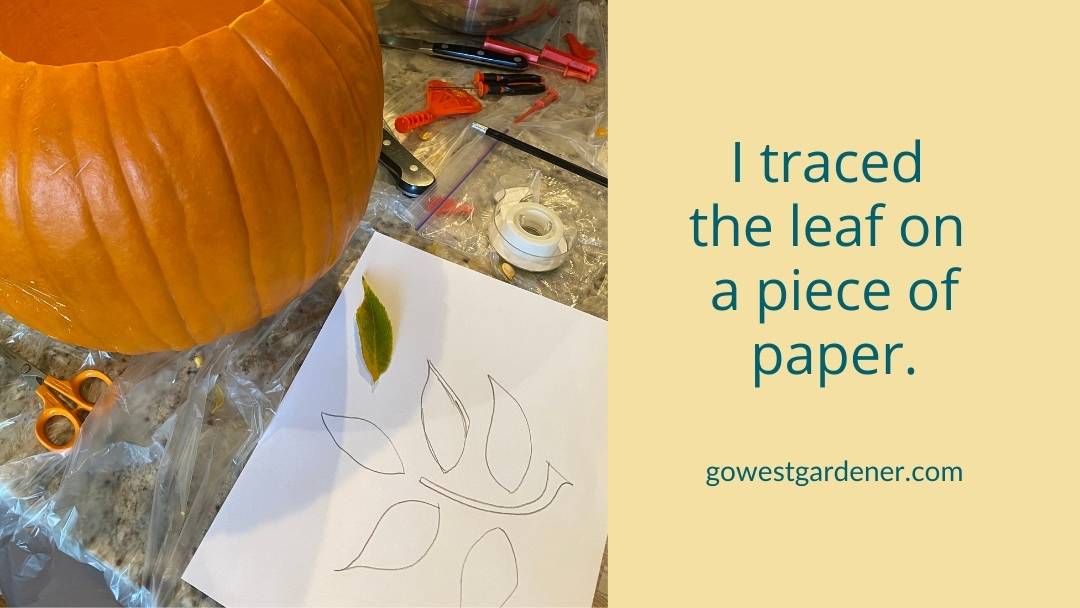
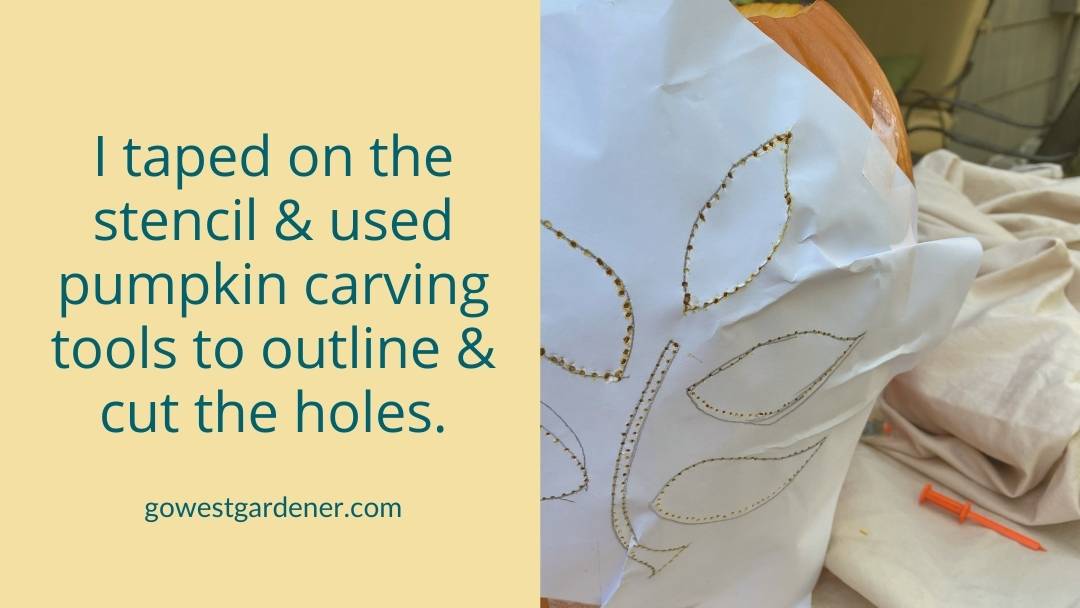
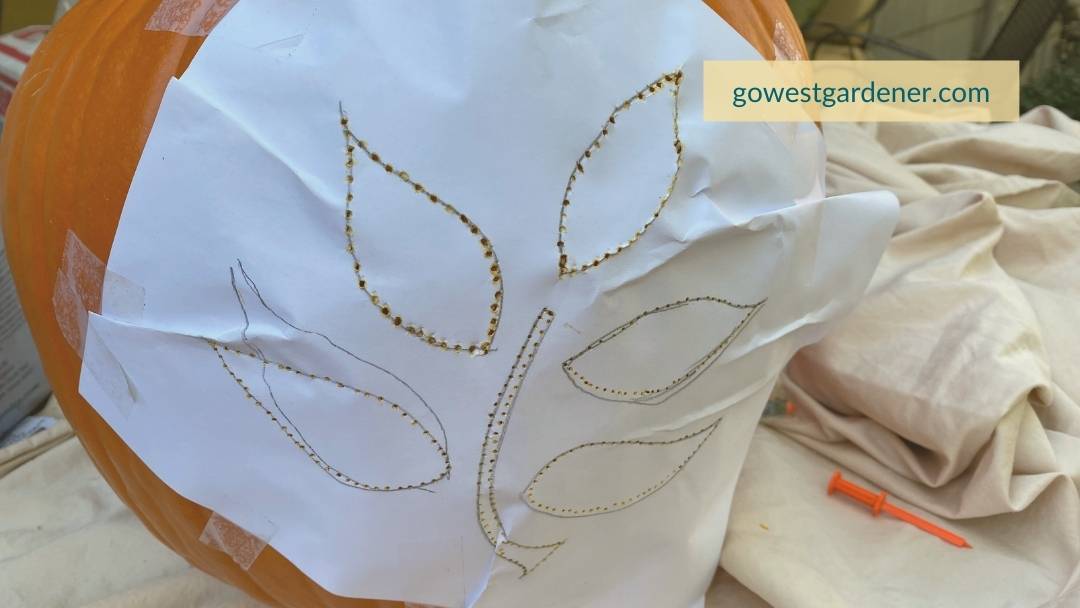
I felt like my pumpkin needed a little “oomph,” so I decided to carve it.
You could carve anything you want into your pumpkin: a funny face, a pretty pattern, the brand logo for your business…
In my case, I started with a leaf.
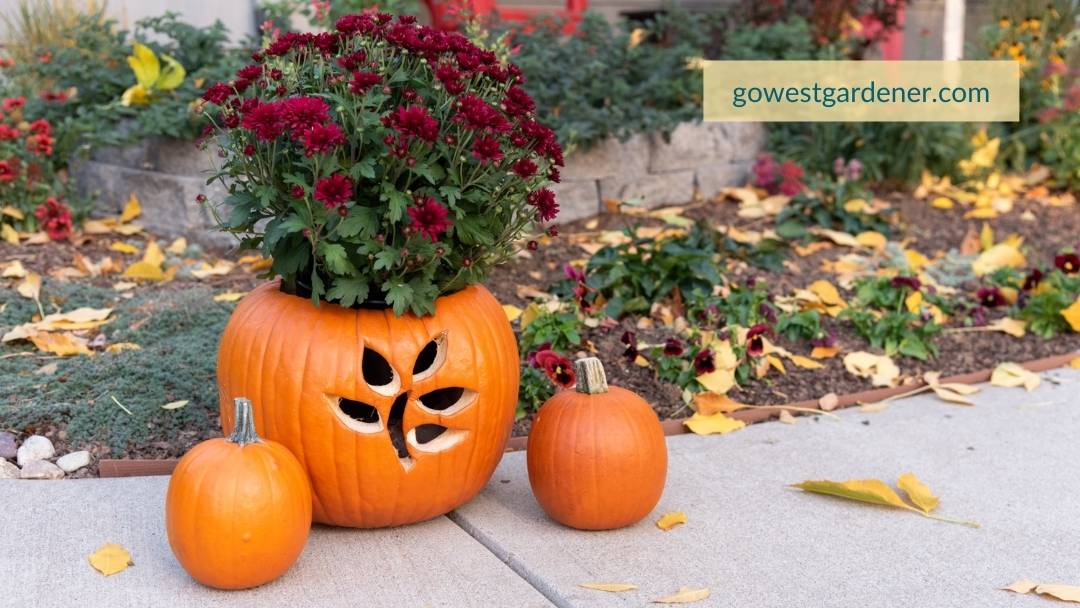
Here’s how my pumpkin planter turned out.
I was excited with how it came together!
How do you get your flowerpot to sit at the right height in the pumpkin?
You may need to put something inside the pumpkin for the flowerpot to sit on.
In my case, I turned an old plastic cup upside down inside the pumpkin. Then, I set the flowerpot on top of it.
This helped the flowers to sit at the right height.
Plant a pretty mix of fall flowers.
If you want to use a pumpkin as a planter, you also could include a mix of fall flowers.
(Go big, right?)
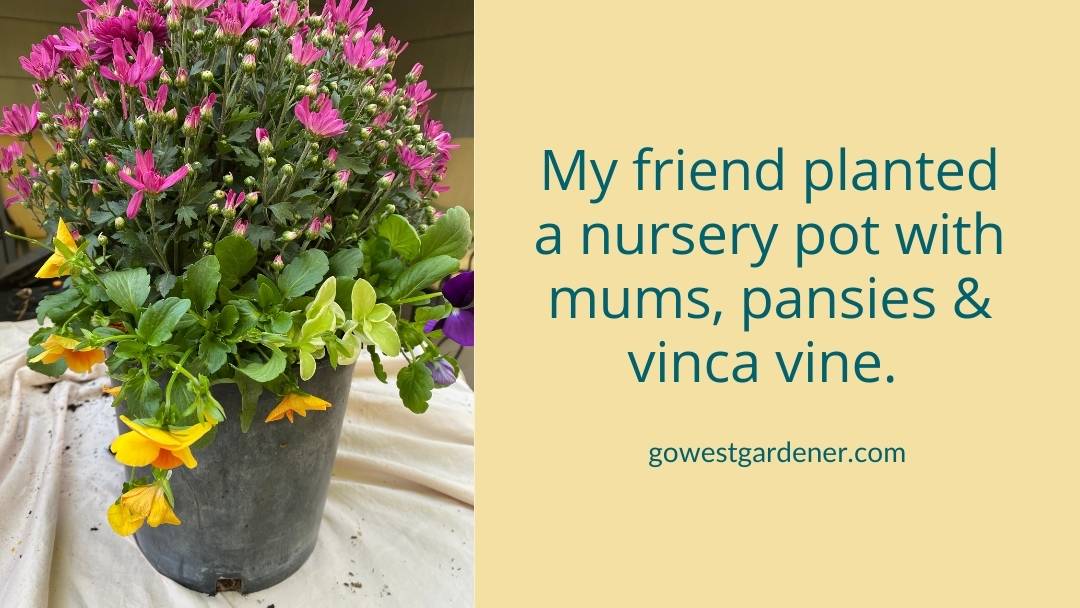
My friend filled an empty nursery pot with potting soil and packed in several types of fall flowers, like mums and pansies.
Then, she put that flowerpot inside her pumpkin planter.
Here’s a look at both of our pumpkin planters.
Cute, right?
What we may tweak for this autumn…
My friend and I may experiment with adding in other types of pumpkins this year. I have a ceramic Jack O’Lantern pumpkin. My friend has a craft pumpkin from a craft store.
We’re going to see if these options help our fall displays last longer.
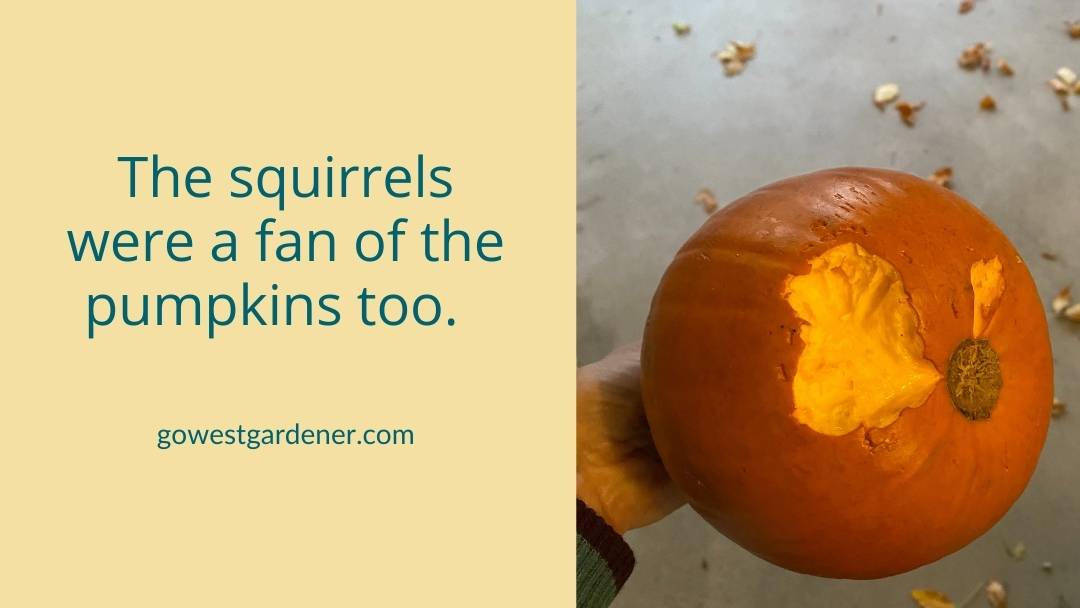
At the very least, the squirrels should be less interested in the pumpkins.
But I’m also going to carve real pumpkins again and use them as planters.
It was fun!
If you make a pumpkin planter, share it on Instagram or Facebook and tag @gowestgardener. I’d love to see what you create.
Related tips that my interest you
by Ann at Go West Gardener | Updated: Sep 10, 2026 | Gardening Tips and Tricks, Western Container Gardening With Flowers
I used to think that once you planted your flowerpots, that was it. Your flower babies were in there for the long haul.
But I’ve come to appreciate that you can swap out the flowers in your pots. It’s like changing your wardrobe for the seasons.
If you want to change the flowers in your flowerpots, you can — especially in the late summer to early fall. You can change just one flower. Or, you can change them all.
Why would you change the flowers in your pots?
There are all kinds of reasons.
Let’s say:
- You want to spice up your flowerpots for a new season — like transitioning from spring to summer, or summer to fall.
- You have an empty gap in your pots. Some of your flowers didn’t fill in quite like you thought they would.
- You’d like to add in more color.
- You have perennials planted in your flowerpots. They’re done blooming for the season. (Perennials are the flowers that can come back each year, but often bloom for a short amount of time.)
- There’s a flower in your flowerpot that doesn’t look so good or it may have died. (No judgment! It happens.)
Late summer to early fall can be a good time to add in new flowers
As we transition to fall, one of my favorite flowers to add to my flowerpots is Black Eyed Susan.
(This plant goes by many names, including Rudbeckia and Gloriosa Daisy.)
You can find it in a lot of pretty colors, as you can see below.
Black Eyed Susans give flowerpots a bright pop of color. They can bloom for a long time.
Best of all, these flowers feel like fall — like a Sunday drive to go leaf peepin’ or the sweet smell of mulled apple cider after a trip to the pumpkin patch.
Give your flowerpots a fresh look for fall
If you’d like to freshen up your flowerpots for fall, you can pop in flowers like…
- Black-Eyed Susans (aka, Gloriosa Daisies)
- Mums
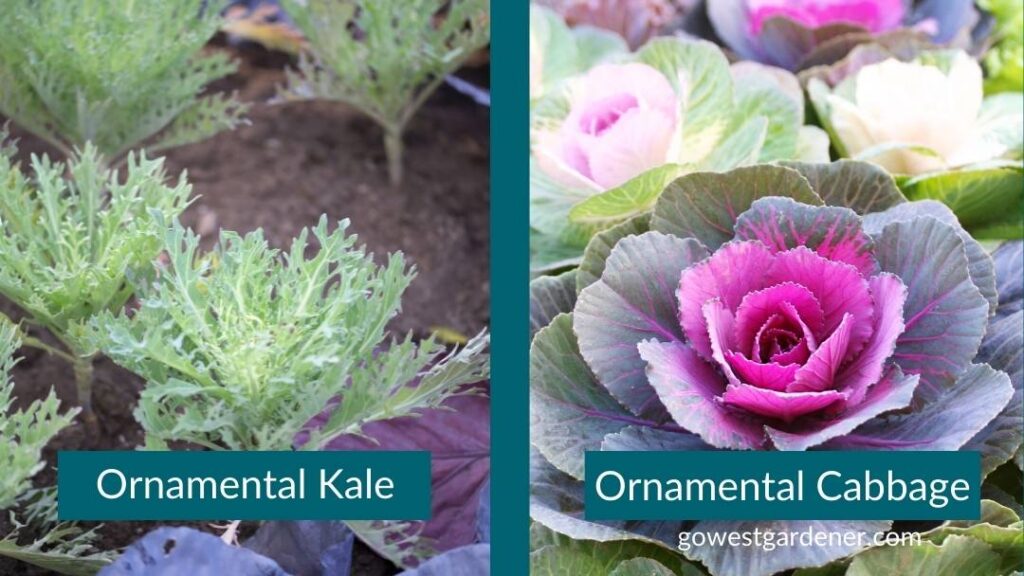
- Ornamental Cabbage
- Ornamental Kale
- Pansies
- Violas
You can see some examples below.
Helpful tips if you change the flowers in your flowerpots
1) Keep your new flowers well-watered
Flowers tend to like A LOT of water when they’re newly planted in flowerpots, especially in our late-summer heat.
You may need to water your pots more than you have been doing.
Keep your eye on your newly-planted flowers. They can get droopy or crispy quickly.
2) Keep your eye on temperatures
Many fall flowers are “cool season” flowers.
They’re happiest when our days and nights start to cool down.
This means you may want to hold off on planting flowers like Pansies, Violas and Ornamental Cabbage until temperatures start to cool off. For example, Pansies tend to be in their happy place when daytime temps are in the upper 50s and 60s, and nighttime temps are in the 40s.
3) Look for plants that have new buds on them (meaning all the flowers haven’t opened yet)
This is one way to ensure that you’ll get longer-lasting color from your new flowers.
If you’d like to see photos of what I’m talking about, check out these 3 simple tips to pick fall flowers that bloom longer.
Related topics that may interest you: